Register Your Seller ID
1.Register Your Seller ID
As per Amazon’s Acceptable Use Policy and Data Protection Policy, the seller has to authorize Emipro’s Seller Application in their Seller Central account, in order to use the connector.
- Go to Amazon ↣ Configuration ↣ Settings
- Click on Register Your Seller ID
SPECIAL NOTE :
In compliance with Amazon’s Data Protection Policy, customer data fetched into Odoo from Amazon is automatically removed after 30 days. The information which will be deleted from the sales order are: Name, Email ID, Phone Number, Billing and Shipping Address If you are legally required to retain personally identifiable information (PII) for tax or regulatory purposes, such data must be stored in a “cold” or offline backup. This backup must be encrypted and kept in a physically secure location, with no immediate or interactive access. These guidelines are outlined in the Amazon Seller Registration page Terms and Conditions. Please ensure you review them during the seller registration process. Reference Link: Terms and conditions
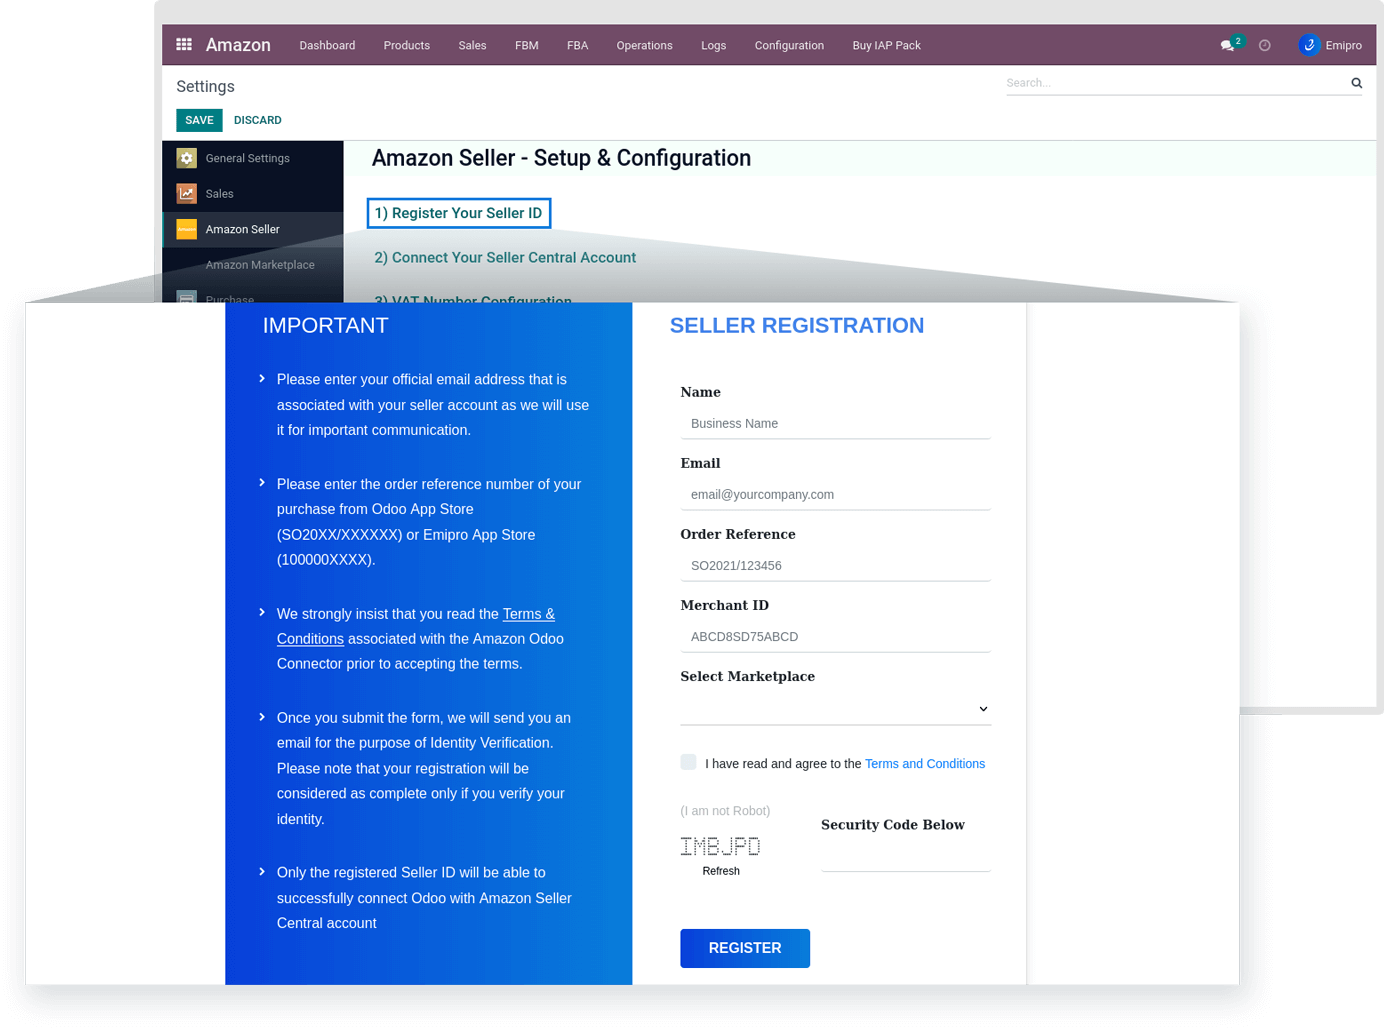
Step-1: Seller Registration Form
A registration form will open after you click on the Register Your Seller ID button. This form requires a few fields to be filled in.
-
Name: The user needs to fill in the name of your business here.
-
Email: The user needs to fill in his/her email ID which is registered with your seller central account as it needs to be verified later on.
-
Order Reference: The User needs to enter the purchase order reference for the Amazon odoo connector from the Odoo App Store here (Example: SO2022/XXXXXXX). The User will find it in the email he/she received regarding the purchase of Emipro’s Amazon Odoo connector.
-
Merchant ID/Seller ID: The User needs to fill in your Merchant ID/Seller ID here.
-
Select Marketplace: The user needs to select the marketplace/s that the user has configured in your Seller Central.
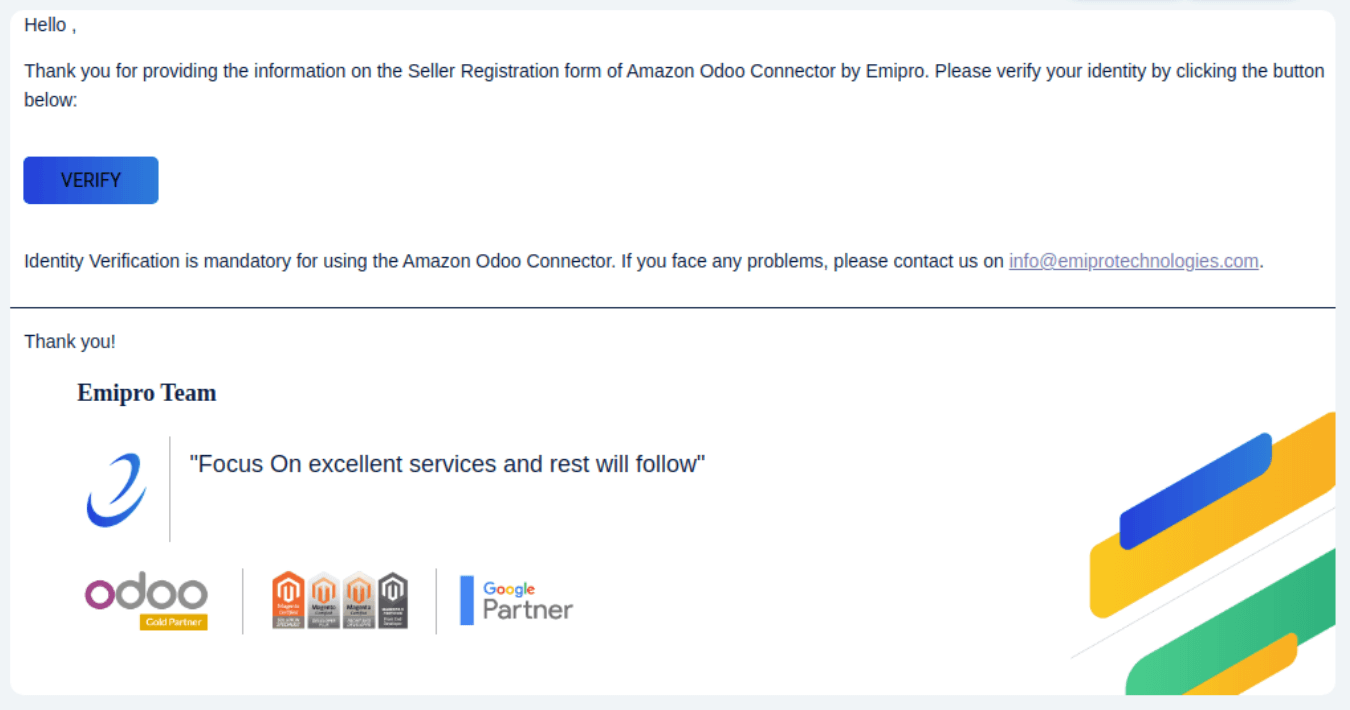
Step-2: Email Verification
Once the user clicks the Register button on the form. An email verification link will be sent to the email address the user provided in the form. You simply need to click on the Verify button in the email to complete the email verification process.
Step-3: SP API Authentication
As soon as the email has been verified, the user will receive another email with an authentication link that helps us synchronize with the user’s Seller Central account.
The user simply needs to click on the Authenticate SP-API button in the email, which will take the user to Amazon’s Seller Central login page.
The user must log into his/her Seller Central account.

Step-4: SP-API data consent
When the user logs in to the seller account, Amazon will ask for the user’s consent to access data using the SP API.
Simply click the Confirm button.
With this, the User has successfully completed the registration process.

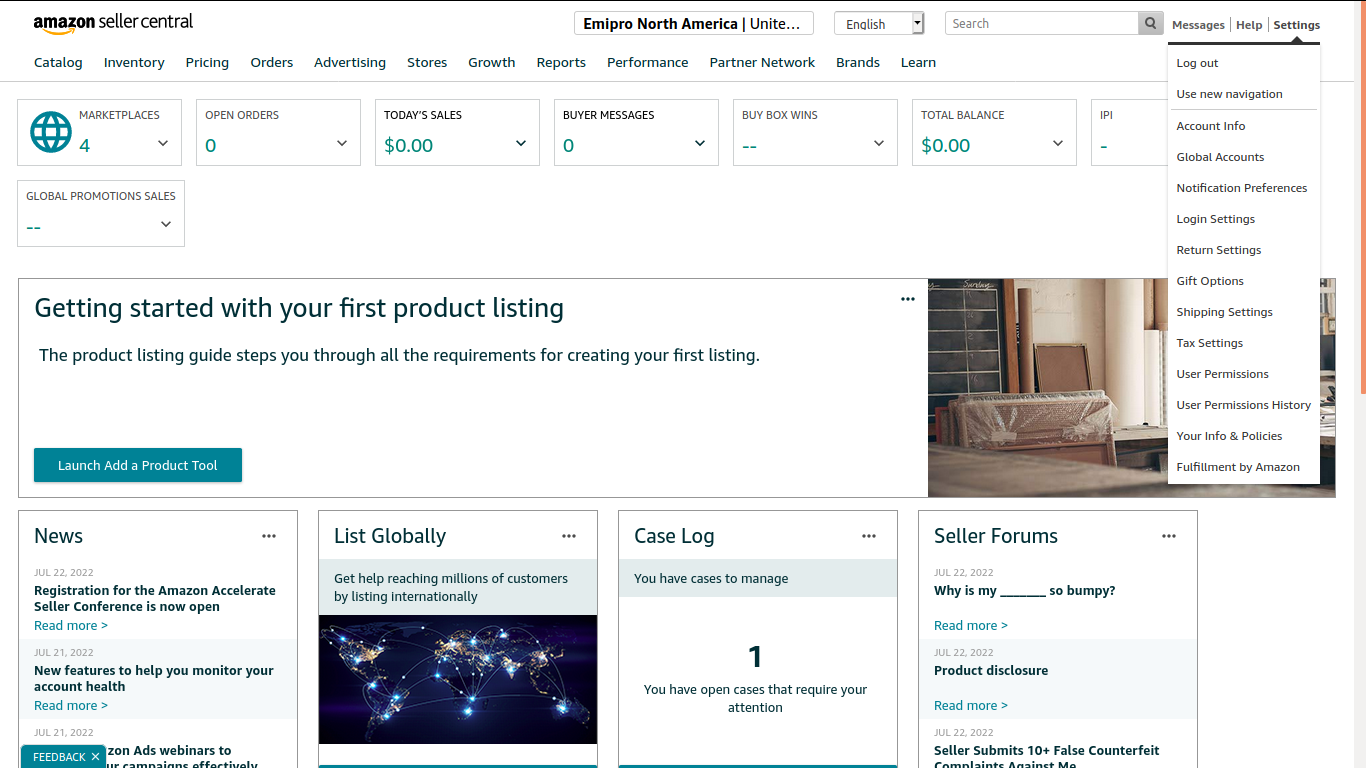
1.1 How to Get Merchant Token/Id
- Go to Amazon Seller Central ↣ Settings
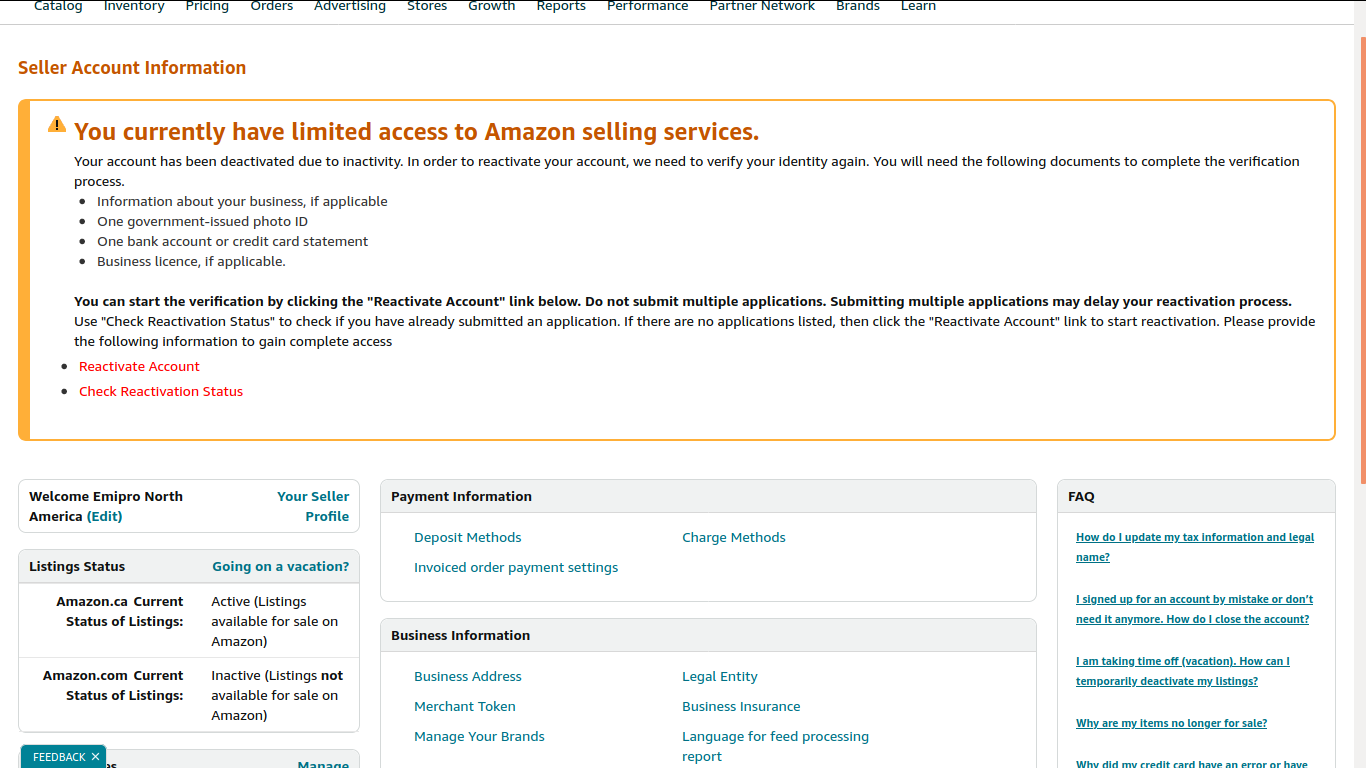
- Click on the Account Information
- You can see the Business Information Tab
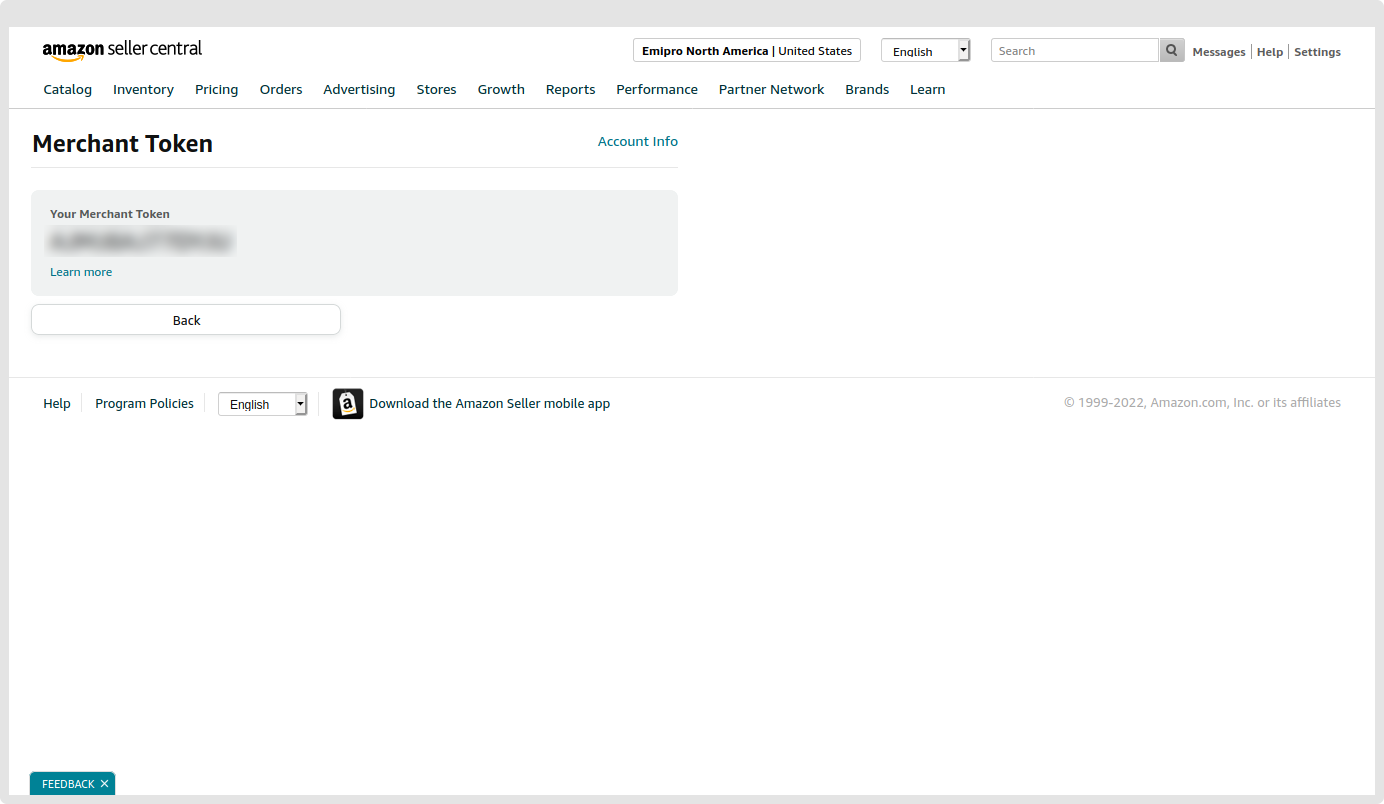
- Click on the Merchant Token field
- Great Job, The user will get successfully his/her Merchant token.