Create and configure Magento Instance
After installing the Odoo Magento2 Connector in your Odoo, you can see the Magento menu in your Odoo if the Current user has rights as manager or User for Magento Connector.
In Odoo, you need to create the instance for each of your Magento accounts. There will be a separate instance for each Magento account, accommodating the multiple accounts to be manageable from a single window.
There are two different ways to configure and create the Magento Instance.
Navigate to Magento and click on the Create Instance.
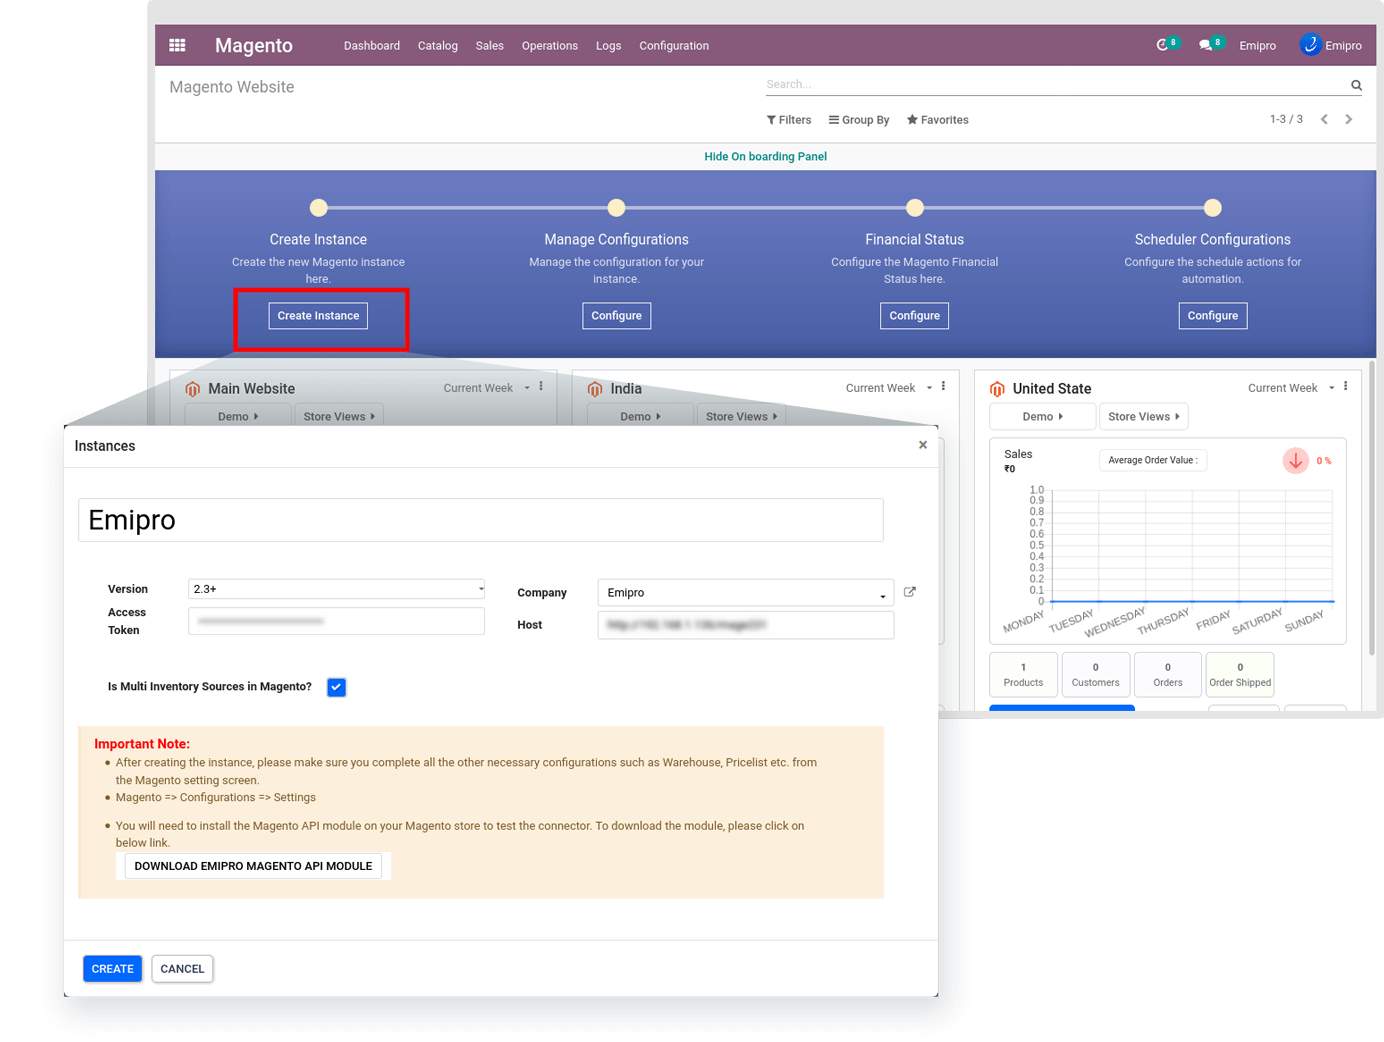
Enter the required information including the Instance Name, Magento 2 Version, Host, Use Multi Inventory Sources in Magento, Company, and Access Token that we secured from the Magento backend.
- Manage Configurations
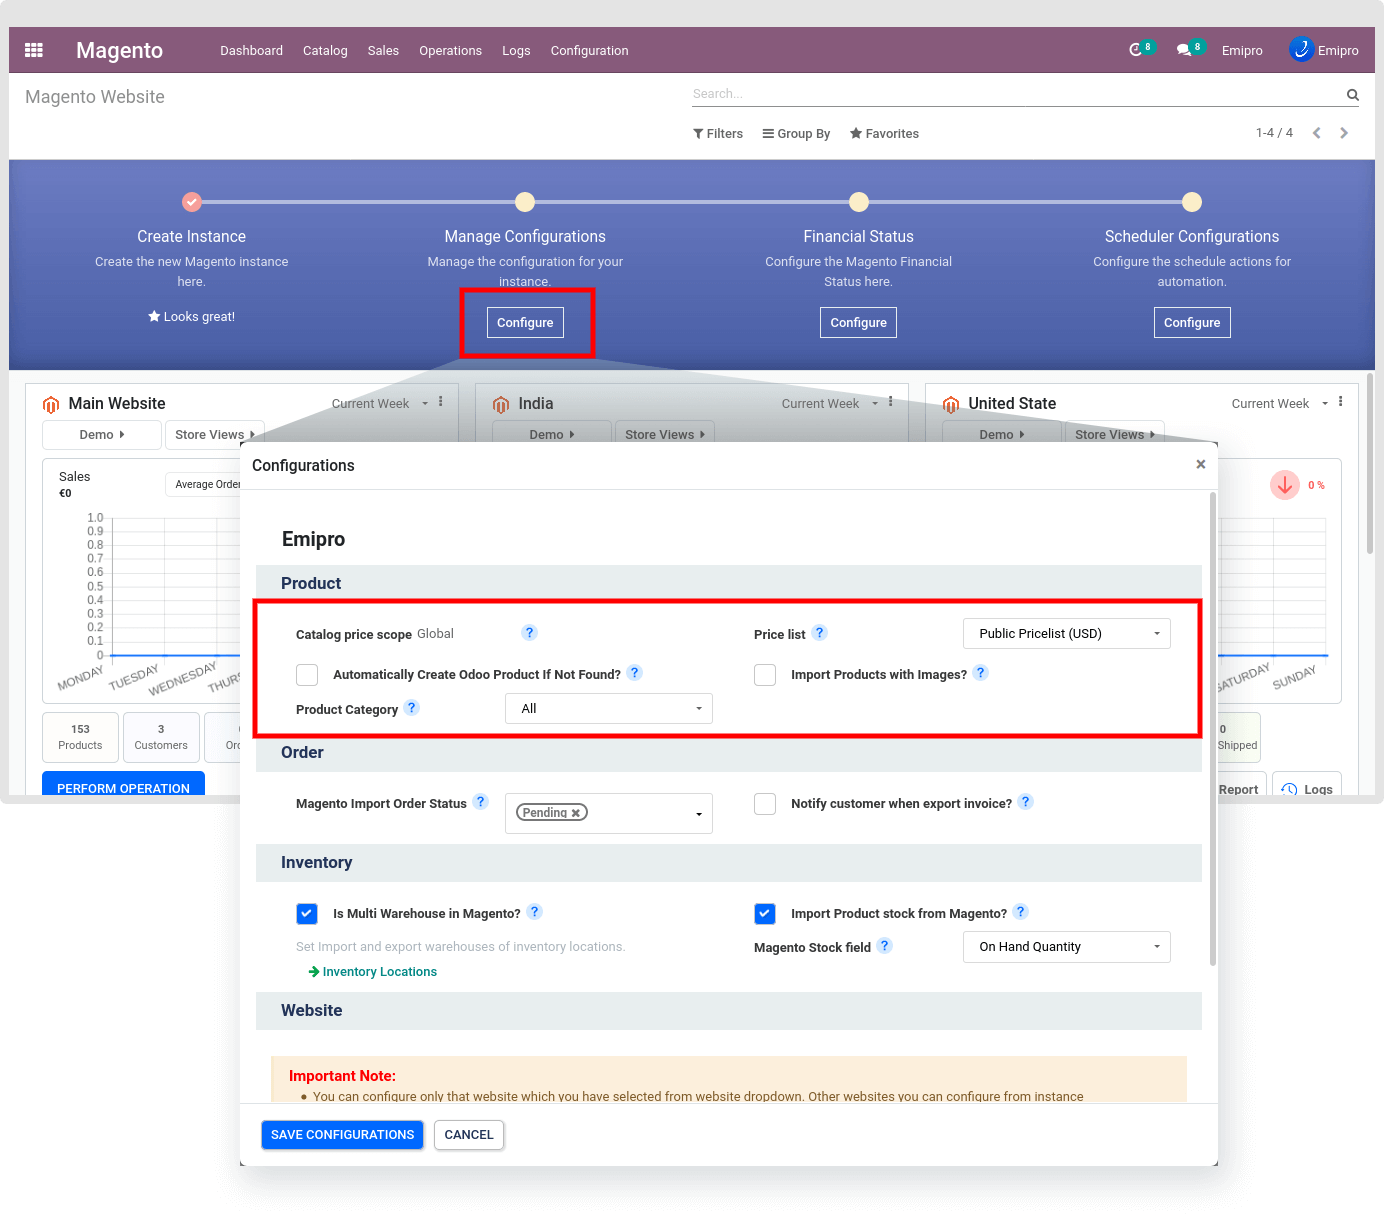
With a single click, Configure and save the appropriate setting as per your requirement.
Product Configuration
-
Catalog price scope
- Global: The same product price is used throughout the store hierarchy.
- Website: The same product can be available at different prices from stores that are associated with different websites.
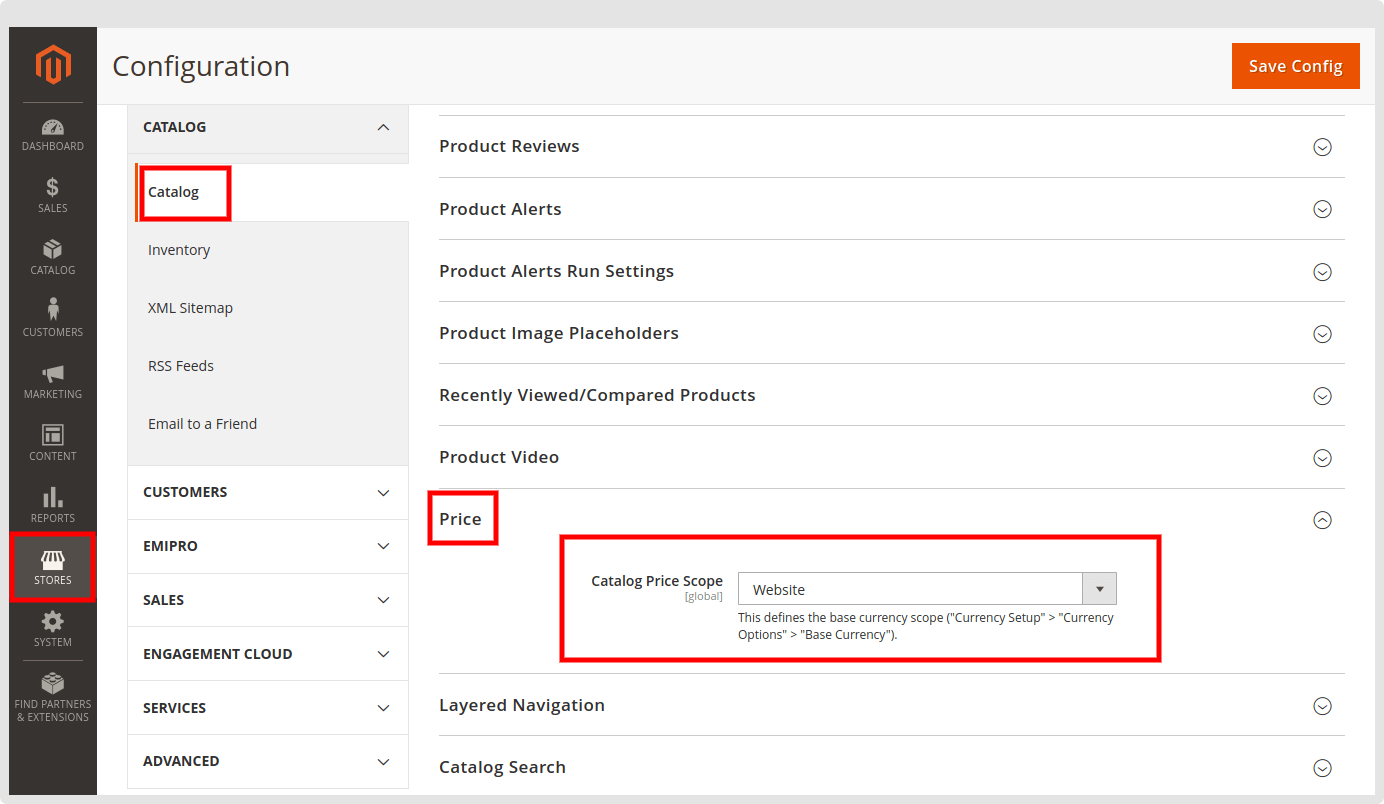
This configuration automatically sets after creating the instance. And this was set based on your Magentocatalog configuration. As shown in the below screenshot of the Magento configuration.
- Automatically Create Odoo Product If Not Found? : By checking this box, it will create new products in your catalog if the product is not found based on the SKU / Internal Reference / Default Product Code. If you are selling on multiple sales channels and having different SKU / Internal Reference / Default Product Code on each sales channel, it may lead to the creation of duplicate products in your product catalog in your database.
NOTE
This is only recommended when there is no product data in your Odoo. If you have an existing product catalog, we recommend not enabling this option at the initial stage.
- Import Products with Images? : Import product images along with products from Magento to Odoo while you carry out import product operation.
- Product Category: While importing a product or creating the product of the Magento instance, the selected category will set in the odoo product.
NOTE
By default it will be set “All” in the Product Category, If you want to set another category then set it as per your requirement.
- Pricelist: Product price will be taken/set from this price list if Catalog Price Scope is global. While the catalog Price Scope is Global at that time set the global level Price List from here. Otherwise, that will be set from Magento > Configuration > Magento Website > Select Website > Select Price-list.
Order Configuration
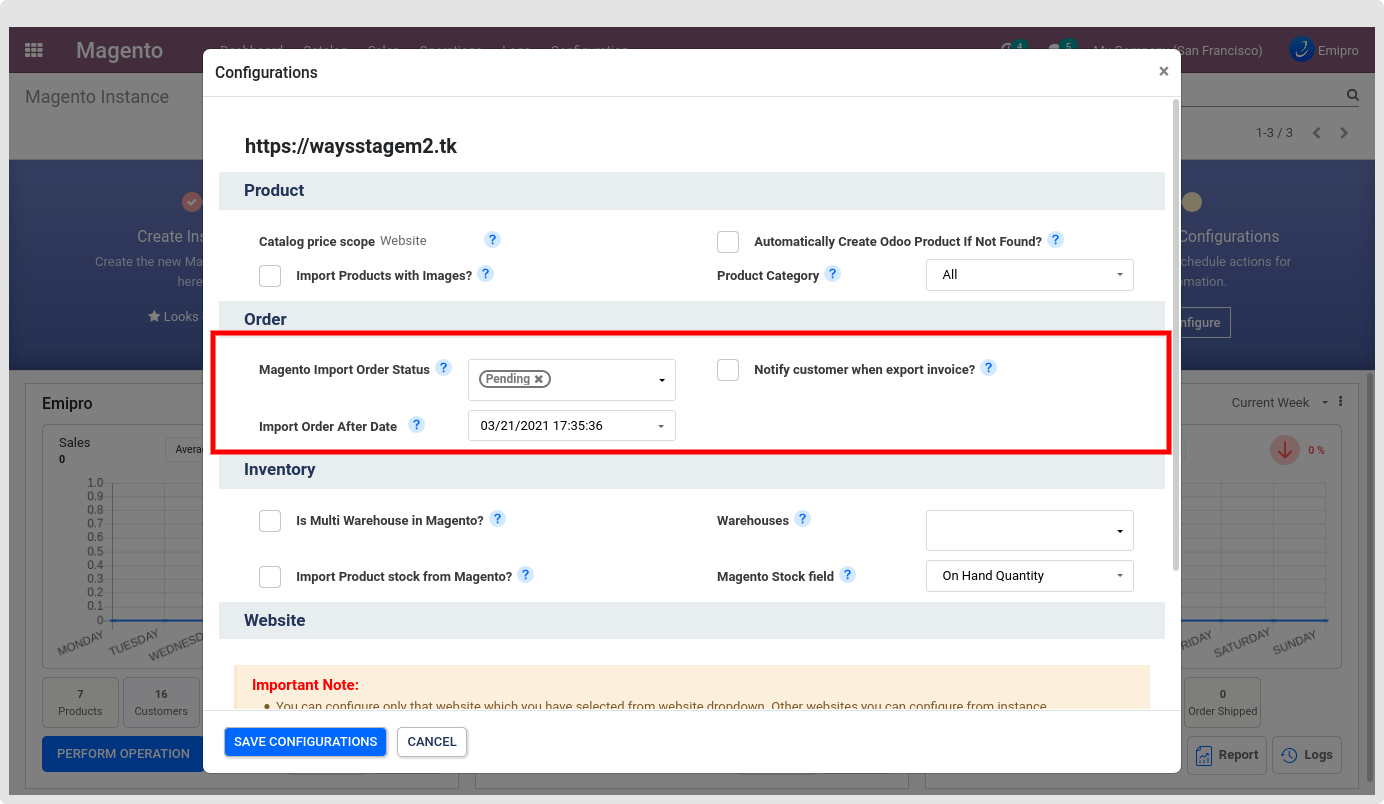
- Import Order Status: Select the types of Orders that you want to import to Odoo from Magento. It can be Pending or Processing or Completed.
- Notify customer when export invoice? : If checked, It will send an email to the customer while the Invoice will be created for the Magento order.
- Import Order After Date: Connector only imports those orders which have been created after a given date. Here the default value will set 30 days before the current date.
Inventory Configuration
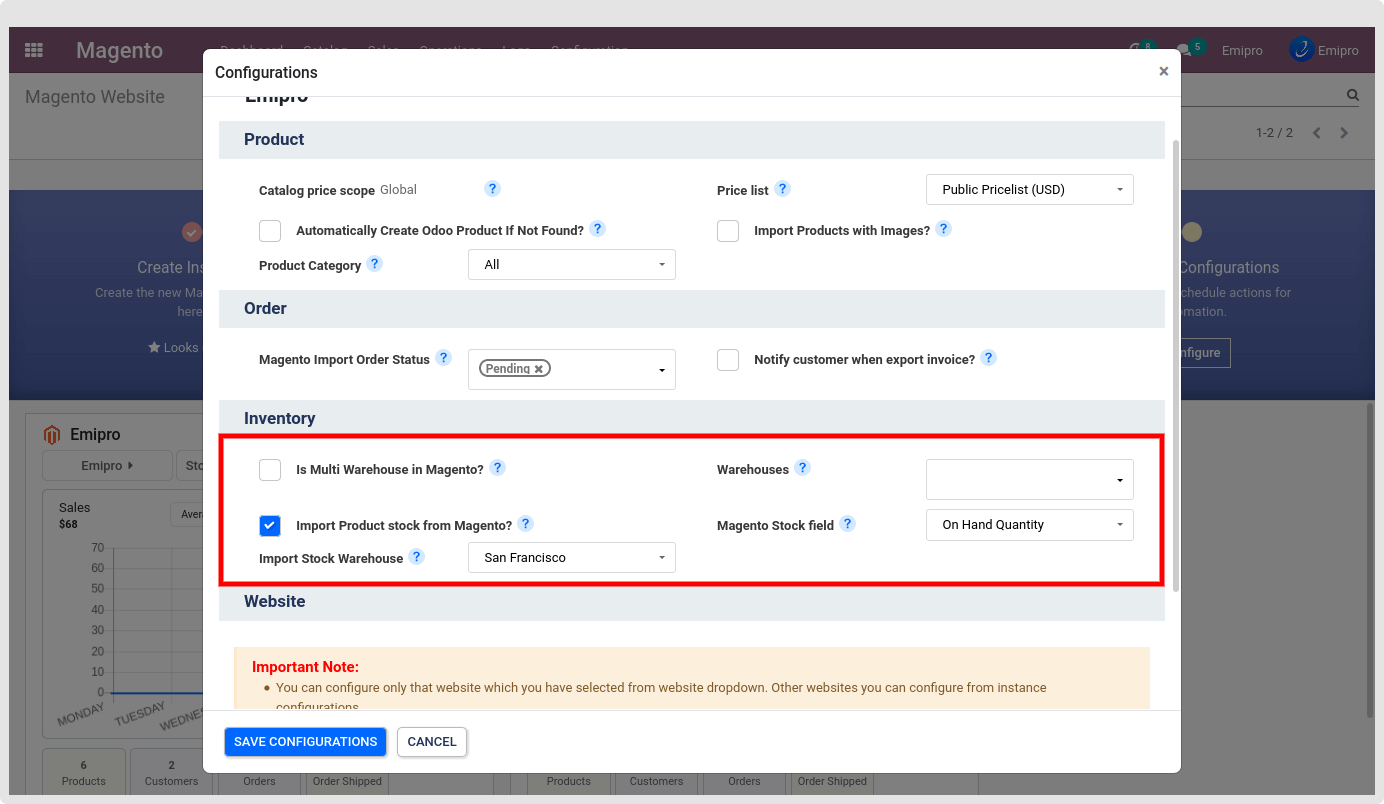
- Is Multi Warehouse in Magento?
In your Magento store if you are using Multi Sources Inventory for product stock then keep it as true. This will only visible if your Magento store version is 2.3 or 2.3+
- Import Product stock from Magento?
Check this box if you want to Import Product Stock from Magento to Odoo. Configure the Warehouse in which you want to import stock.
- Warehouses
This will be used to Export Stock from Odoo to Magento. Only visible this setting under while you are not using MSI.
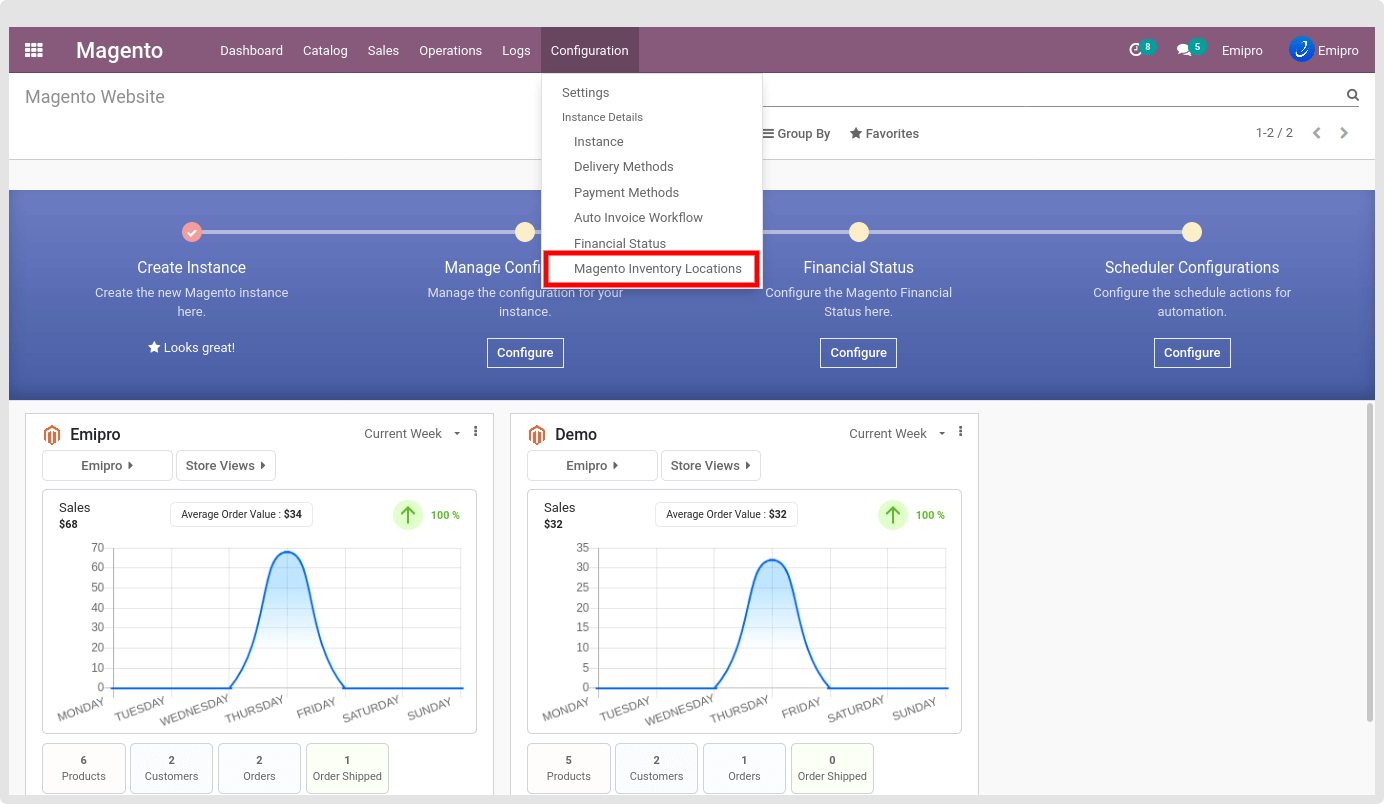
If your MSI setting is enabled then that warehouse will be set from Magento > Configuration > Magento Inventory Locations.
-
Magento Stock field
- Free Quantity = (Quantity On Hand - Reserved Quantity)
- Forecast Quantity = (Quantity On Hand - Outgoing) + Incoming
Based on this configuration Product stock quantity will be exported from odoo to Magento.
Website Configuration

- Warehouse: These fields are mandatory and very important. All the orders that you import will be processed and fulfilled through the warehouse that you select here.
- Pricelist: Product price will be taken/set from this price list if Catalog Price Scope is a website.
- Tax Calculation Method: The value for this field will be either “Excluding Tax” or “Including Tax”. Based on your Magento tax configuration set in odoo. Magento configuration path is “Store > Configuration > Sales > Tax > Calculation Settings > Catalog Price”.
NOTE
You can configure only that website which you have selected from the website dropdown. Other websites you can configure from instance configurations. Magento > Configurations > Settings > Select Instance > Select Website.
Store View Configuration
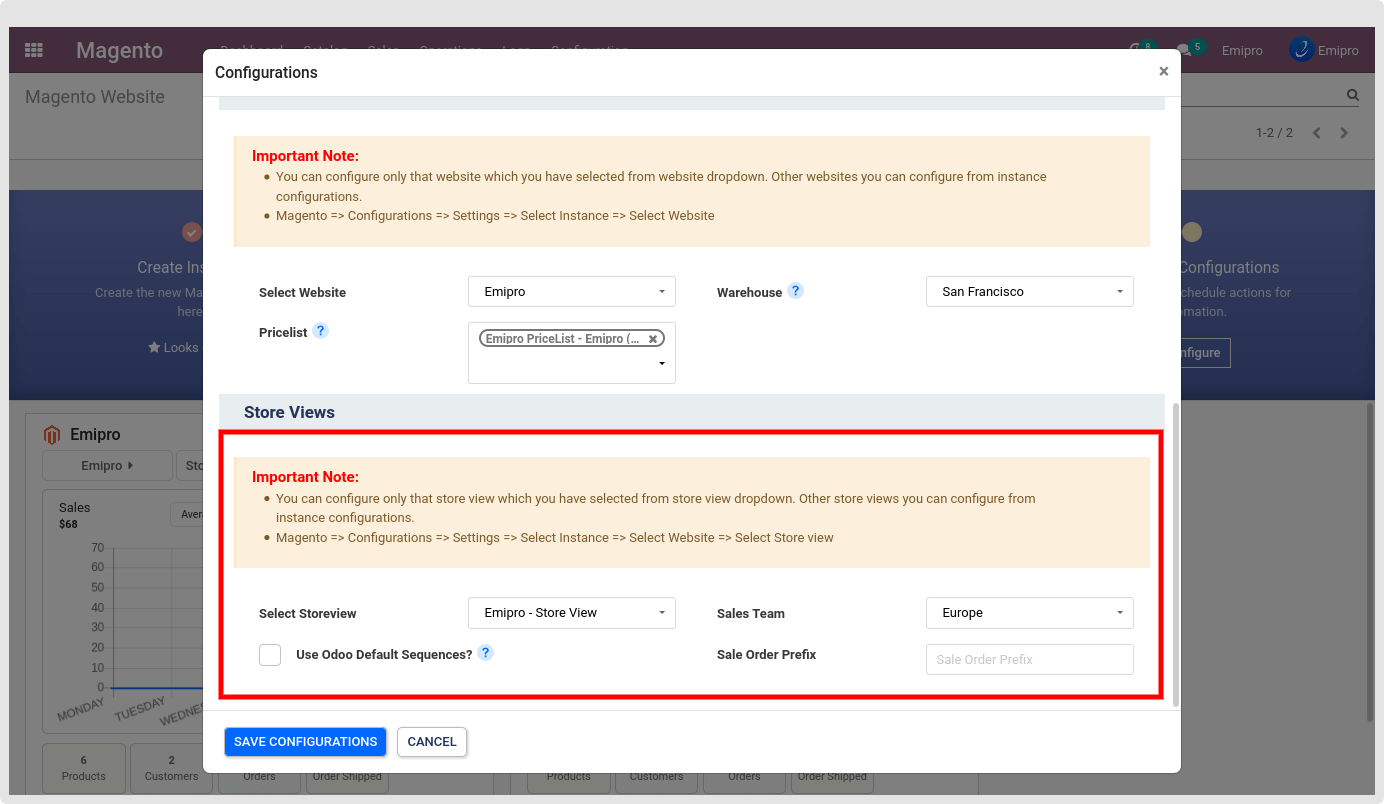
- Sales Team: Select the Sales Team in your Odoo which will manage this store view.
- Use Odoo Default Sequences? : If it is checked, the imported orders from Magento will be seen the same as Odoo default Sales Order. To visibly differentiate it, we recommended not to use this option.
- Sale Order Prefix: You can set any prefix (word or letters) to identify the Sales Order fetched from Magento.
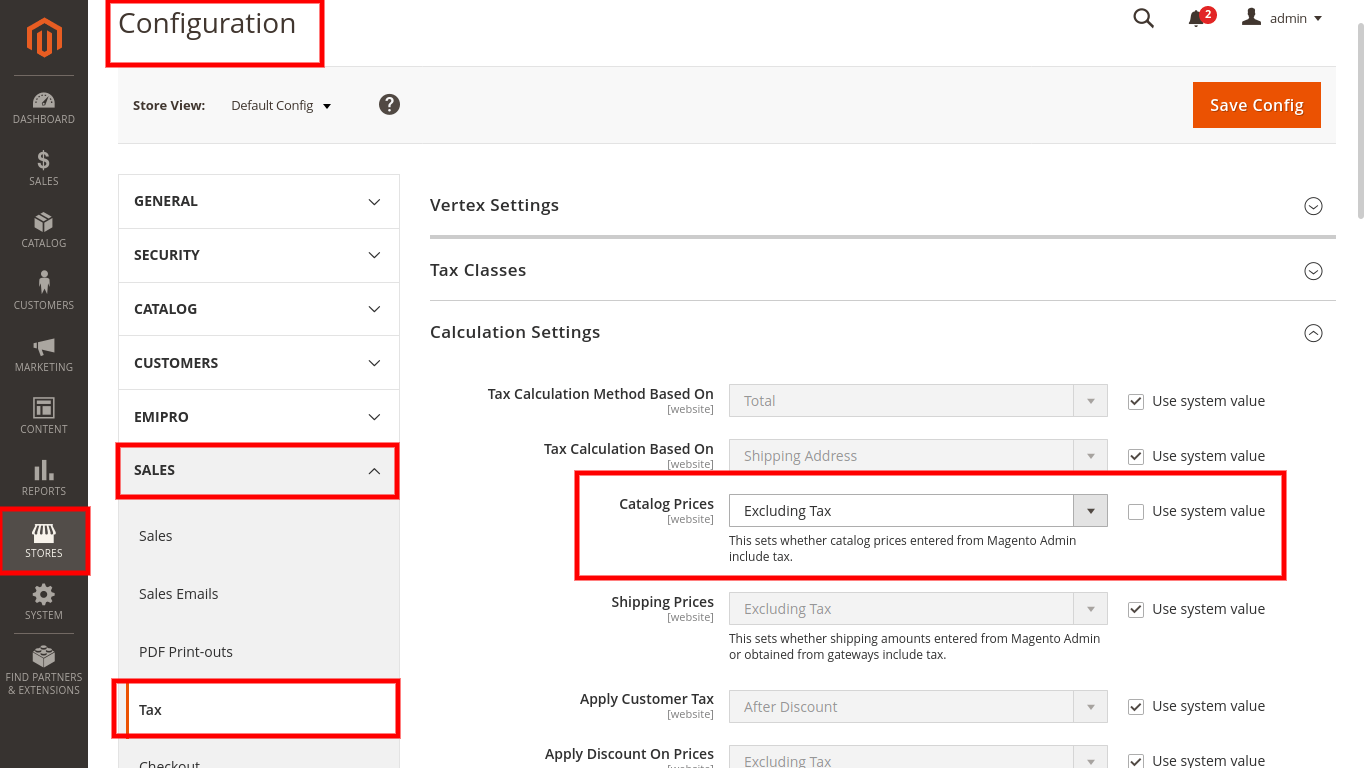
Based on the magento “Catalog Prices” tax calculation setting we will manage the tax in the odoo.
Based on that configuration apply the same setting in odoo magento instance.
If the magento configuration is set as the excluded tax we will take “price” and in case of included tax will take “price_incl_tax” from the order reference to create the order in odoo.
NOTE
You can configure only that store view which you have selected from the store view dropdown. Other store views you can configure from instance configurations. Magento => Configurations => Settings => Select Instance => Select Website => Select Store view.