MANAGE INBOUND SHIPMENT
After creating inbound shipments, the first step is to verify whether the routes Have been configured or not.
If not configured, the user will see an error message, and the Create Shipment Picking button will be visible.
The user will have to configure the route, then click on the create shipment picking button.
Next step is to select Shipping Type and Transport Type.
There are two types of Shipping Type:
- Partner
- Non-partnered
There are two types of Transport Type:
- Small
- LTL
To view all inbound shipments, Navigate to Amazon ↣ FBA ↣ Inbound Shipment.


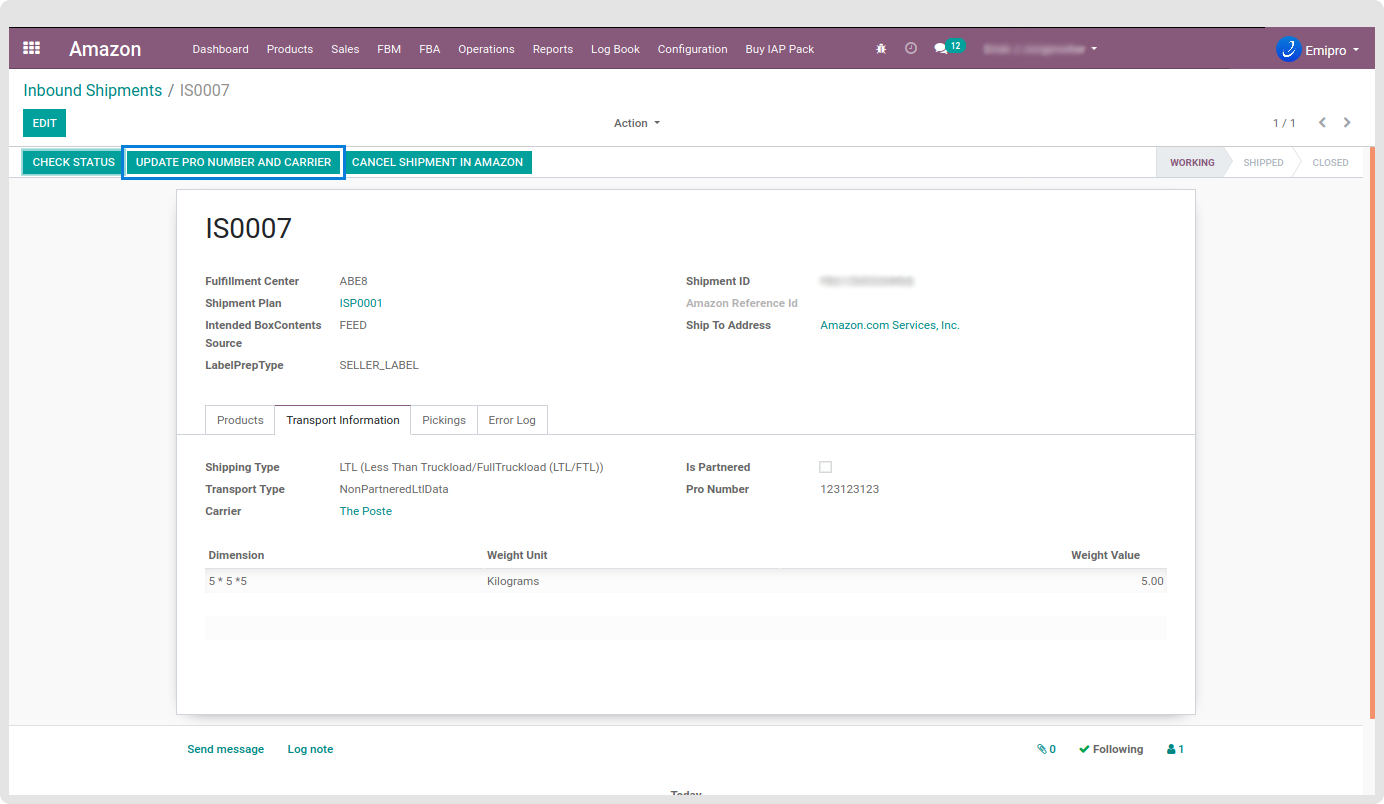
Non-Amazon-partnered carrier shipments:
In this case, you will need to select your own carrier and deliver the products to the Amazon Warehouse.
-
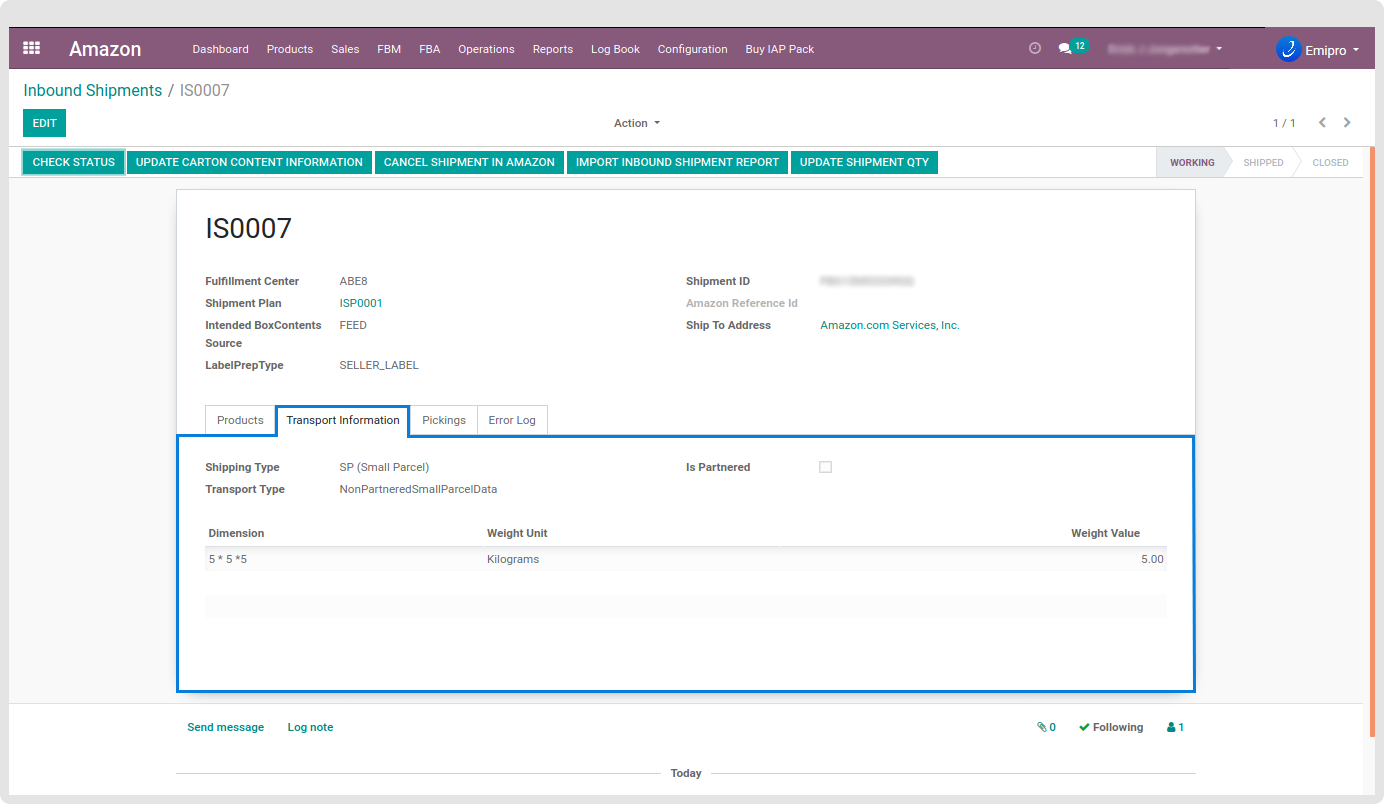
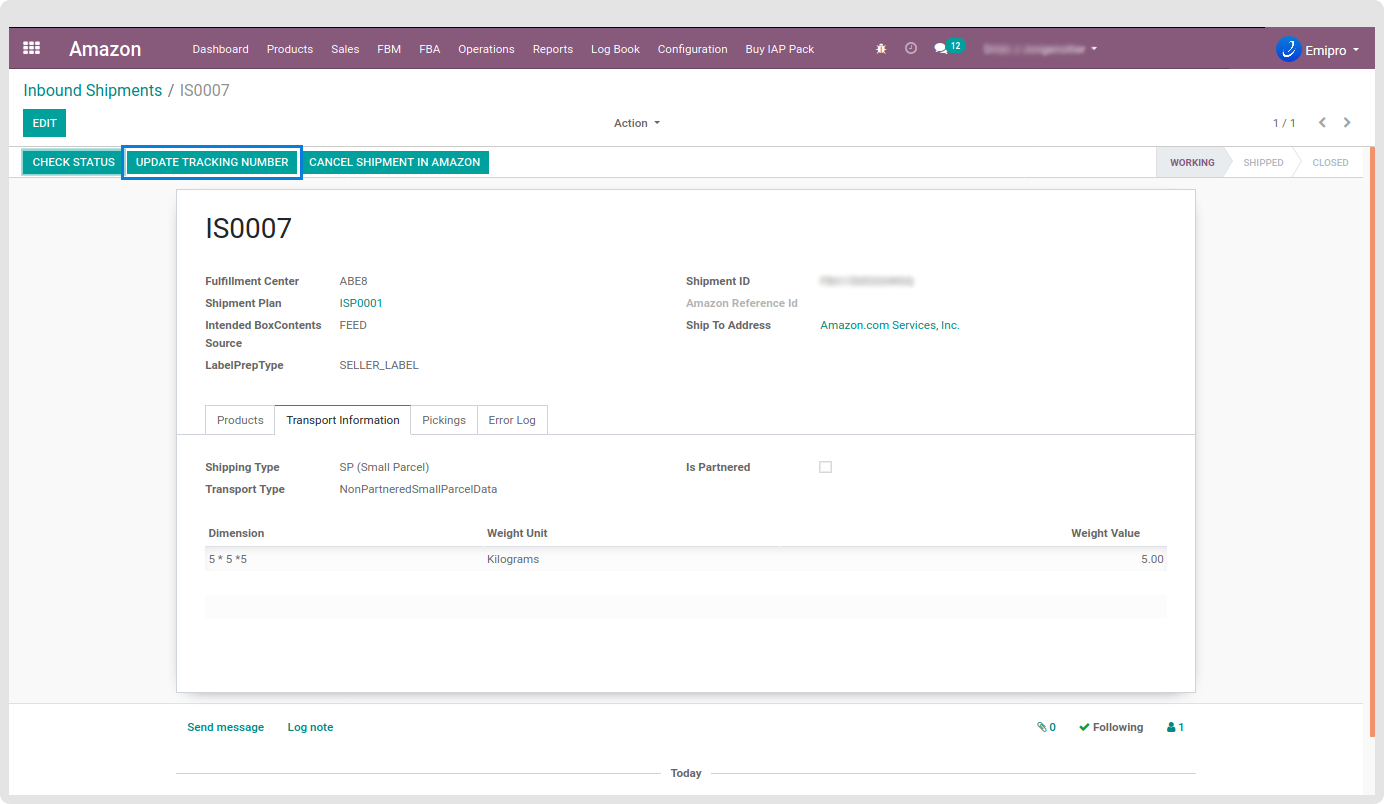
Small Parcel: If Carrier is non-partner and transport type is small then Amazon will require the Carrier Name and list of the tracking number.
-
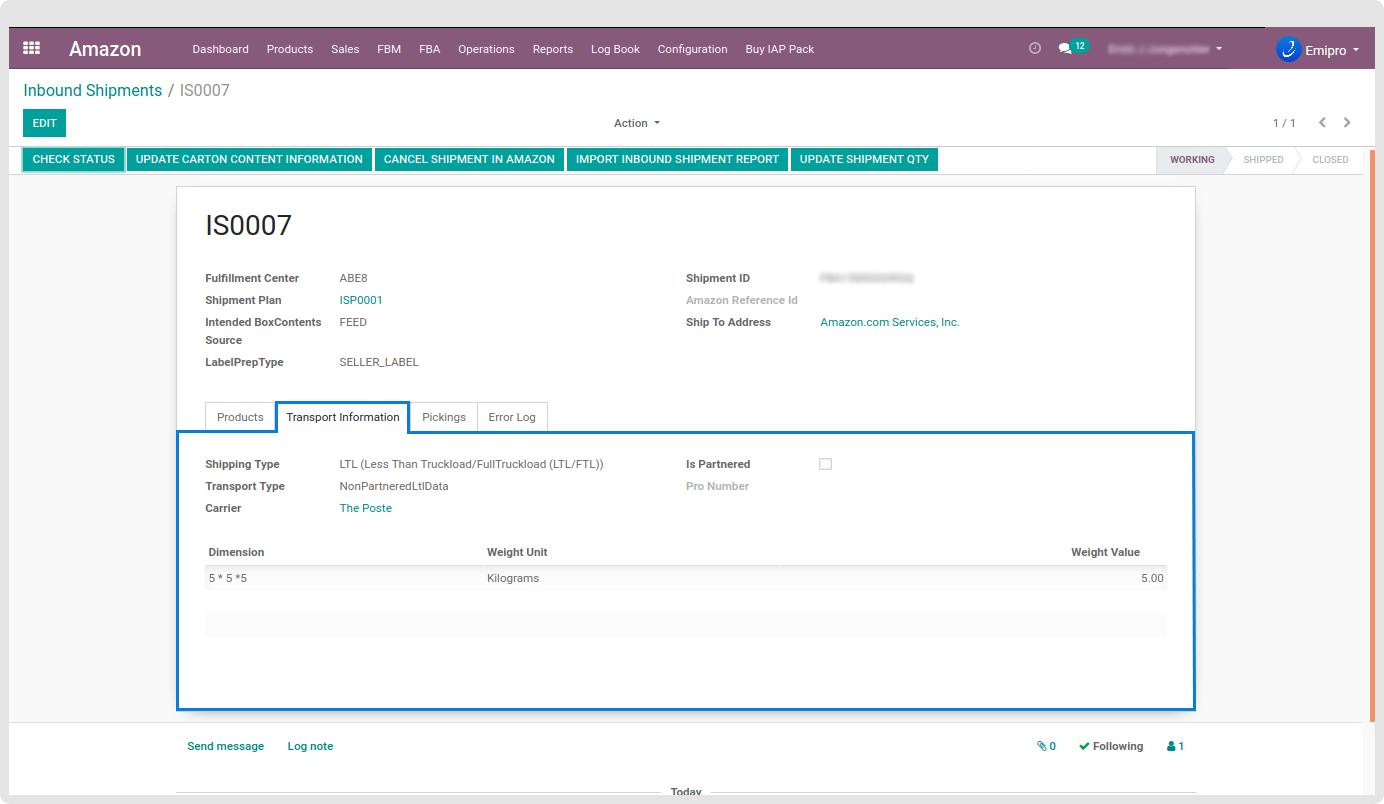
LTL Parcel: If the carrier is non-partner and transport type is LTL then Amazon will require a carrier name and Pro-number. Pro-number is the tracking number provided by the non-partner carrier.
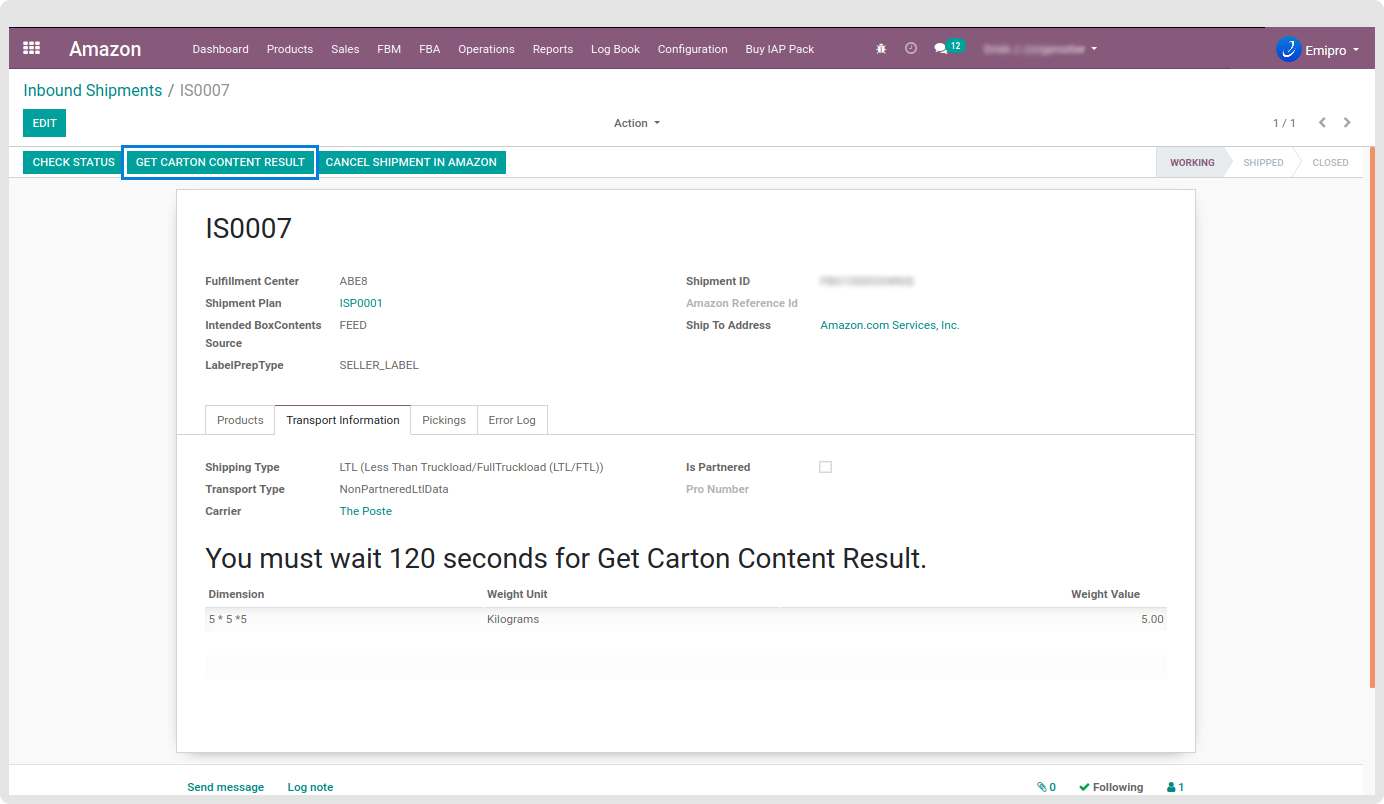
Update Carton Content information & Get Carton Content Result:
If you are using an Amazon Non-Partner carrier, Amazon recommended unique product labels, and for that users must import the following details. If the inbound shipment has 3 boxes, the user must create 3 box info in the Inbound shipment with all product details.
In the box info, the user must specify the dimensions, weight, product, and quantity. Also, each box id is a number and the user can start with 1, 2..N. After inputting carton details the user must submit it to Amazon and wait for 120 seconds, and one button will show up, called Get Carton Content Result.
On clicking this button, the system will check for any error in Amazon if not, the system will set the state to working and the Update carton content button will be visible.
Users can see the error log in the error log tab and correct it, then again update the carton content information to Amazon.
The same process will be repeated until the correct carton details are updated on Amazon.
The user can import Carton content details using a CSV file as well.

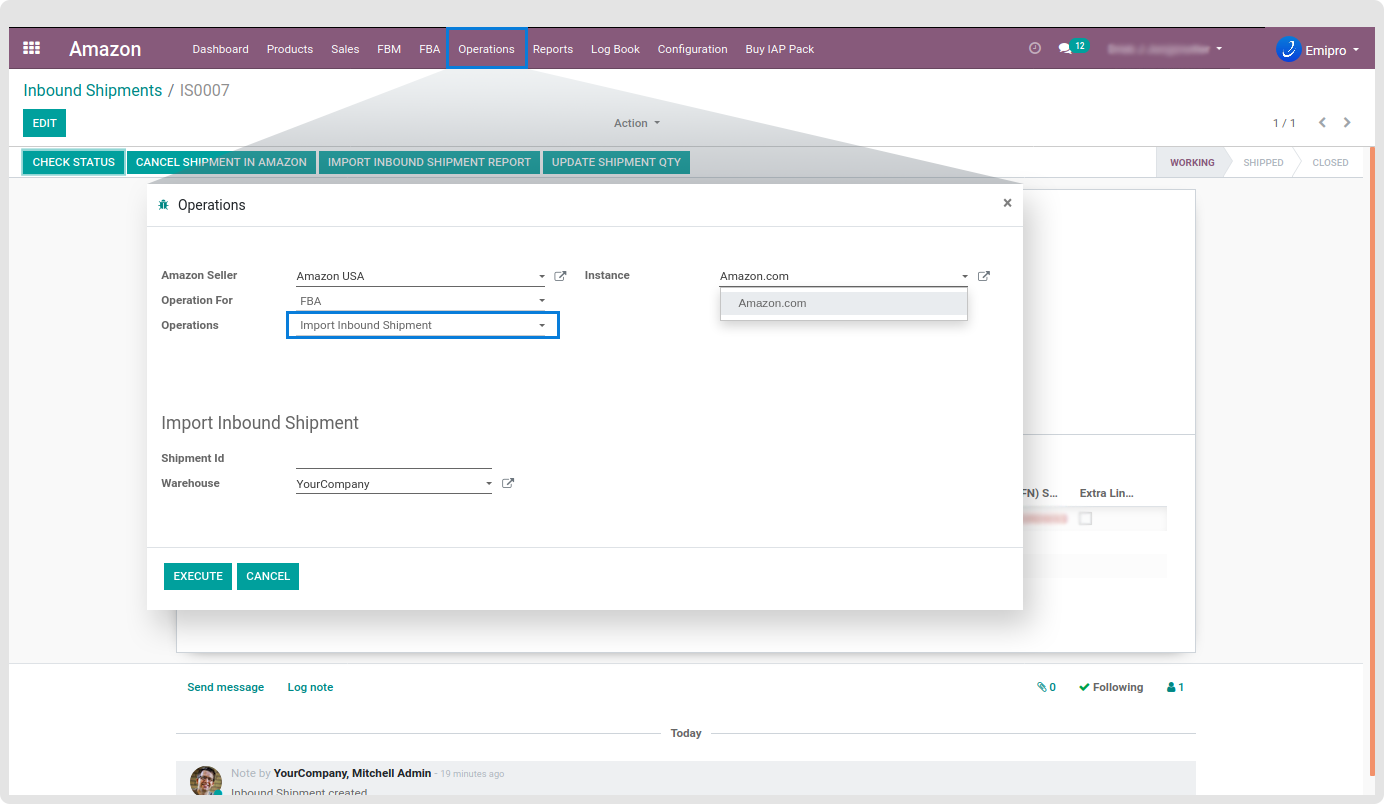
Import Inbound Shipment from Amazon to Odoo :
The inbound shipment which was created in Amazon can be integrated into Odoo by navigating to Amazon ↣ Operations ↣ Import Shipment.
-
Warehouse: The user will need to select from the drop-down menu and choose the warehouse from which you will need to deliver the product to the Amazon warehouse.
-
Shipment ID: The user will need to enter the Shipment ID from the seller portal.
-
Instance: The user needs to select the Instance from the drop-down menu for which Amazon Inbound Shipment will be carried out.
Once you have entered all the required details you can Import Shipment.
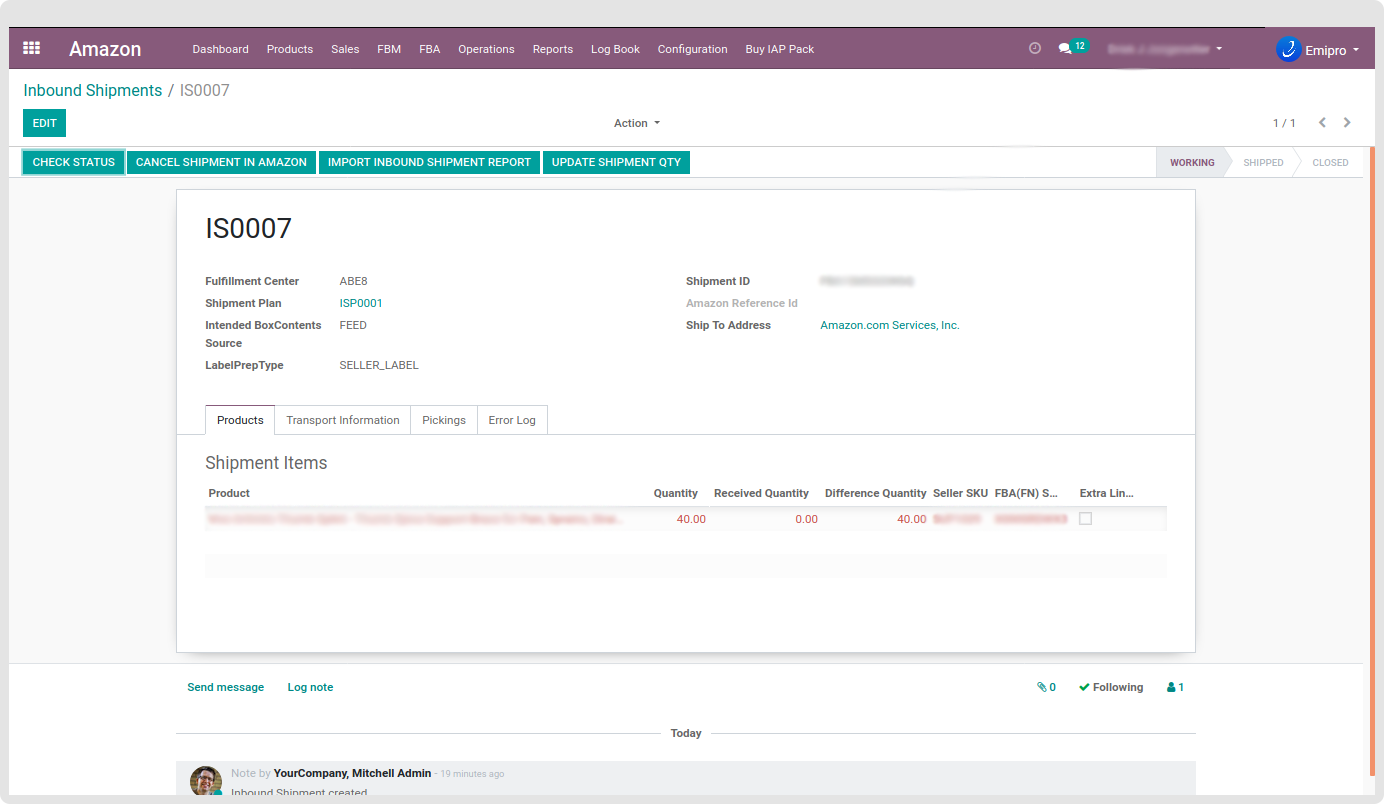
Once, the details are successfully fetched from your Amazon Seller Account, you will be able to see all the required information of the products you are sending to the Amazon Fulfilment Center.
Here, for each inbound shipment, there will be two pickings. One from your own warehouse to transit (Delivery Order) & second from transit to Amazon (Receipt).
So, this is also one of the ways to manage and process inbound shipments for Amazon in case if it is not directly integrated/configured with Odoo.