Seller Registration
As per Amazon’s Acceptable Use Policy and Data Protection Policy, the seller has to authorise Emipro’s Developer ID in their Seller Central account, in order to use the connector.
You only need your Merchant Token / Seller Id.
And follow the instructions below.
TIP
If you are selling in multiple regions, then you will need to register for each region’s seller ID separately.
Register Your Seller Id
Amazon Seller Setup & Configuration
-
Navigate to Amazon ↣ Configuration ↣ Amazon setting
-
Click on Register your Seller ID
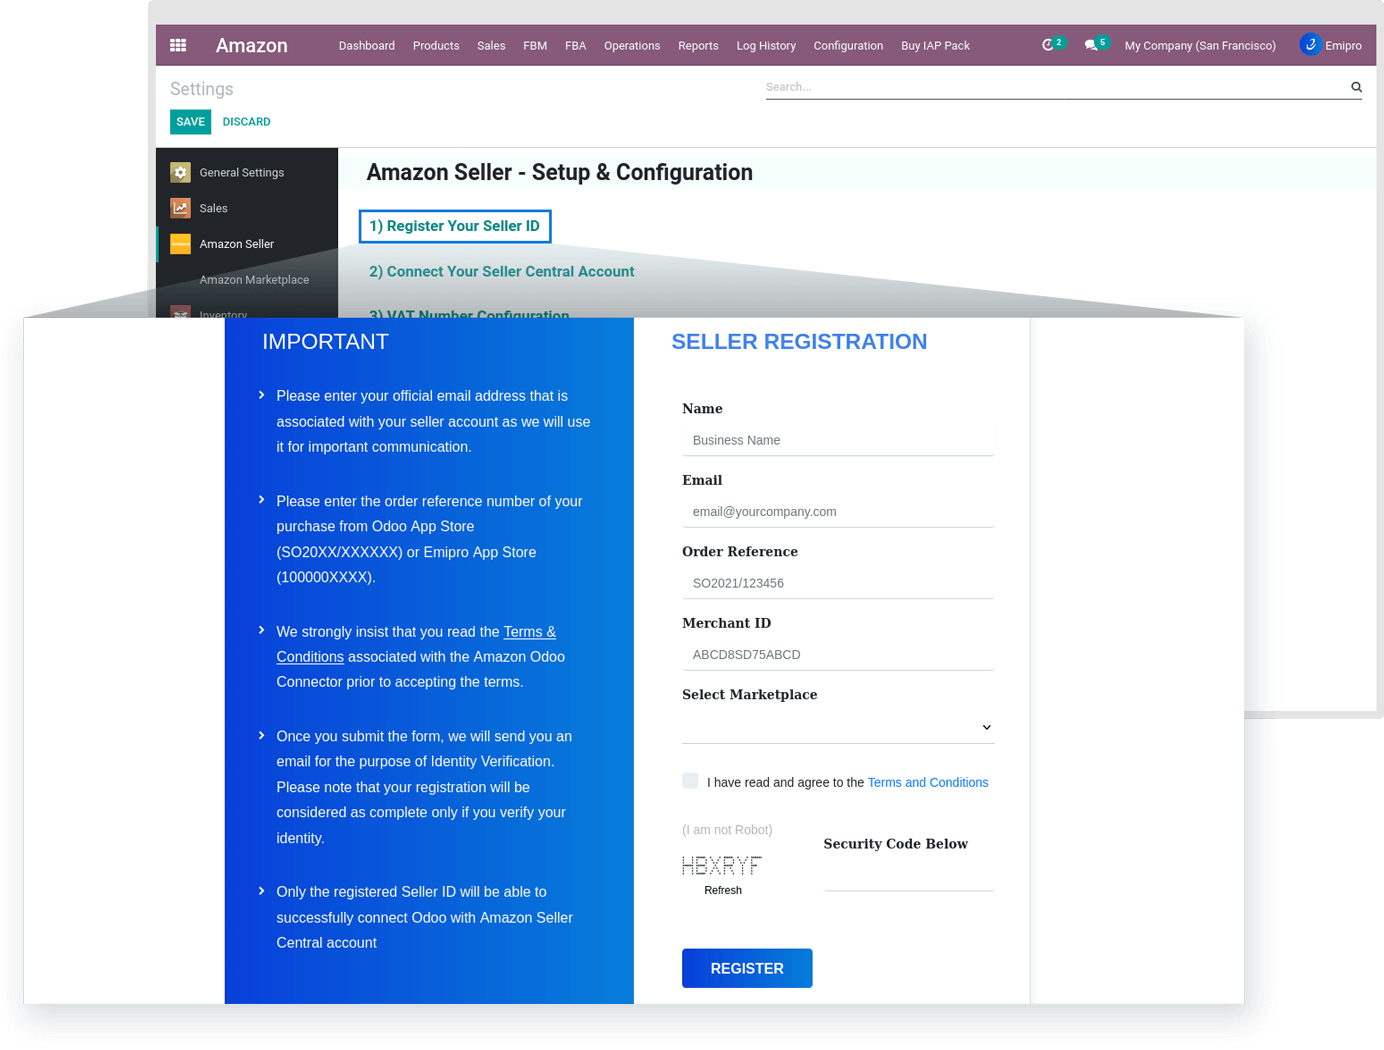
Seller Registration Form
A registration form will open after you click on Register your seller ID Button. This form requires five fields to be filled in.
-
Name: You have to fill in the name of your business here.
-
Email: You have to fill in your email id which is registered with your seller account as it needs to be verified later on.
-
Order Reference: You have to fill in the purchase order reference from Odoo App store (Example: SO2022/XXXXXXX) for Emipro’s Amazon odoo connector here. You will find it in the email you received regarding your purchase of Emipro’s Amazon odoo connector.
-
Merchant ID: You have to fill in your merchant Token/seller Id here.
-
Select Marketplace: You have to select the marketplace/s which you have configured in your seller central.
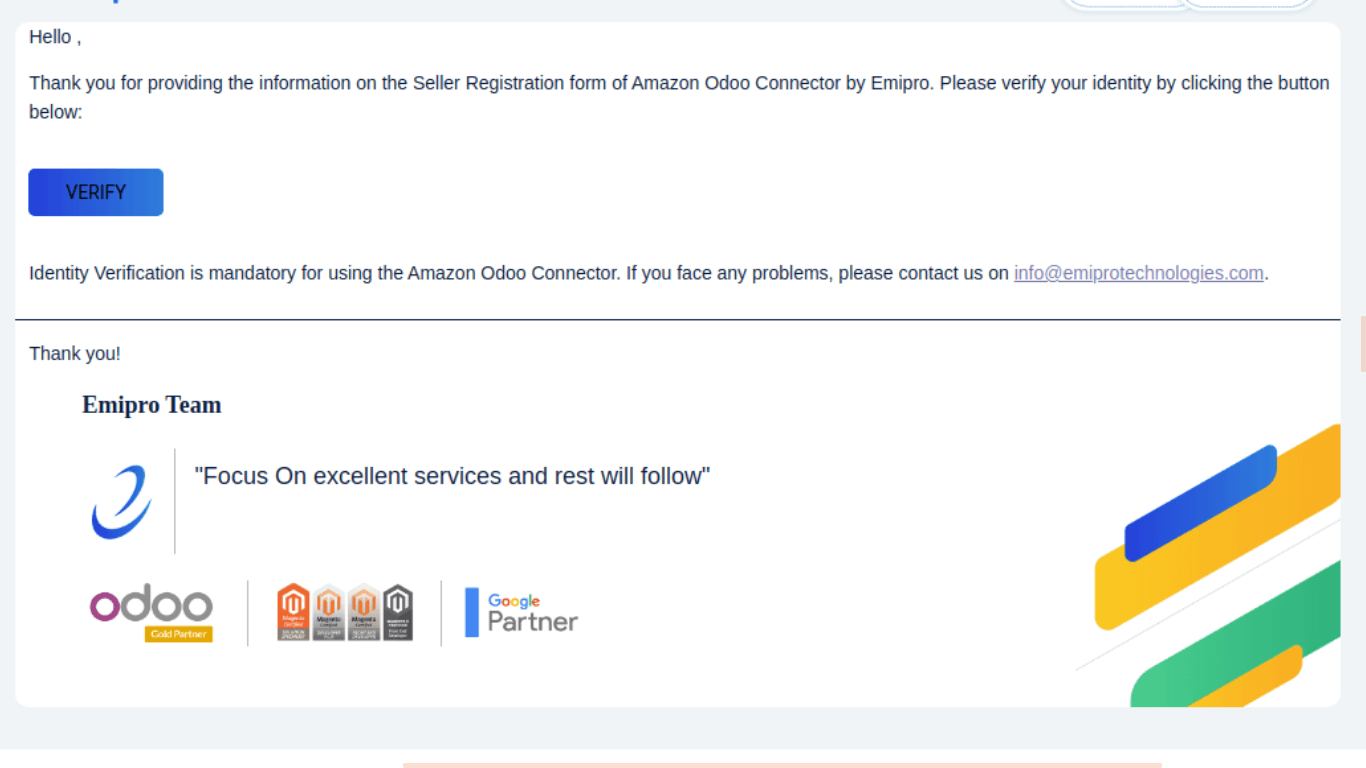
Email Verification
Once you click the Register button on the form. An email verification link will be sent to the email address you provided in the form. You simply need to click on the Verify button in the email to complete the email verification process.
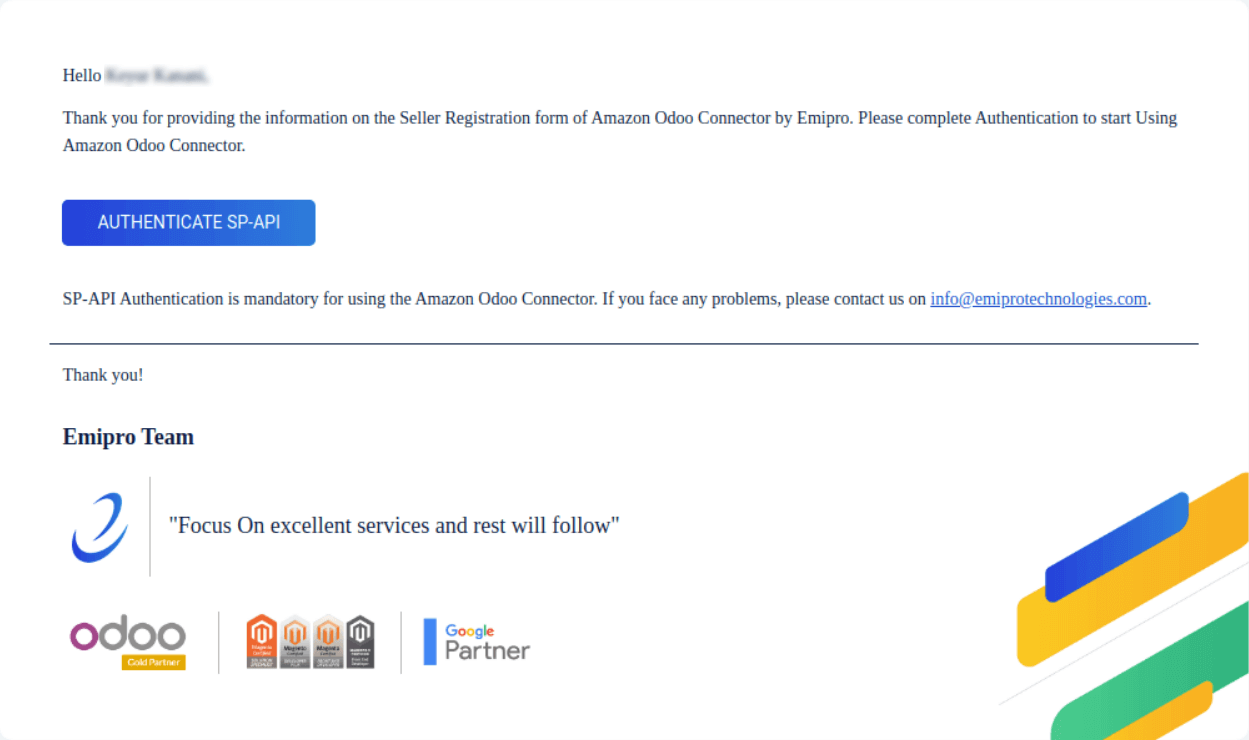
SP API Authentication
As soon as your email has been verified, you will receive another email with an authentication link that helps us synchronize with your seller central account.
You simply need to click on the Authenticate SP-API button in the email, which will take you to Amazon’s seller central login page.
You must then log into your seller central account.
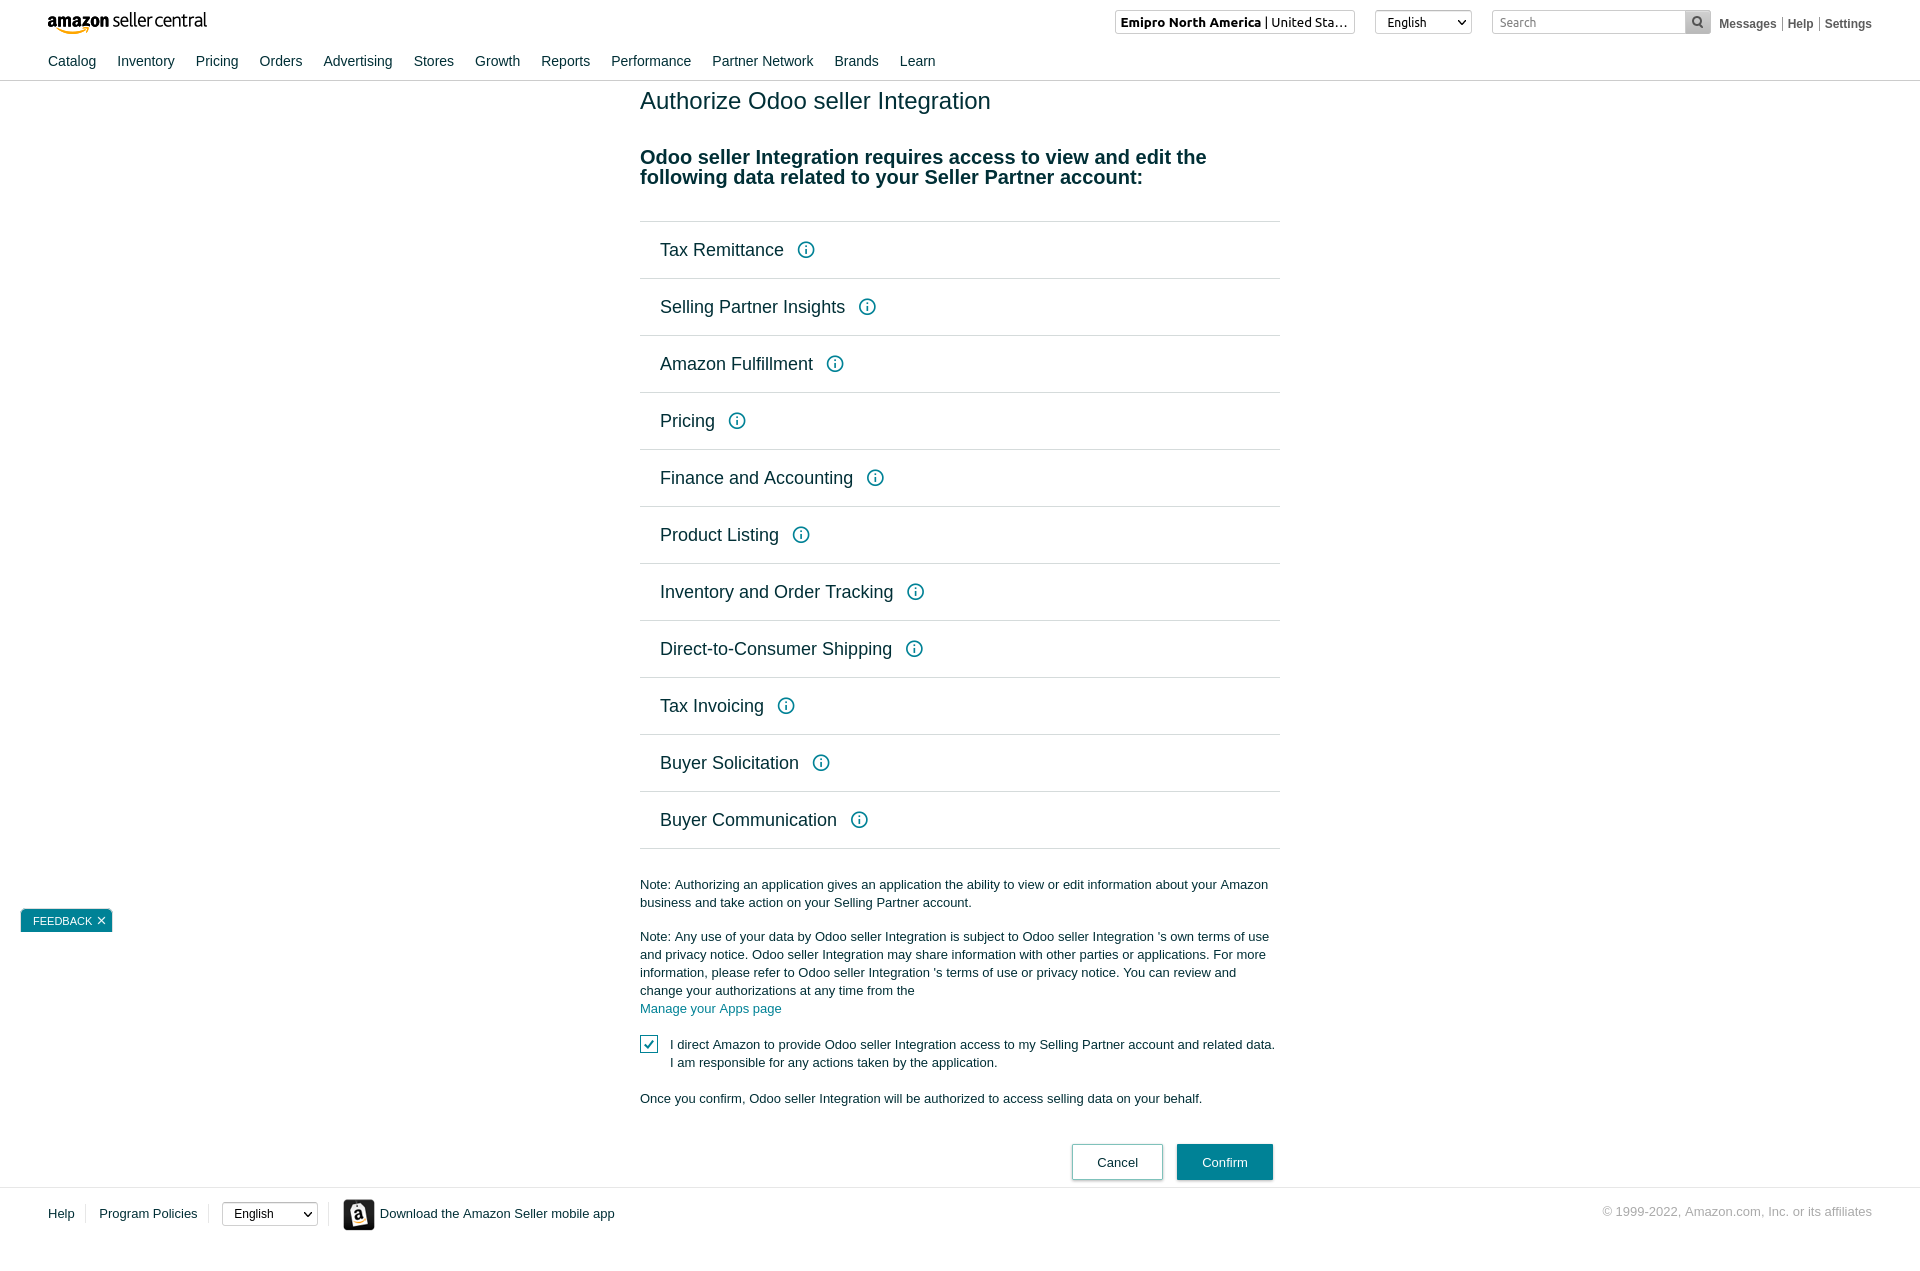
SP-API data consent
When you log into the seller account, Amazon will ask for your consent to access data using the SP API.
Simply click the Confirm button.
With this, you have successfully completed the registration process.
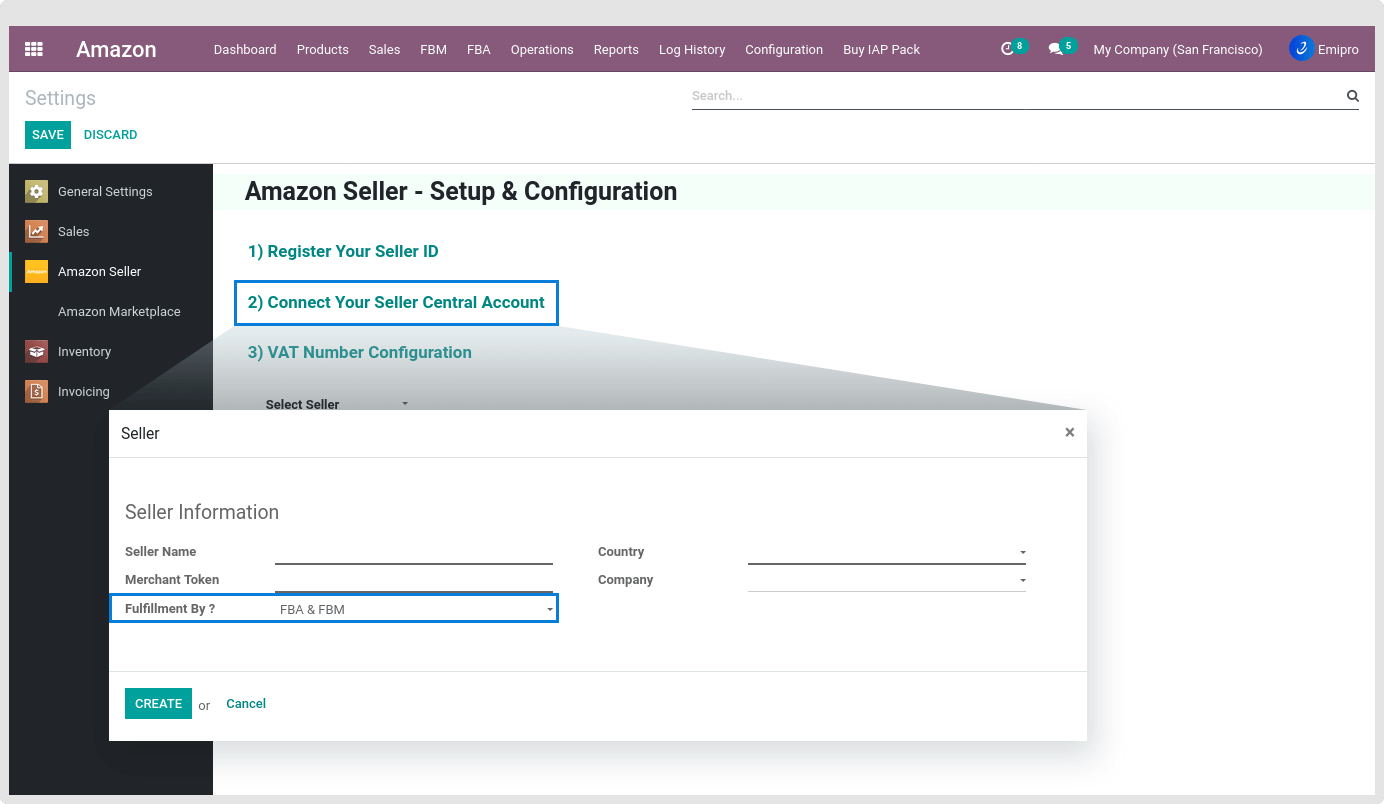
Connect your seller central Account
Navigate to Amazon ↣ Configuration ↣ Amazon setting
Click on Connect Your Seller Central Account
A pop-up window will open and you need to fill in five details here.
-
Seller Name: Enter the Name of Amazon Seller. It can be anything.
-
Country: You have to select your country here.
-
Merchant ID: You have to fill in your merchant Token/seller Id here.
-
Company: Enter the Company of seller. Make sure it is correct because all transactions will be carried out by Odoo on the basis of configuration of the company.
-
Fulfilment by : Enter the fulfilment option for the selected seller ID viz. FBM (Fulfilment By Merchant) or FBA (Fulfilment By Amazon).
After filling in all the required details click on the Create button.
Good job, you have successfully connected your seller account to the Amazon Odoo Connector.
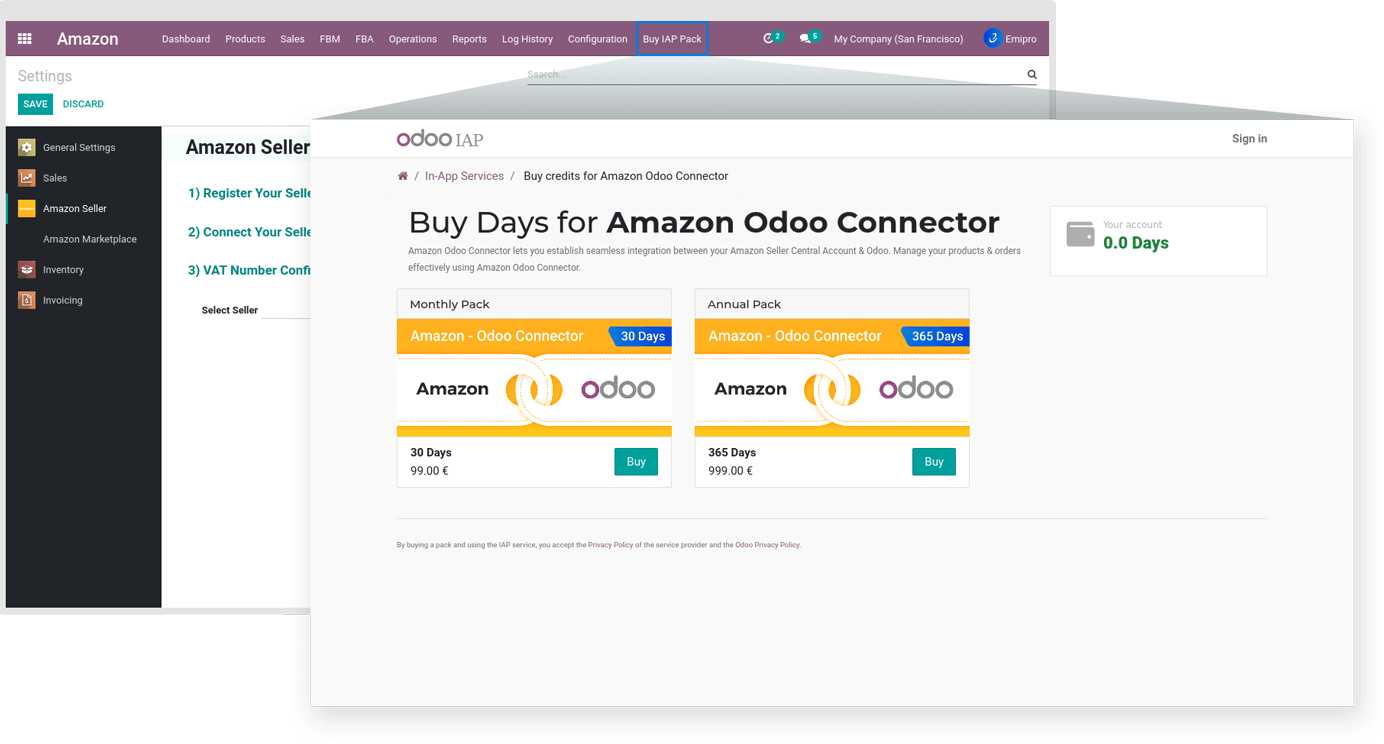
With the purchase of the app, you get 6-months free usage from the date of purchase and after that, you can choose to buy a Monthly or Annual IAP pack.
Buy IAP Pack
Navigate to Amazon ↣ Buy IAP Pack menu and the system will redirect you to the IAP pack selection page.