Export Stock:
- When you are managing an inventory at odoo and want export this inventory to Woo commerce Store, you can perfrom an operation of Export Stock.
- Export Stock can be done in two ways: - Manually - Automatically via Scheduler
Export Stock Manually:
If you want to export the stock manually, navigate to Woo commerce app > Operation > Select an instance > Select the operation of export stock.
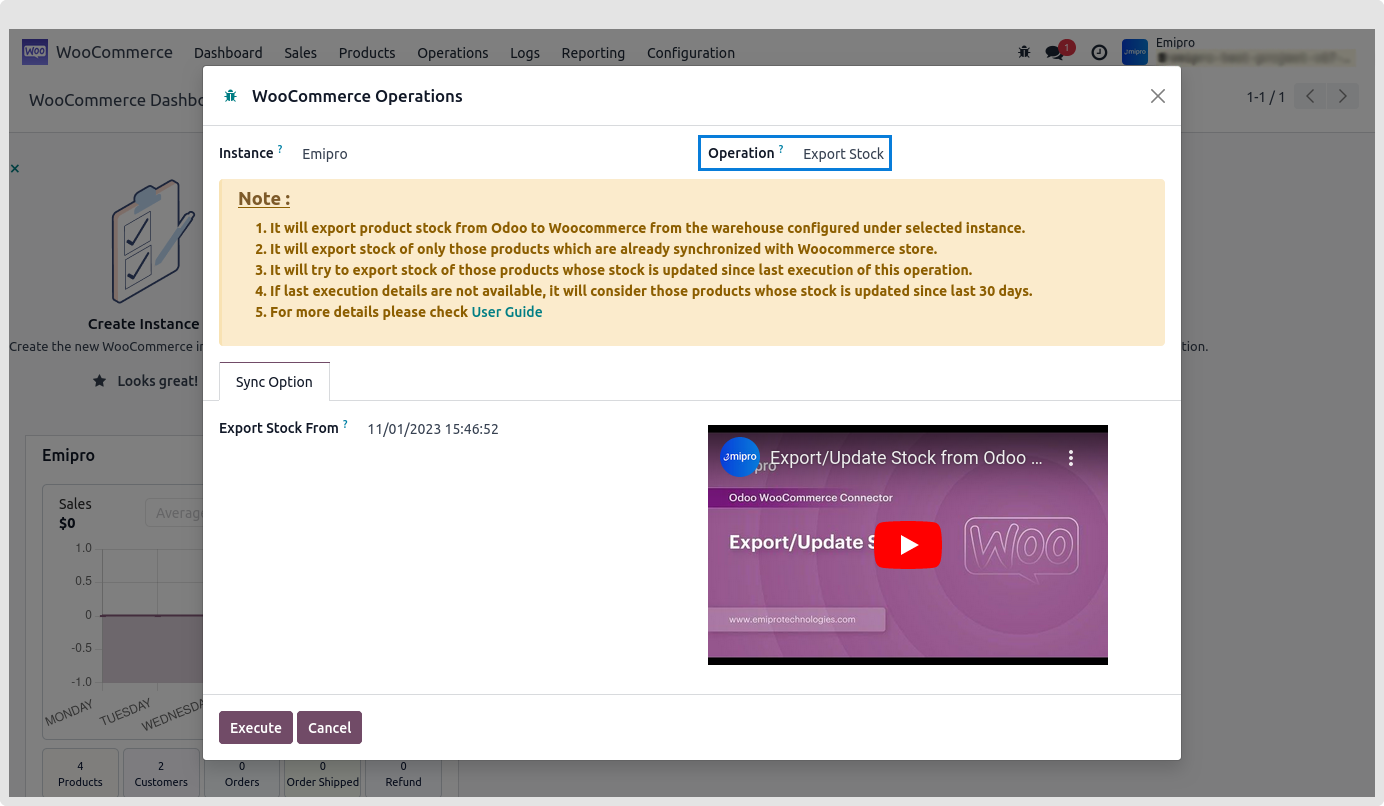
You can select the date and time as per your requirement and click on the execute button.
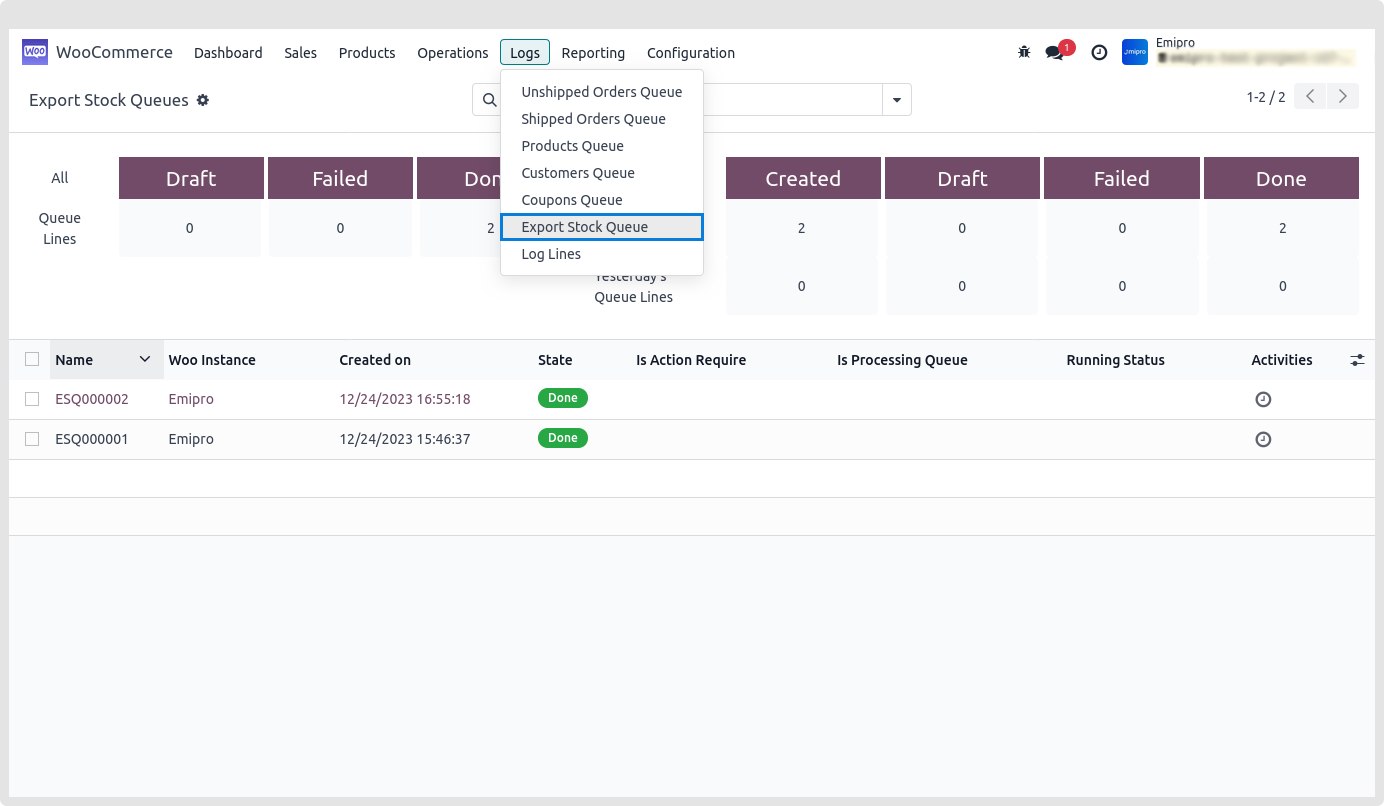
After performing an operation the system will create a queue in the export stock queues.
This queue will be in a draft status, we neee to process it.
For that we need to click on process queue manually and you can wait for while to process it if you set any scheduled action to process the queue.
If the queues are in a Done status then all the orders are successfully imported in the odoo.
If the queues are in a Partially Processed or in a Faild status then check the log lines and again process it.
Queue Dashboard:
-
Navigating to Woo Commerce App » Logs » Export Stock Queue.
Manually Export Stock from Smart Button
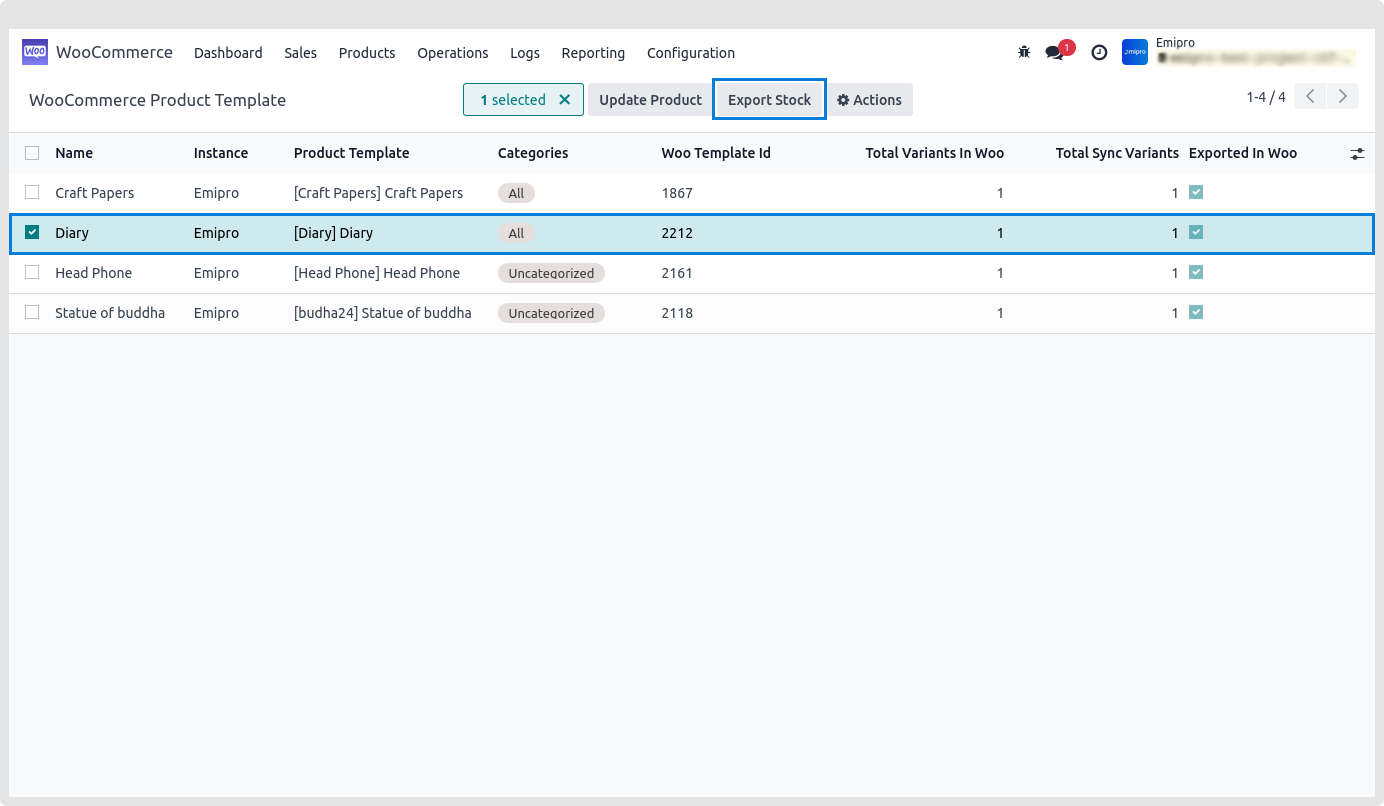
Make the list view of products, select the prodycts. Clcik on the smart button of Export Stock and it will manually export the stock of selected products.
Export Stock Automatically via Scheduler:
To export stock using Scheduler follow the below mentioned navigation Woo commerce app » Congratulations » Instance
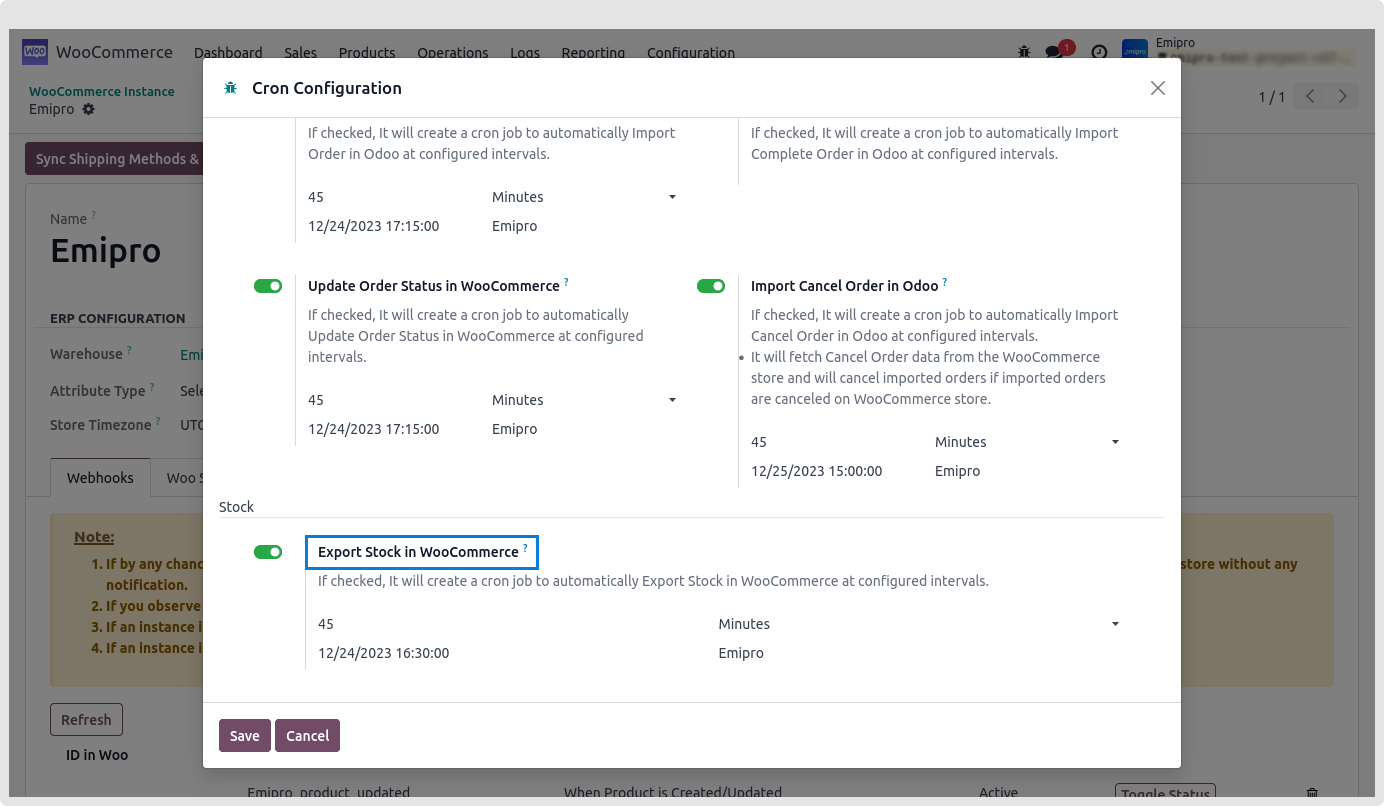
You need to select the instance and click on Configure Schedulers and activate an opton of export stock.
User can configure many schedulers to set automated jobs to perform the various tasks.
It is necessary to set the below mentioned values
Time: You can set the interval in different time duratio, which means scheduler will run after a selected time interval.
Note: It is a advisable to minimum set 45 Minutes in order to avoid the conflict.
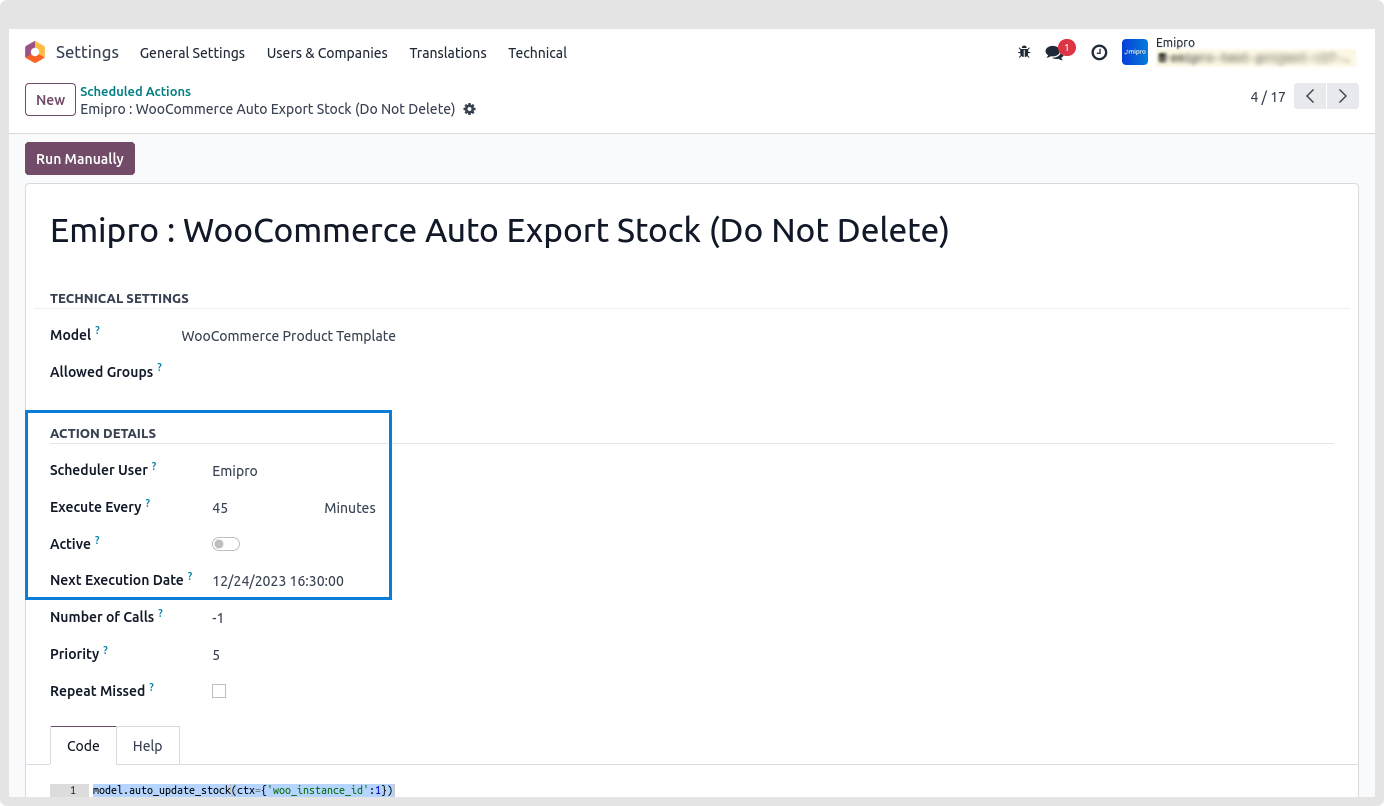
Execution date and time:
Here you can set the execution date and time from when the scheduler will start.
User: You have to select the user through which you want the task to be carried out. Make sure that the user selected for this task should possess the rigjts for the same.
Scheduled Actions Congratulations:
In any case whenever the queue is generated it is necessary to process it.
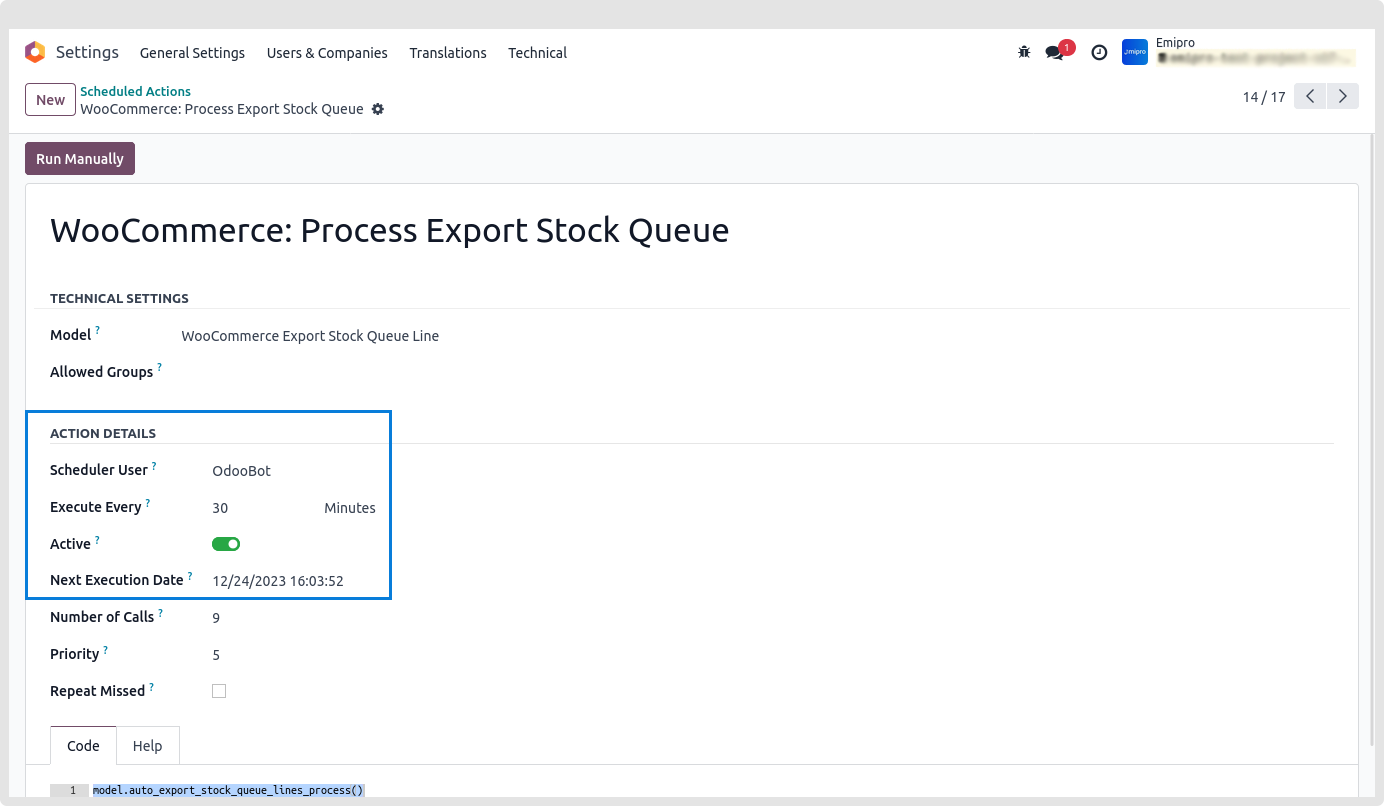
To automatically pricess the queue you can follow this navigation Main Dashboard of odoo » Write Scheduled Actions » Click on Woo Commerce Auto Export Stock and activate it.