Instance
At a dashboard there is an option of coniguration. Under that there is an option of an instance.
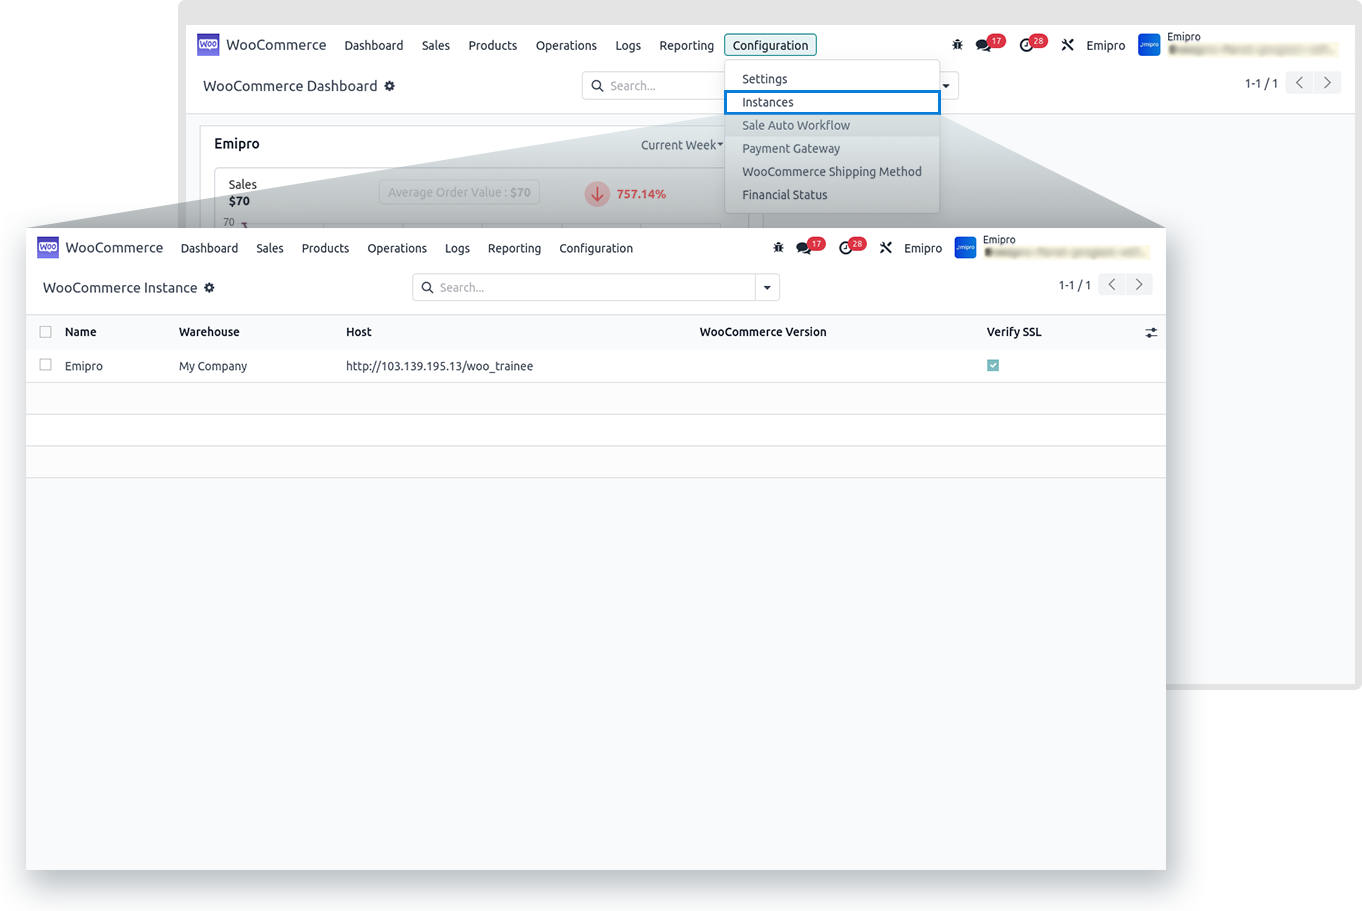
It will provide information about the various aspects of connector.
First we have the 4 smart button
- Reset Credentials
- Configure Schedulers
- Active Scheduler
- Active
Lets get idea about each and every smart button.
Reset Credentials
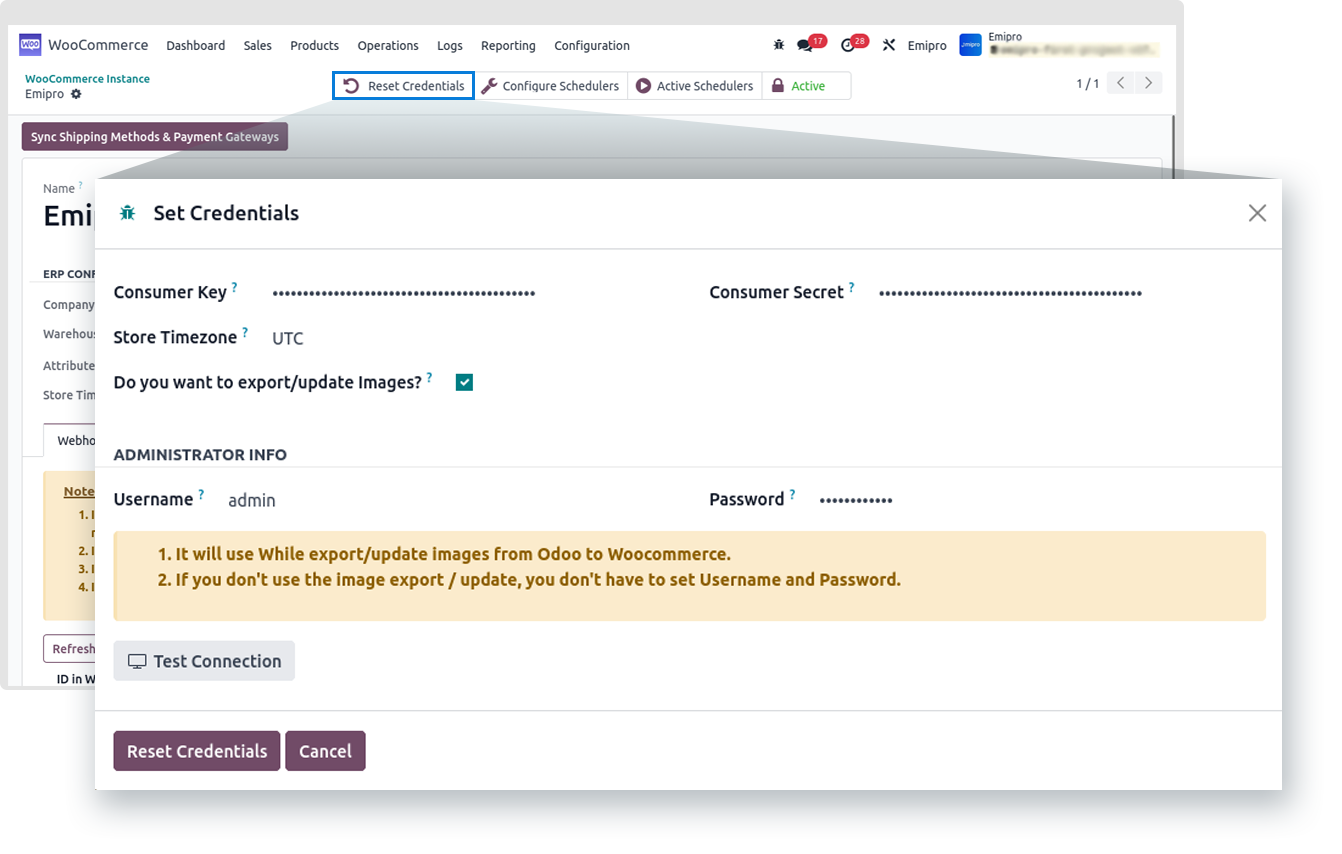
-
It will provide an information about the Consumer Key, Consumer Secret, Store timezone, export/update image and Administrator info.
- After that there is an option of Test Connection.
- This option plays an important role.
- Once you click on this, it will provide you an information regarding the connection between Woo Commerce Store and Woo Commerce Connector.
- After clicking on this option you will get idea about the connection between the Store and Connector.
Cron Congratulations
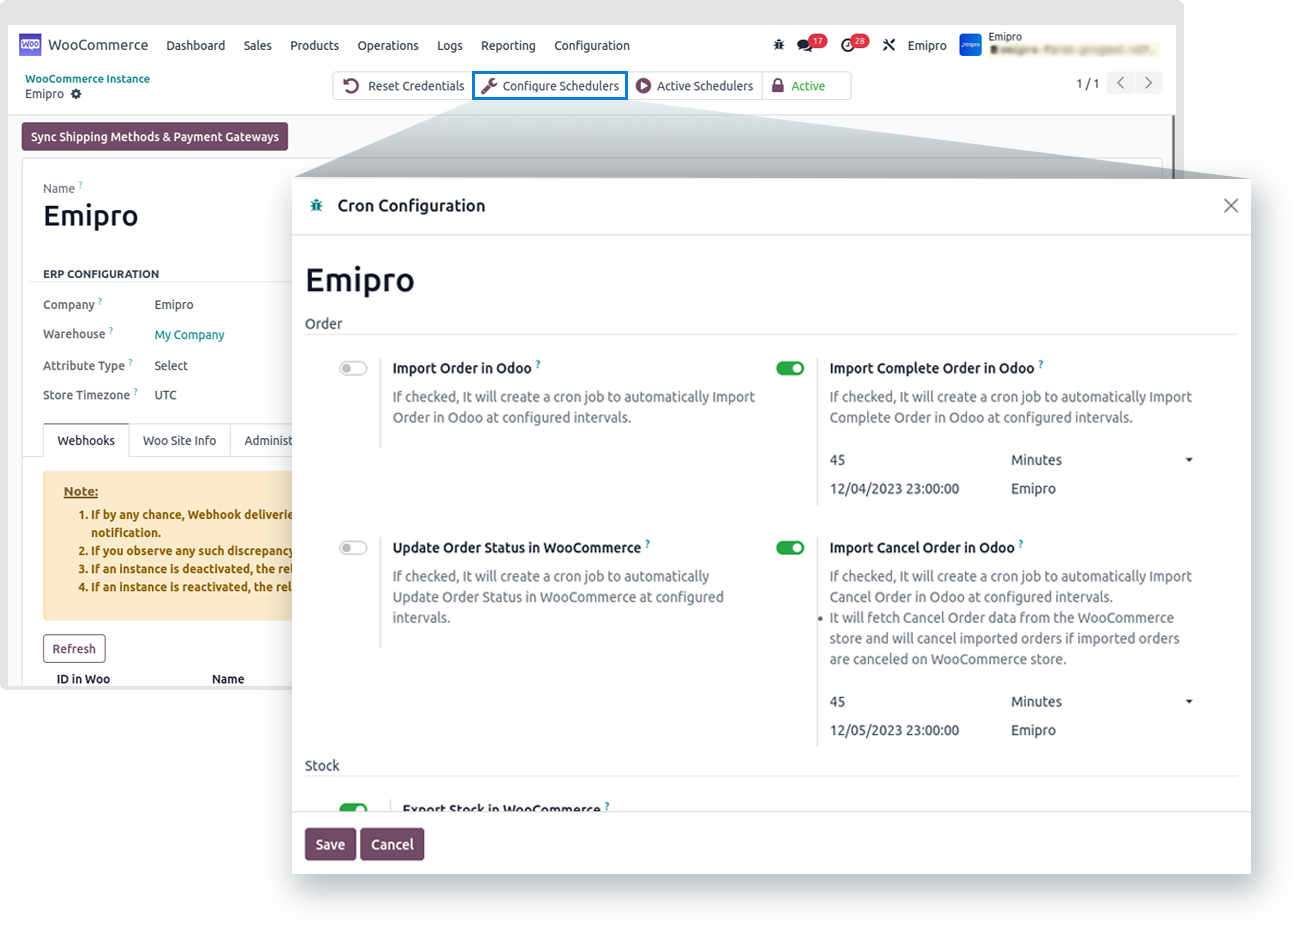
Cron Congratulations involves two different cron congratulations such as Order and Stock
Orders
Order cron Scheduler involves the four major cron job such as:
- Import Order in Odoo:
If this option is enabled, than it will create a cron job to automatically Import Order in Odoo at configured intervals.
Once you actiavte it, you need set teh time duration. Here it is advisable to set at least 45 minutes for smooth functionality of scheduler.
- Import Complete Order in odoo:
If this option is enabled, than it will create a cron job to automatically Import Complete Order in Odoo at configured intervals.
Once you actiavte it, you need set teh time duration. Here it is advisable to set at least 45 minutes for smooth functionality of scheduler.
- Update Order Status in WooCommerce:
If this option is enabled, than it will create a cron job to automatically update order status in Woo Commerce at configured intervals.
Once you actiavte it, you need set teh time duration. Here it is advisable to set at least 45 minutes for smooth functionality of scheduler.
- Import Cancle Order in Odoo:
If this option is enabled, than it will create a cron job to automatically Import Cancle Order in Odoo at configured intervals. It will fetch Cancle order data from the Woo Commerce store and will cancle imported orders if imported orders are cancelled on Woo Commerce Store.
Once you actiavte it, you need set teh time duration. Here it is advisable to set at least 45 minutes for smooth functionality of scheduler.
Stock
Stock cron Scheduler involves the scheduler of export stock.
Export stock in Woo Commerce:
If you activate it, than it will create a cron job to automatically export stock in Woocommerce at configured intervals.
Once you actiavte it, you need set teh time duration. Here it is advisable to set at least 45 minutes for smooth functionality of scheduler.
Active Scheduler
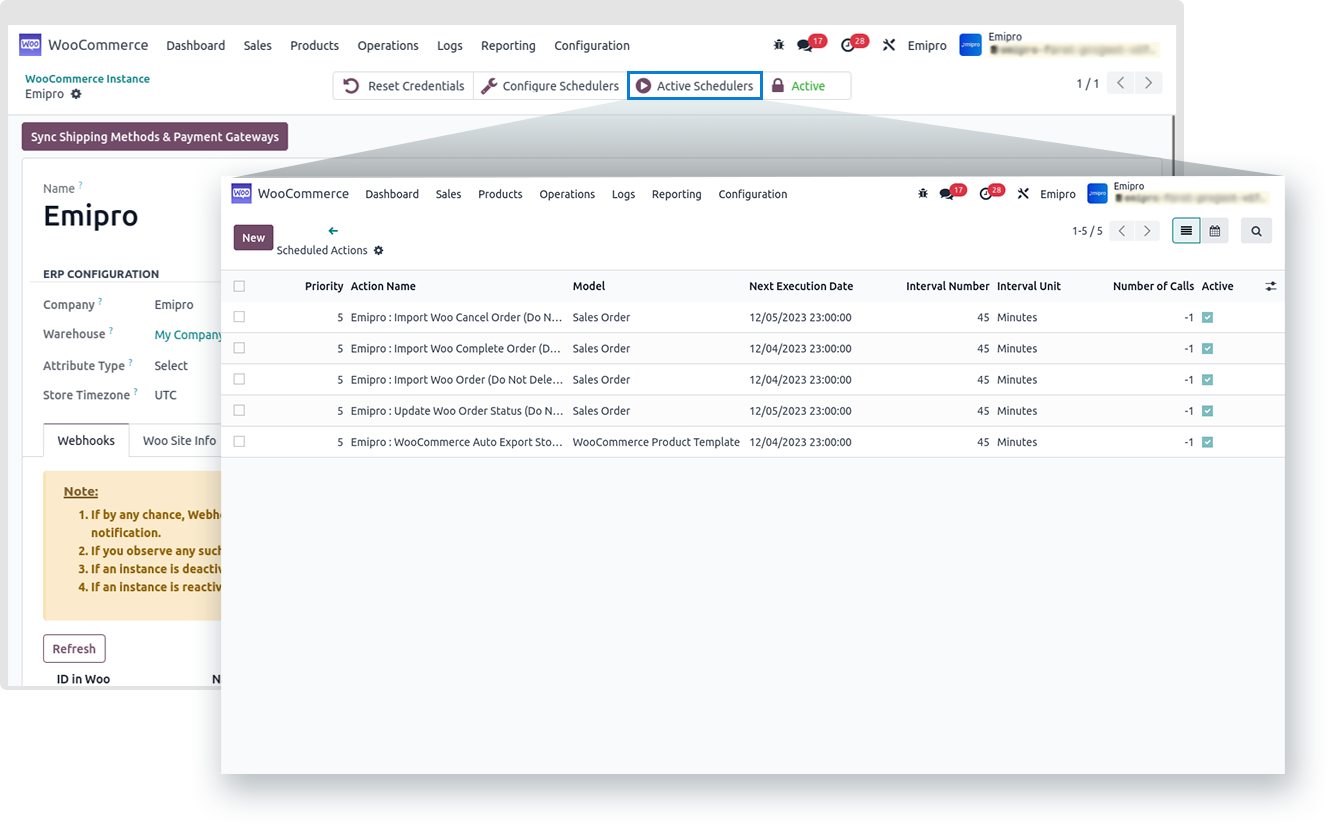
It will provide an information about the active crons.
Active
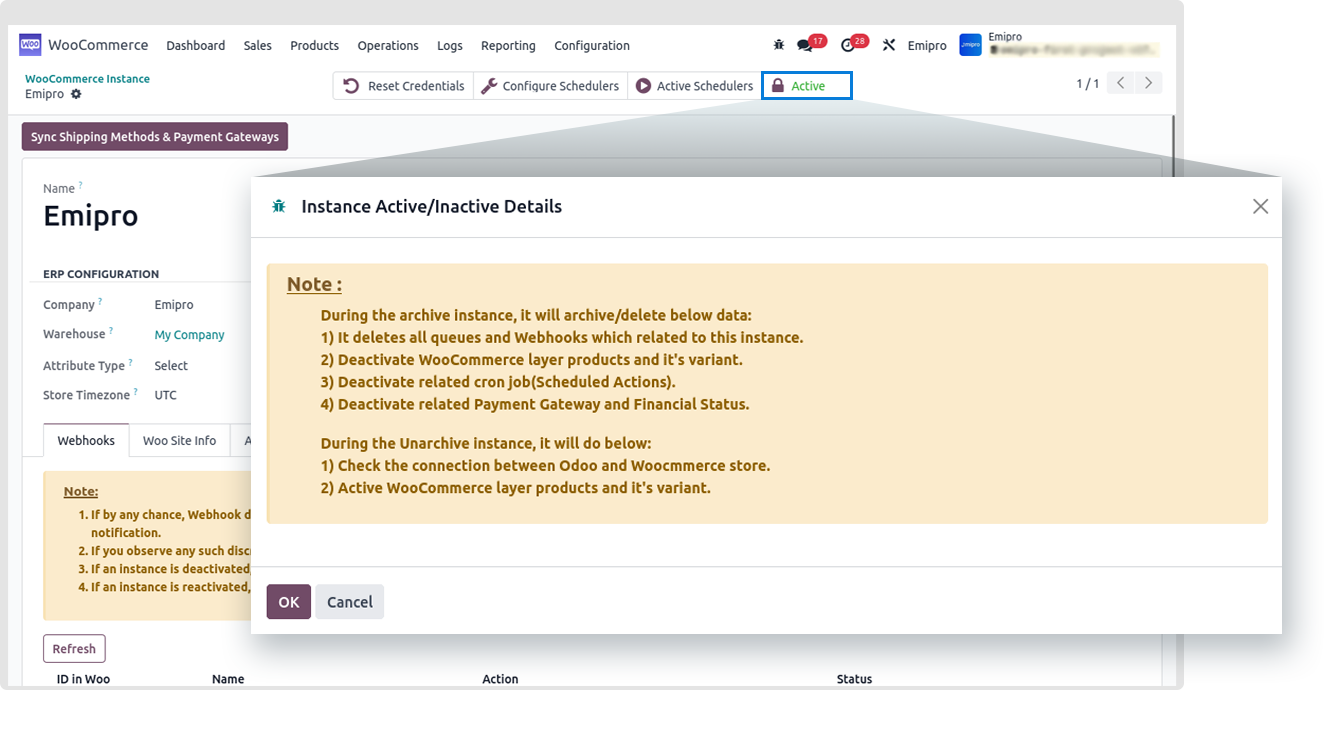
This smart button is associate with Archive and Unarchive of an instance.
Synce Shipping Methods & Payment Gateways
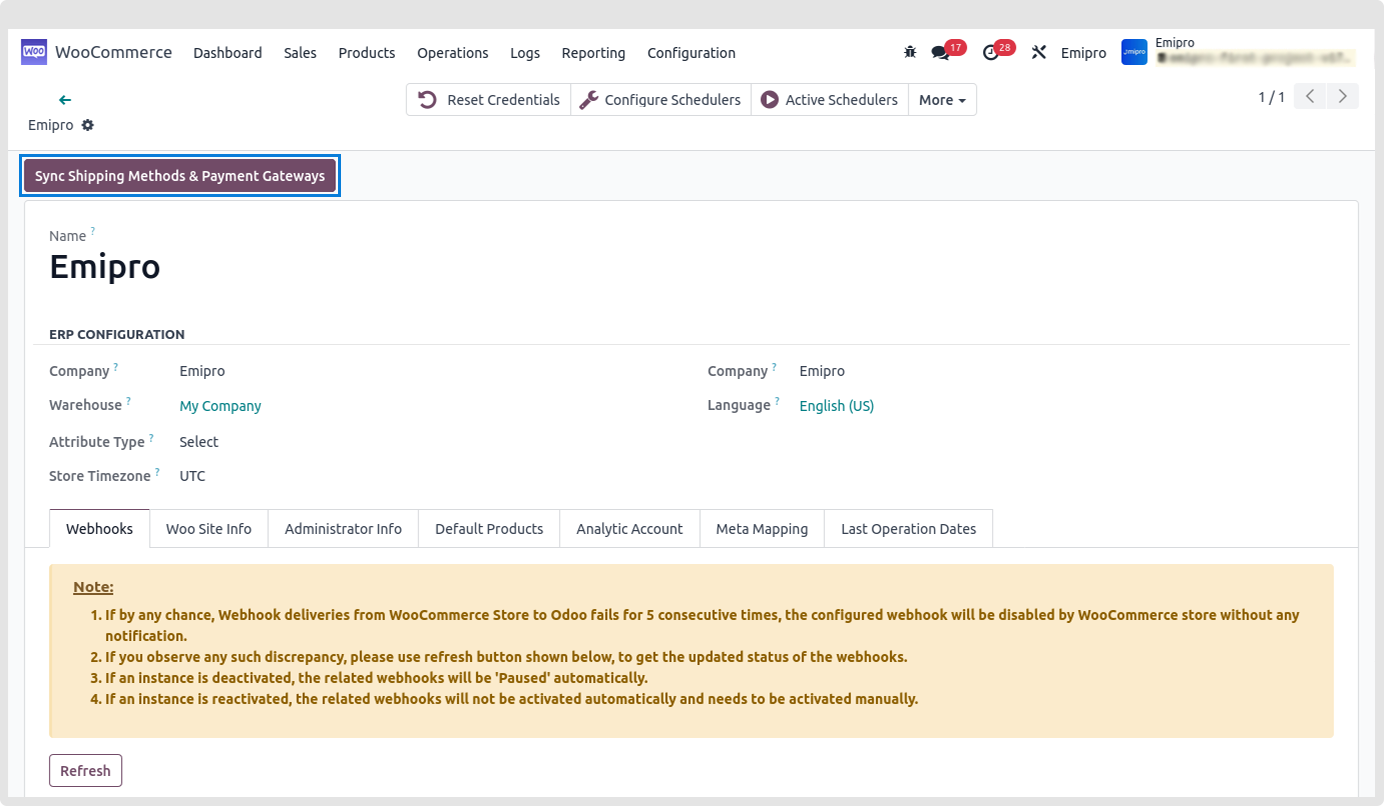
-
In WooCommerce stores we have multiple payment methods.
-
When a new Instance is created the system will automatically create new payment methods.
-
WooCommerce is providing API to Import Payment methods and shipping method in Odoo.
-
By clicking on this smart button you can directly sync Shipping Methods & Payment Gateways of WooCommetcs store.
At bottom of page there are serveral options, let’s get idea about it.
- Webhooks
- Woo Site Info
- Administrator Info
- Default Products
- Analytic Account
- Meta Mapping
- Last Operation Dates
Webhooks
-
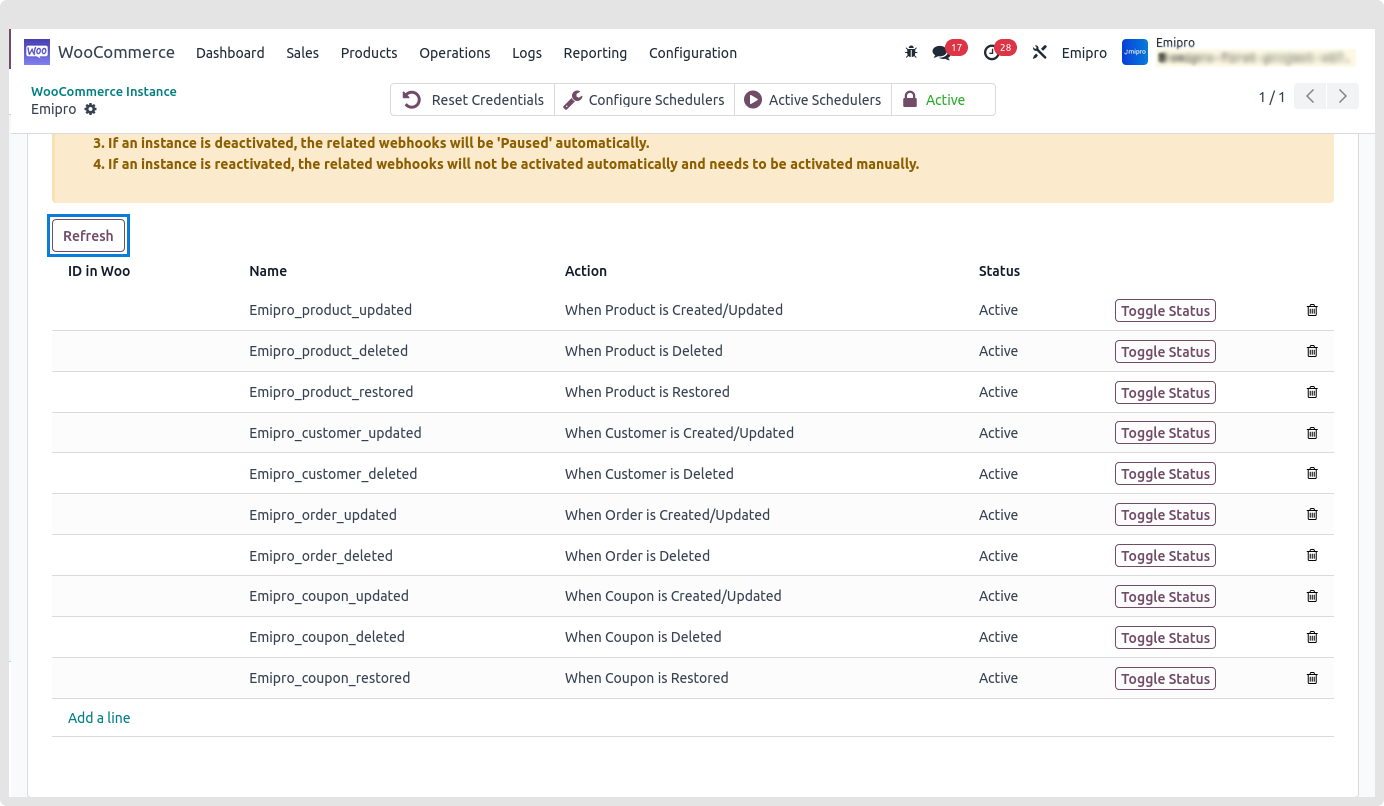
Once you activate the Webhooks from the settings and webhooks configuration, you will find list of the actions in this option.
-
It will shows the status of Webhooks along with it’s action.
Woo Site Info
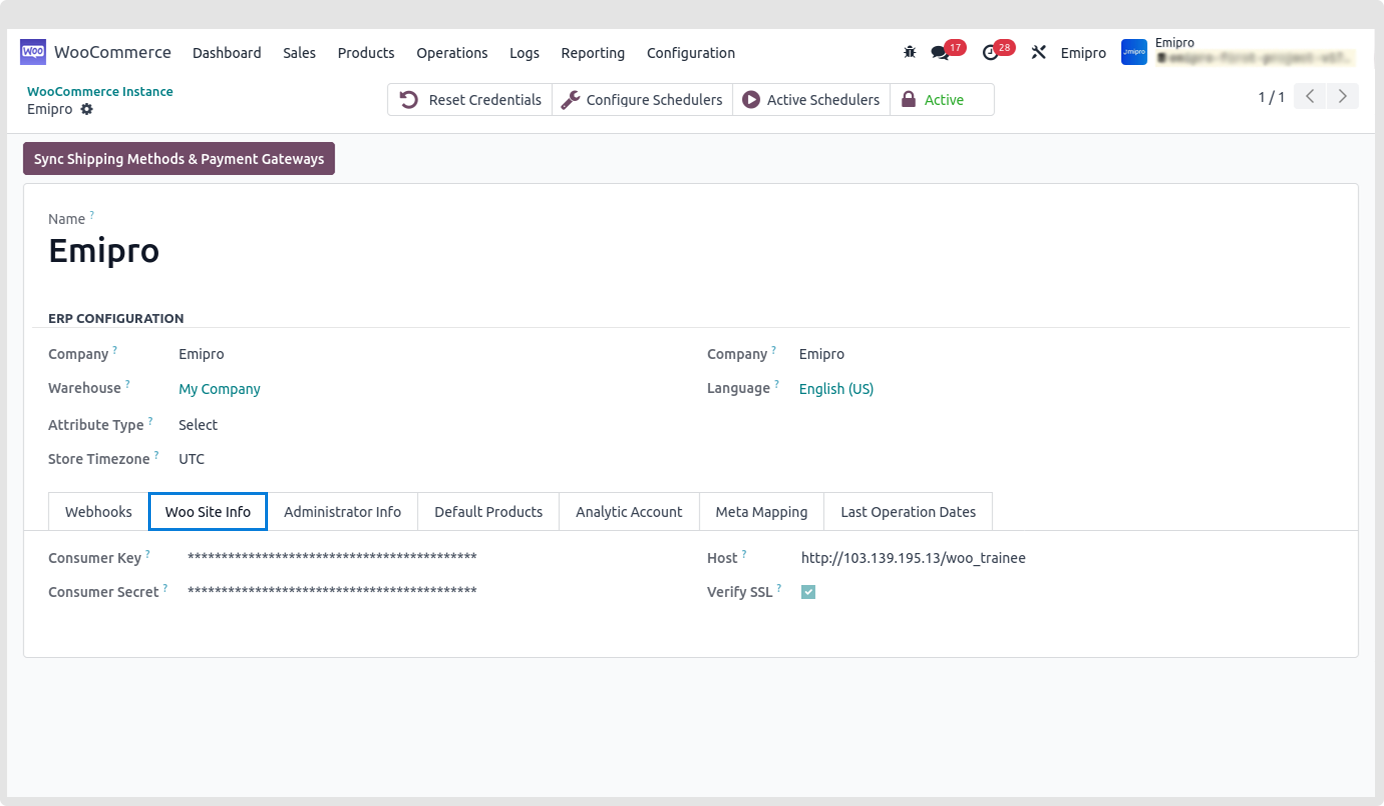
- It will provide an information about the Consmer Key, Consumer Secret, Host and SSL certificate.
Administrator Info
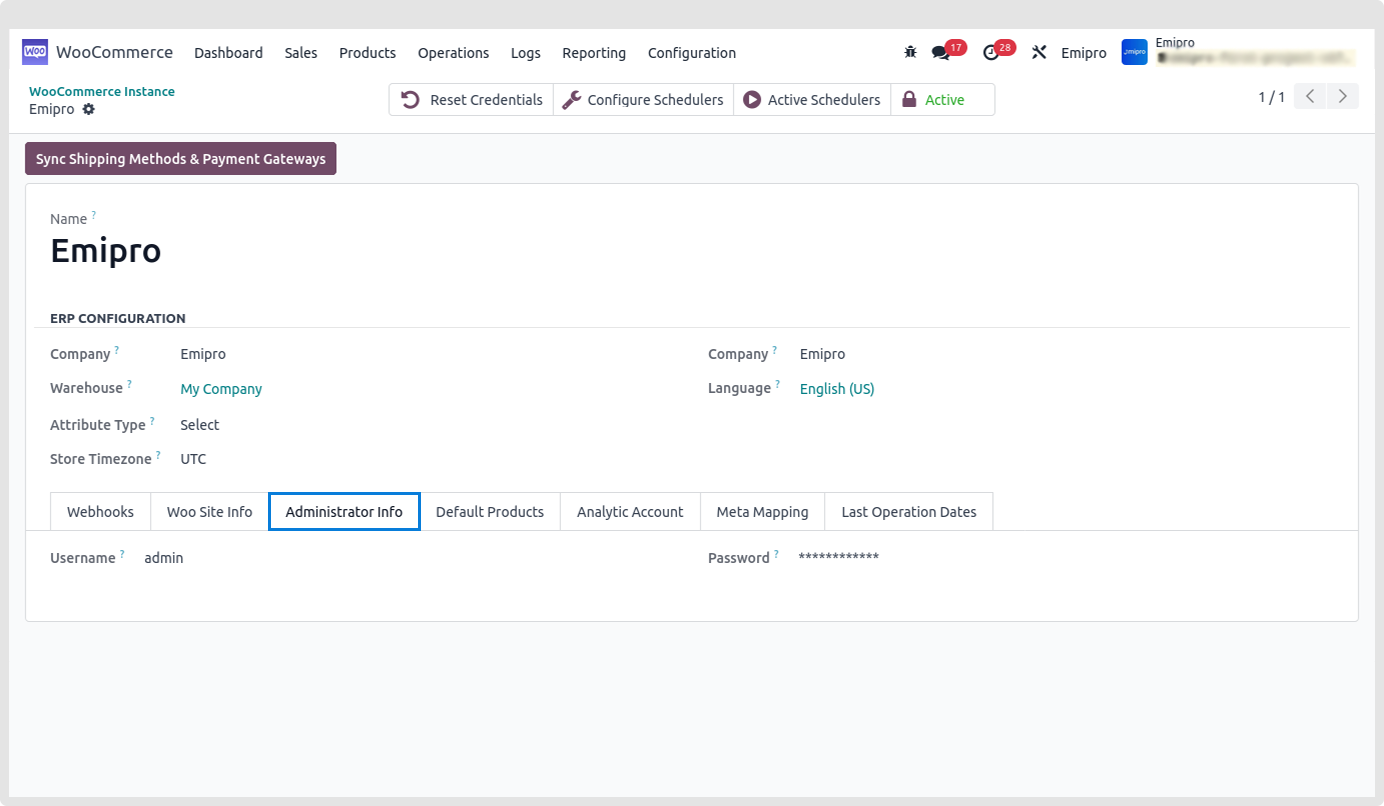
- It will provide an information about the Username and password
Default Products
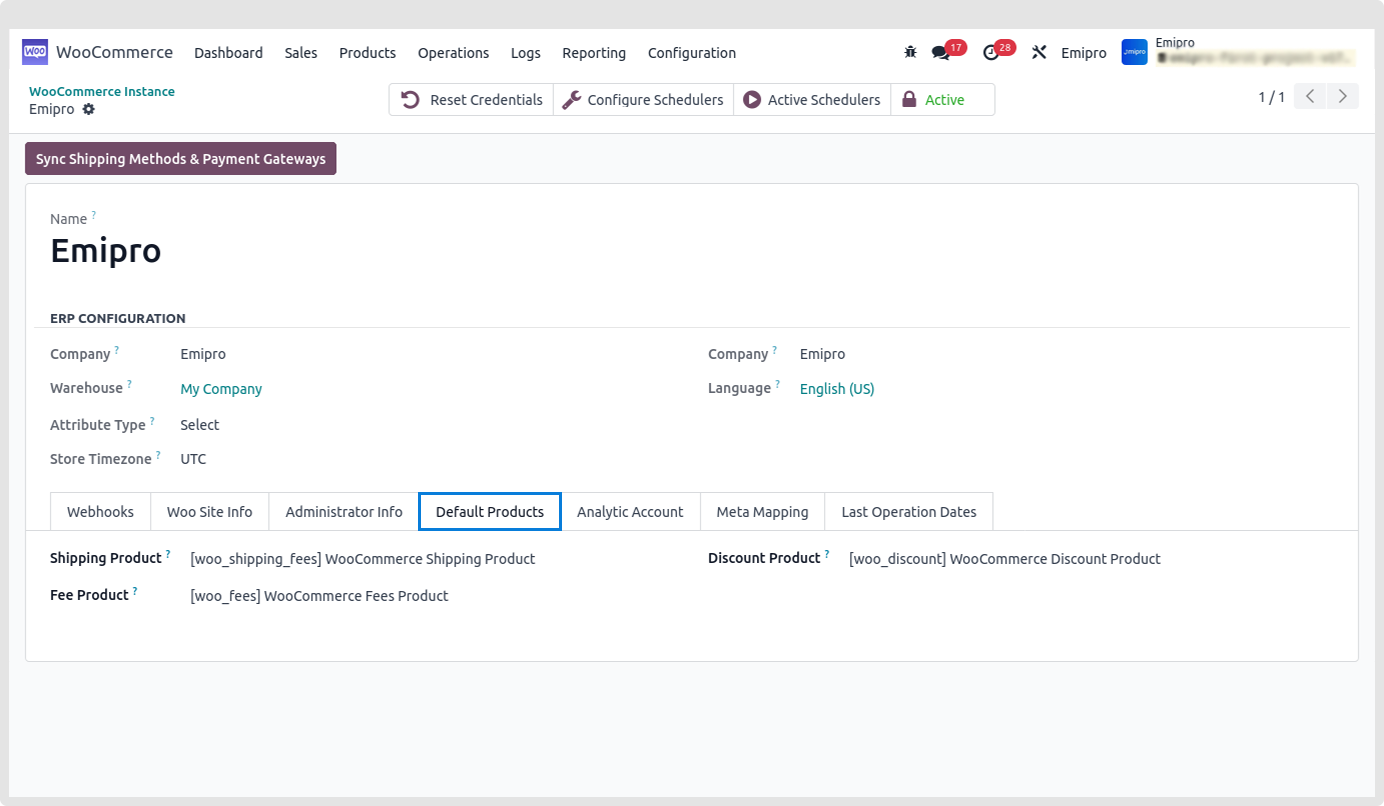
- It will default products of oyr connector such as Shipping Product, Fee Product and Discount Product.
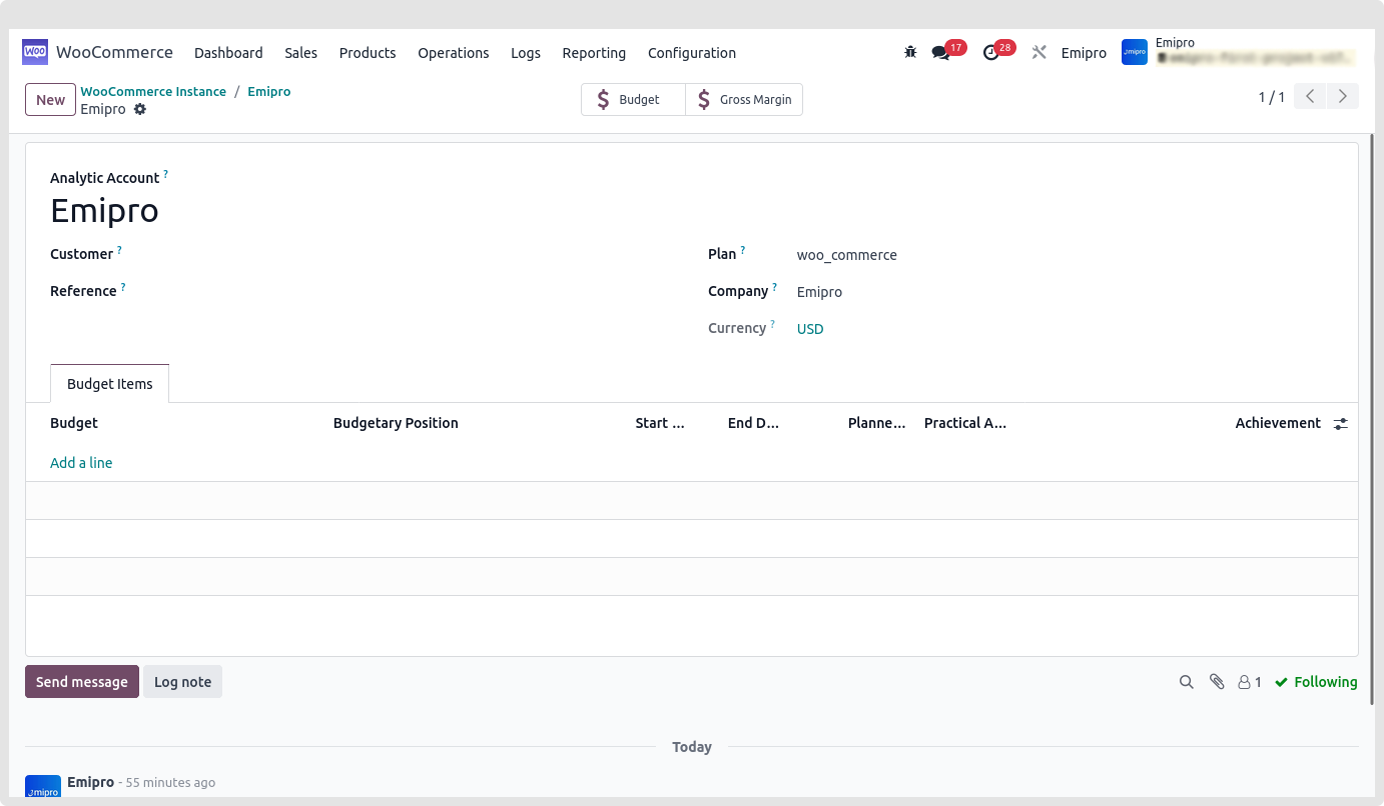
Analytic Account
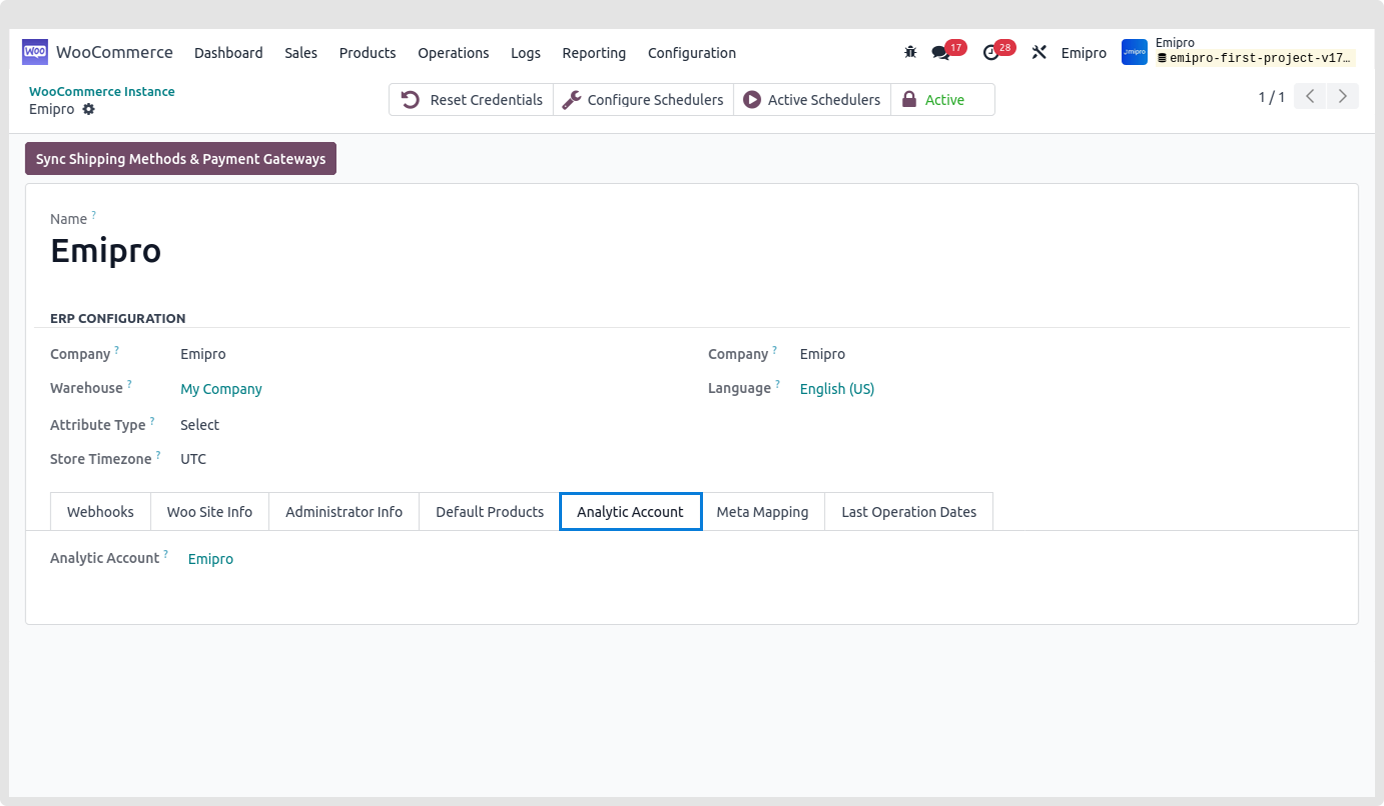
- It will provide an information about analytic account.
Meta Mapping
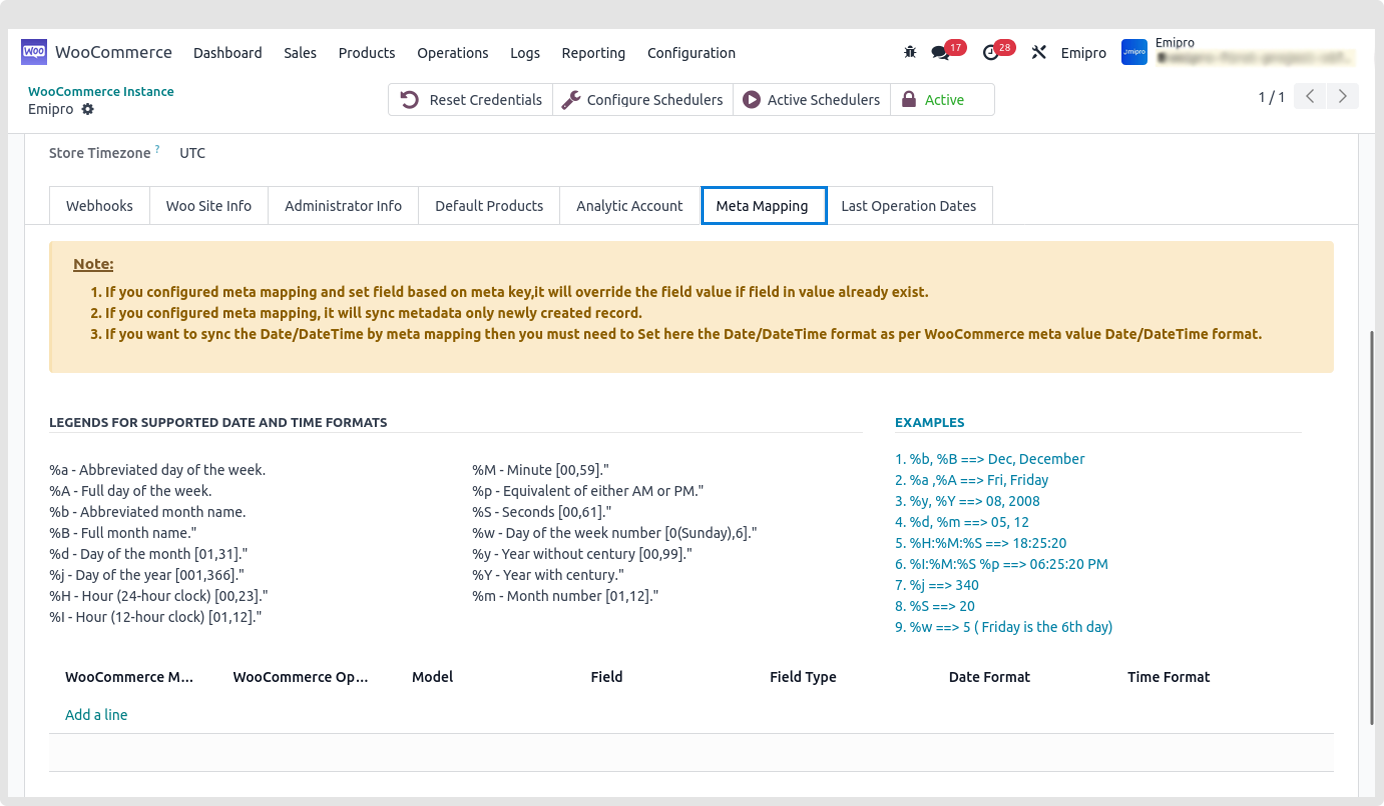
What is Meta Data?
- Meta Data is defined as the data providing information about one or more aspects of the data for specific page location.
- User can use metadata to add additional field information to the specific page (i.e. Customer, Product, Order, etc.) in WooCommerce Store and then map & use the same for various operations of Odoo WooCommerce Connector.
WooCommerce Store
- Prepare any meta data field (with required specific field type).
- Assign it to specific page location (i.e. Customer, Product, Order, etc.).
- Make appropriate settings for the metadata field.
Odoo WooCommerce Connector
- Map the newly prepared meta data field with Odoo model & field.
Note
- It’s not possible to map meta data field with Odoo’s Type = Many2One,Binary,Many2Many,One2Many field.
- It’s possible to map meta data field with Odoo’s Type = Boolean,Char,Date,DateTime,Float,Html,Integer,Selection,Text field.
Meta Data Mapping in Odoo WooCommerce connector
- Go to Meta Mapping tab.
- Add required meta data field information in this Meta Mapping tab.
- WooCommerce Meta Key : It should be the same as you added Field Name information in WooCommerce Store.
- WooCommerce Operation : Select WooCommerce operation name (i.e. Import Products, Import Customers, Import Unshipped Orders, Import Shipped Orders, Export Shipment Information / Update Order Status) by which meta data field information should be imported / exported.
- Model : Select Odoo model name in / from which meta data information should be imported / exported.
- Field : Select Odoo model’s field name in / from which meta data field information should be imported / exported.
For Example : To add newly created metadata field i.e. ‘VAT Number’ information, need to add below mentioned information in Meta Mapping tab,
- WooCommerce Meta Key : vat_no.
- WooCommerce Operation : Import Customer.
- Model : Contact.
- Field : VAT/Tax ID (res.partner).

Note
- You can add ‘N’ number of metadata field information in this ‘Meta Mapping’ tab for same or different operations as per your need and requirement.
Perform Operation
- For Example : I want to import newly created customer (i.e. Test User) along with added metadata field i.e. VAT Number information into Odoo.
- So, I’ll need to perform Import Customer operation for the same (as added in Meta Mapping tab of Odoo WooCommerce Connector to create VAT Number metadata field).
- Click on the Operation menu.
- Select respective WooCommerce Instance and Import Customer operation. Click on Execute to perform the selected operation.


- It will create a Customer Queue to be imported into Odoo.
- Now, click on Process Queue Manually to process this customer queue manually.
- It will import all these customer records into WooCommerce -> Sales -> Customers.
- You can find our imported Test User record on this screen.
- By going to detail page of this imported Test User record, you can find that, our added metadata field i.e. VAT Number information has been successfully imported from WooCommerce Store to Odoo.
Note
- Here, I have performed operation Manually for the above mentioned example. You can also perform the operation either via Web hooks or Automatic Scheduler.

Last Operation Dates
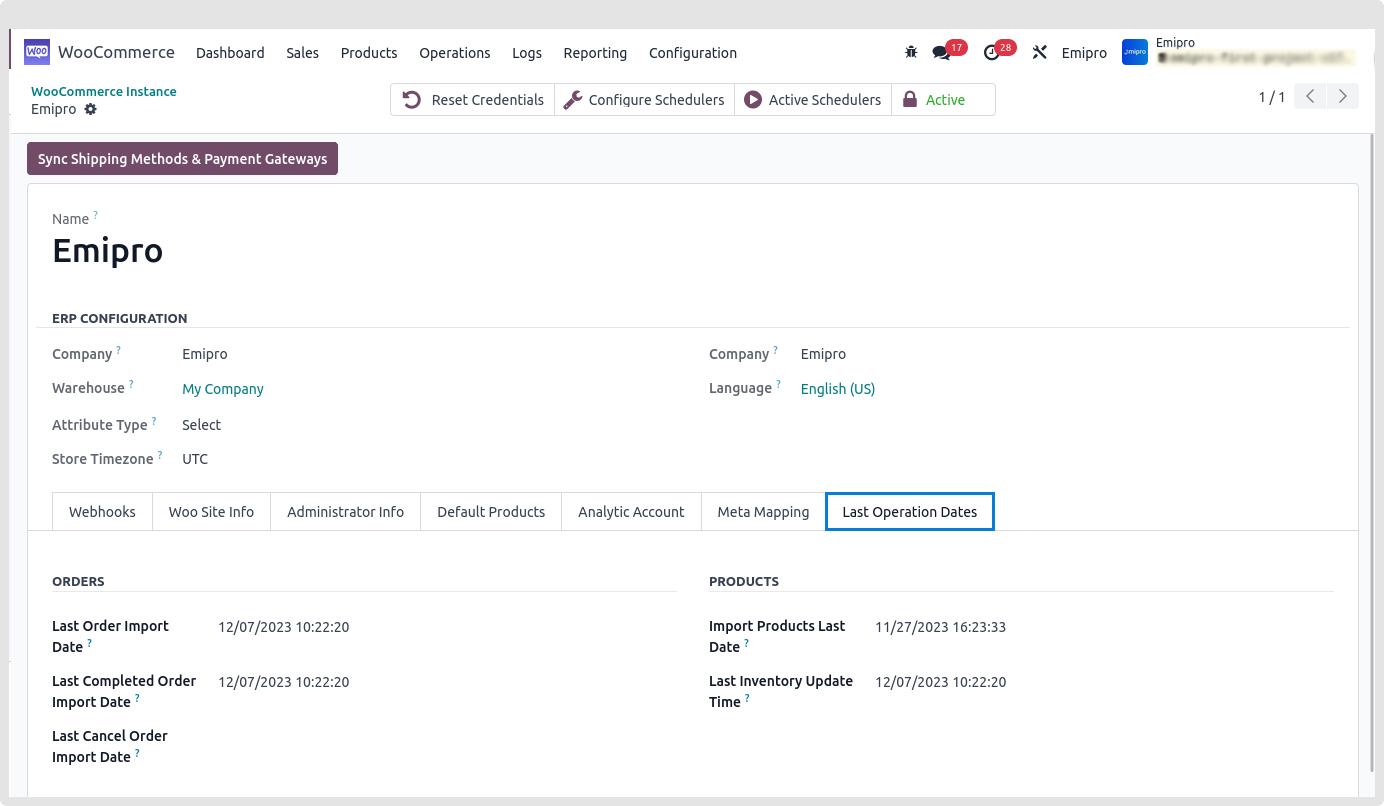
- It involves the Last operations dates of orders oriented operation and products oriented operation.