Instance Setup
-
An instnace represnts the Woo Commerce Website or store from which you are selling your products to customers. So here it will be treated as an instance.
-
You can create an instance in two ways. You can create an instance by
- Navigating to the Dashboard (On Boarding Panel)
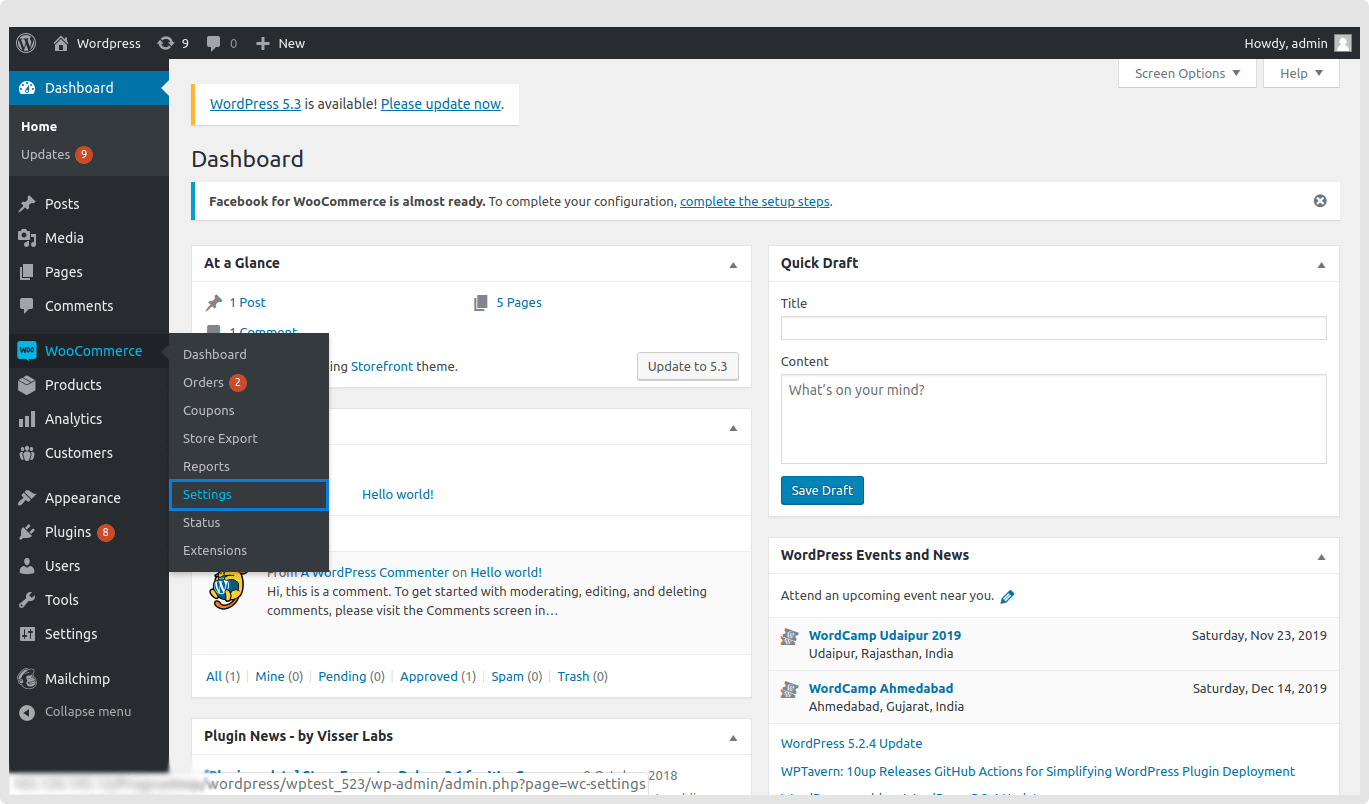
- Navigating to WooCommerce -> Configuration -> Settings.
1.Instance setup from Dashboard(On Boarding Panel)
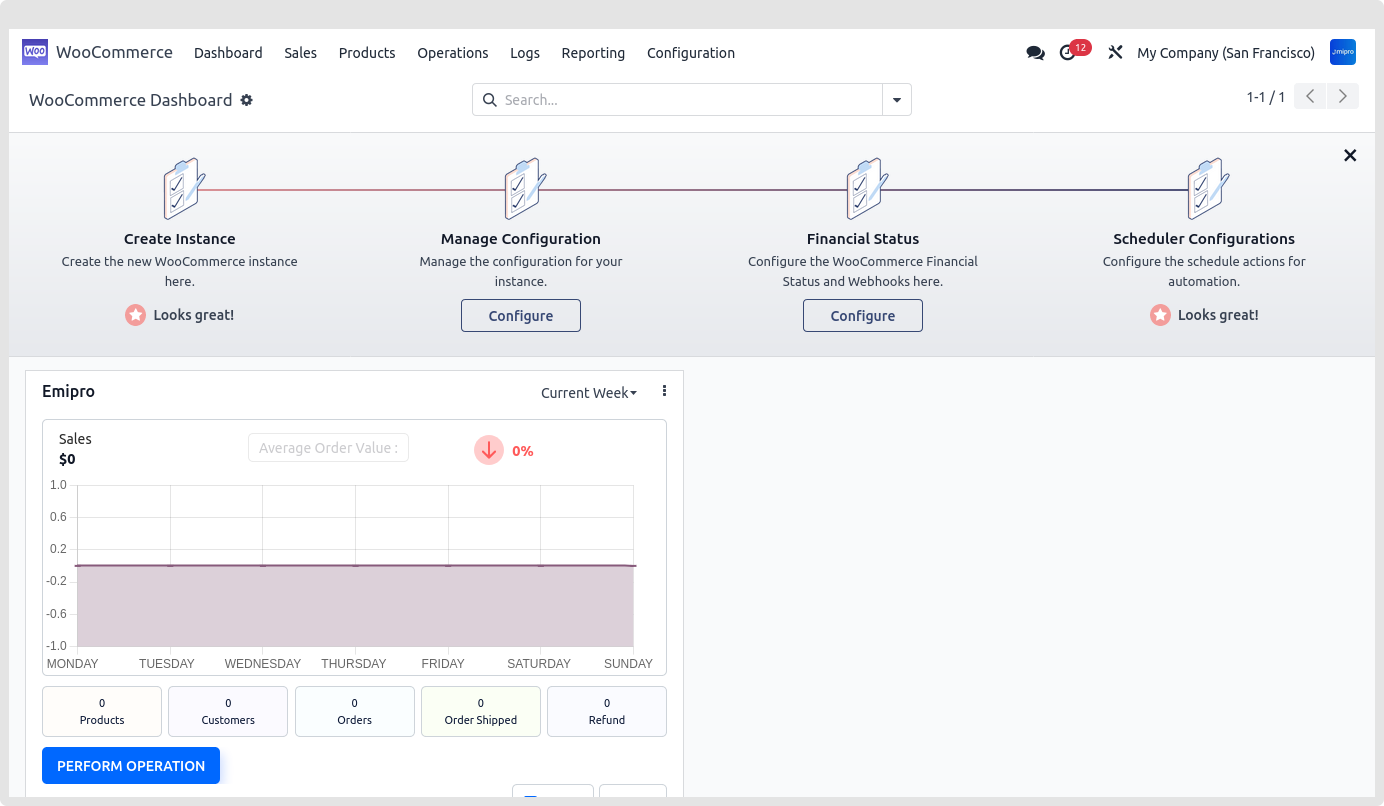
- We have introduced a Smart Dashboard where you can configure Instance, Manage Configuration, Financial Status and Scheduler Configuration on the WooCommerce dashboard itself.
- With the help of a smart dashboard, you can complete all the initial steps required. You can connect your WooCommerce Odoo connector to your WooCommerce store.
- Once the connection is set up you can even configure the instance and activate the automation process as well.
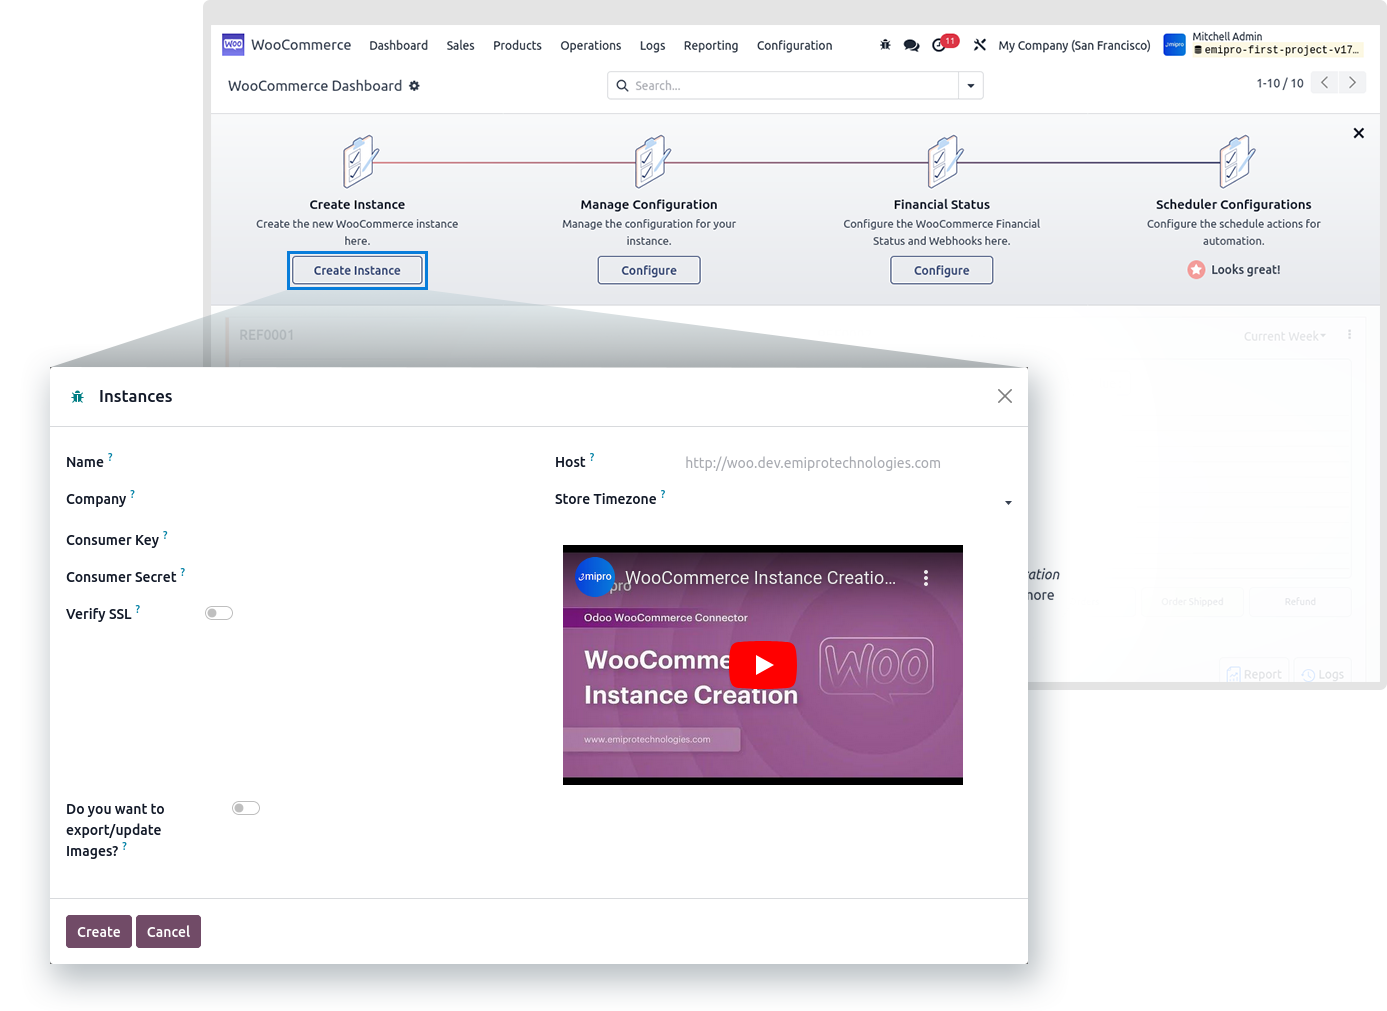
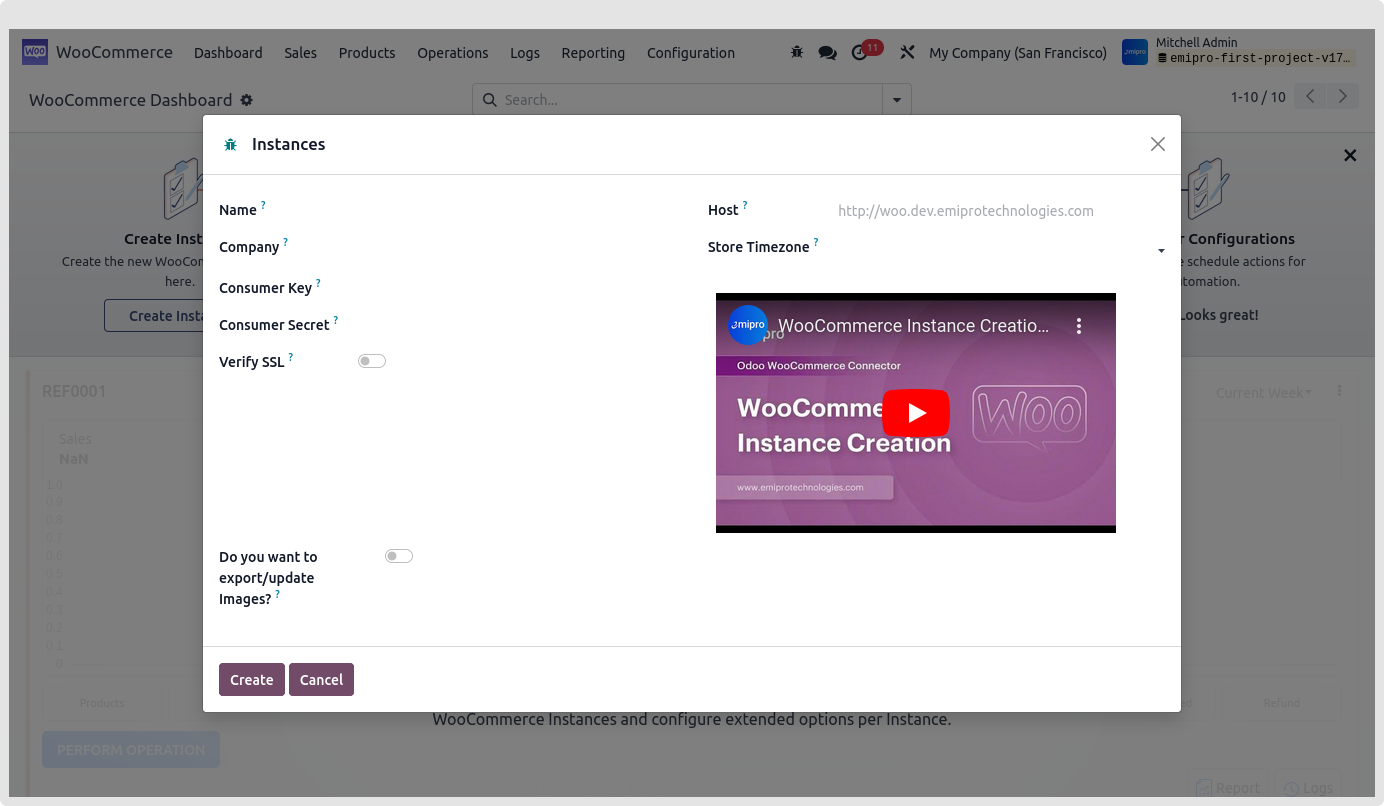
- Once you have clicked on the button Create Instance. It will open a popup window requesting you to enter a few details as shown in the below image.
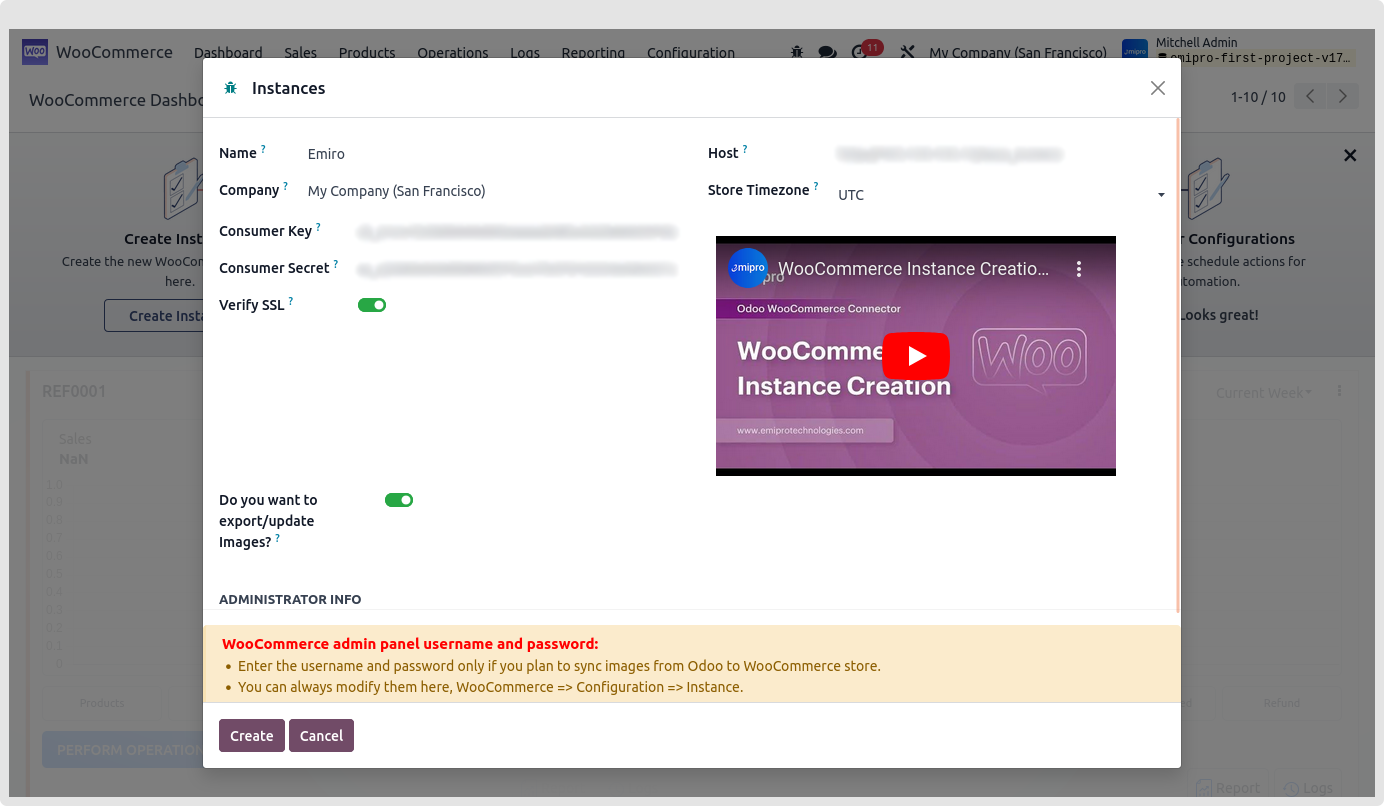
- You need to enter the following details:
- Name of the instance (you can enter any name for the instance as per your choice)
- Host (your WooCommerce website store URL)
- Company
- Store timezone (WooCommerce store timezone)
- Consumer Key and Secret Key.
- You can generate Consumer Key and Secret Key from the WooCommerce store backend.
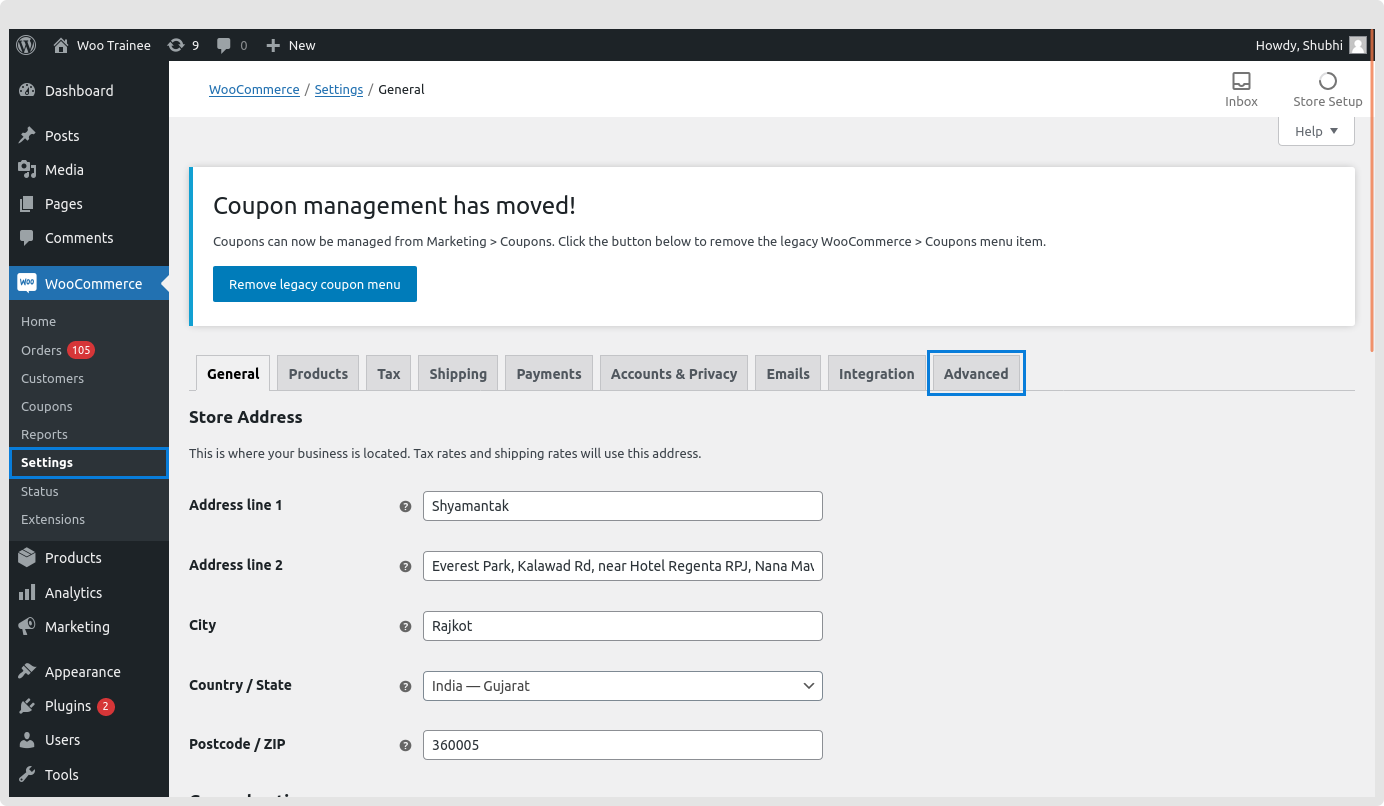
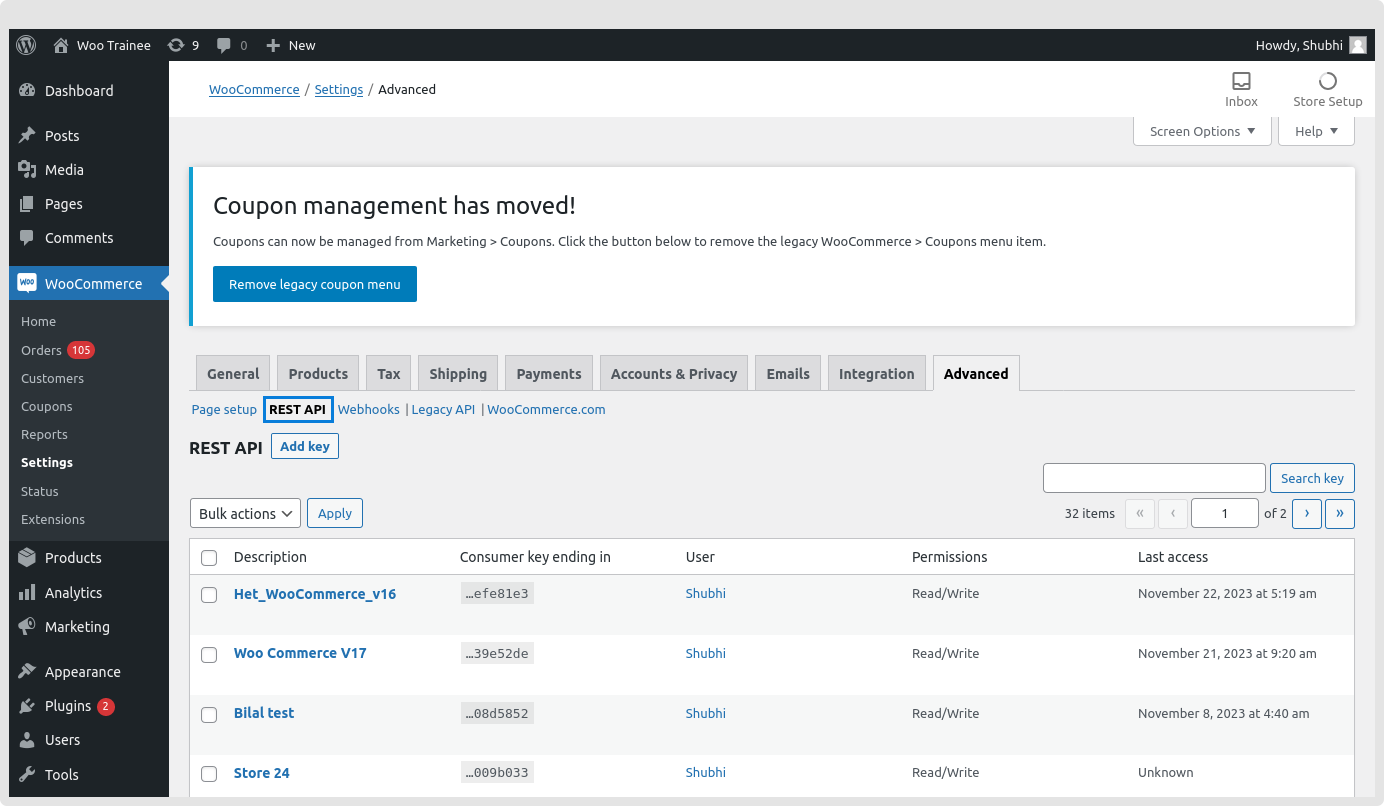
- Navigate to WooCommerce -> Setting ->Advanced -> Rest API and select Add Key.
Note:
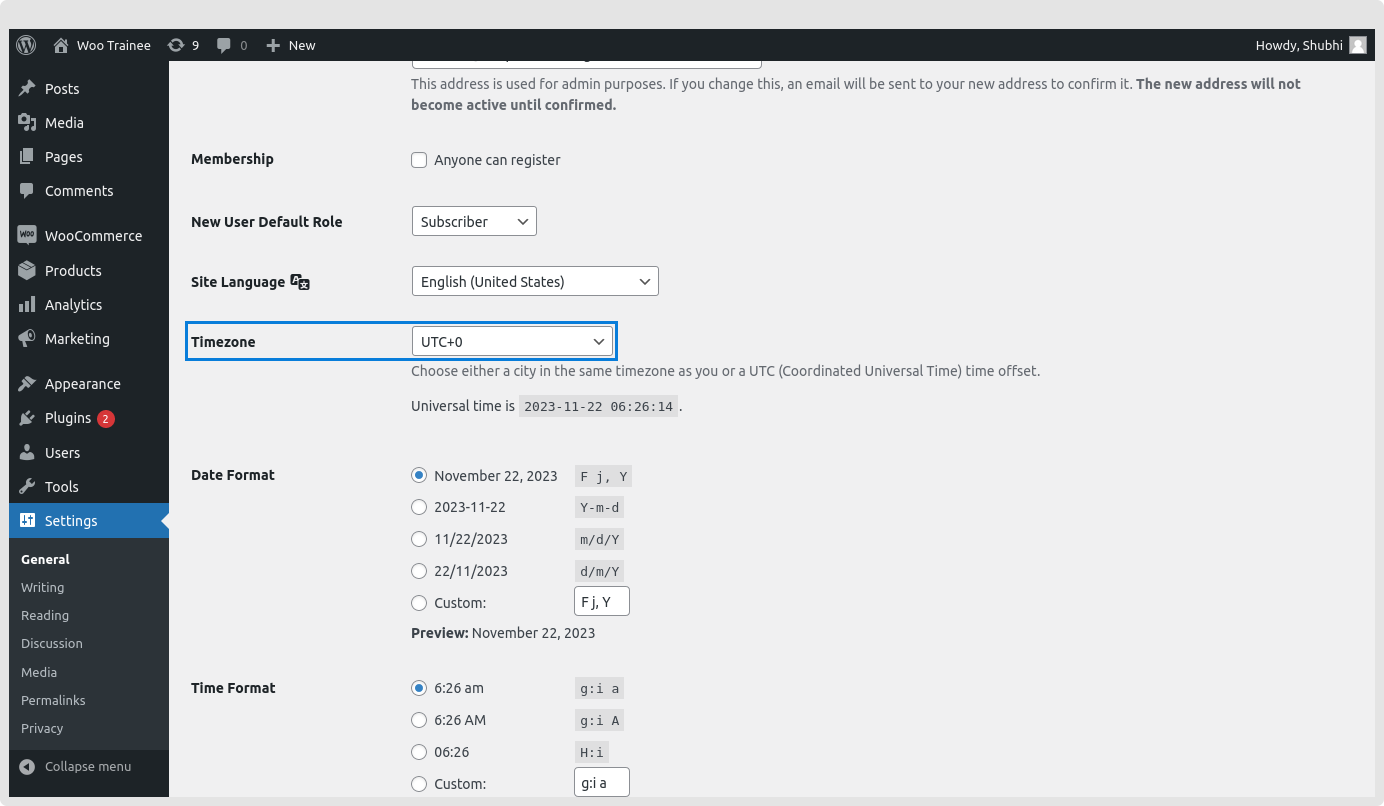
- To create a WooCommerce instance, users must specify the same timezone as the WooCommerce store.
- Woocommerce may lose some orders or products if the same timezone is not set in the instance.
Note:
- When creating the Rest API please provide the permission as Read/Write as shown in the below screenshot.
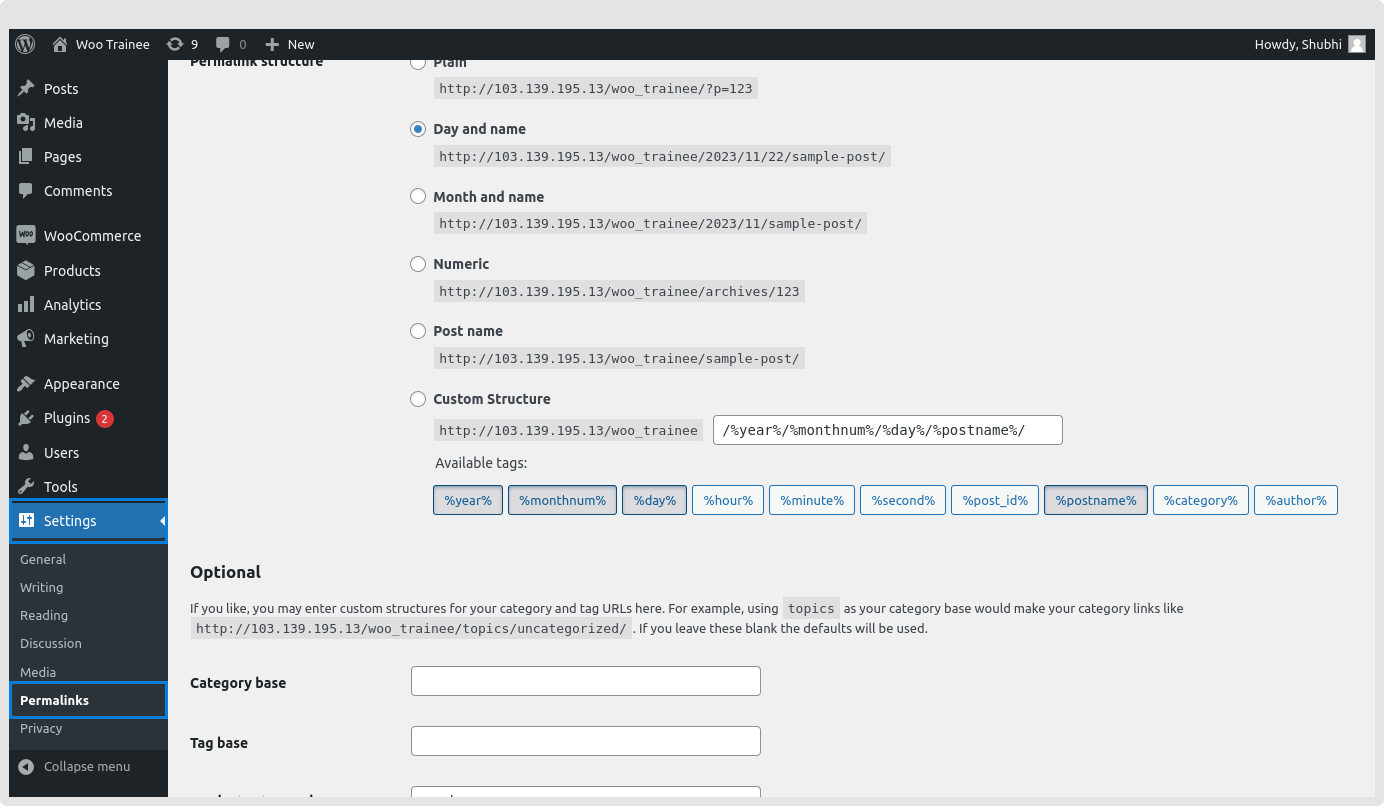
Permalinks
- According to the WooCommerce rest API documentation, if you’re using default permalinks, you’ll see an error message when you try to create a WooCommerce instance in Odoo.
- If your WooCommerce store carries an SSL certificate, check Verify SSL.
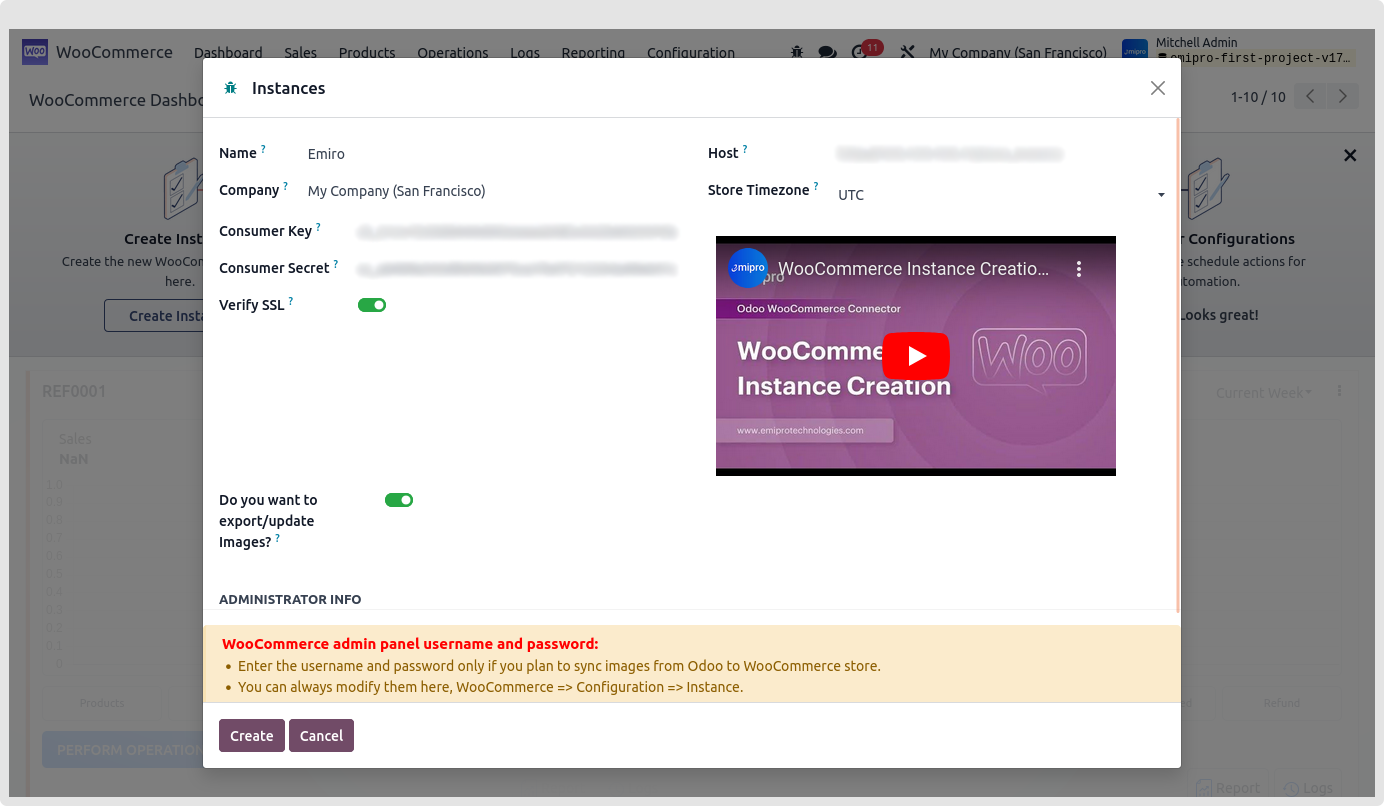
- If you wish to export products or update images from Odoo to WooCommerce you will need to activate the feature “Do you want to export/update Images?” When creating the instance, you need to enter the username and password of your WooCommerce store backend.
2.Instance setup from Configuration
- From the above mentioned, we can create an instance Configuration -> Settings -> Click on the Create More Instances button
- When you click the button, a pop-up menu will appear. Simply fill in all the details and click the create button.
Note:
During the archive instance, it will archive/delete below data:
- It deletes all queues and Webhooks which are related to this instance.
- Deactivate WooCommerce layer products and its variants.
- Deactivate related cron jobs(Scheduled Actions).
- Deactivate related Payment Gateway and Financial Status.
During the Unarchive instance, it will do below:
- Check the connection between Odoo and Woocommerce store.
- Active WooCommerce layer products and its variants.
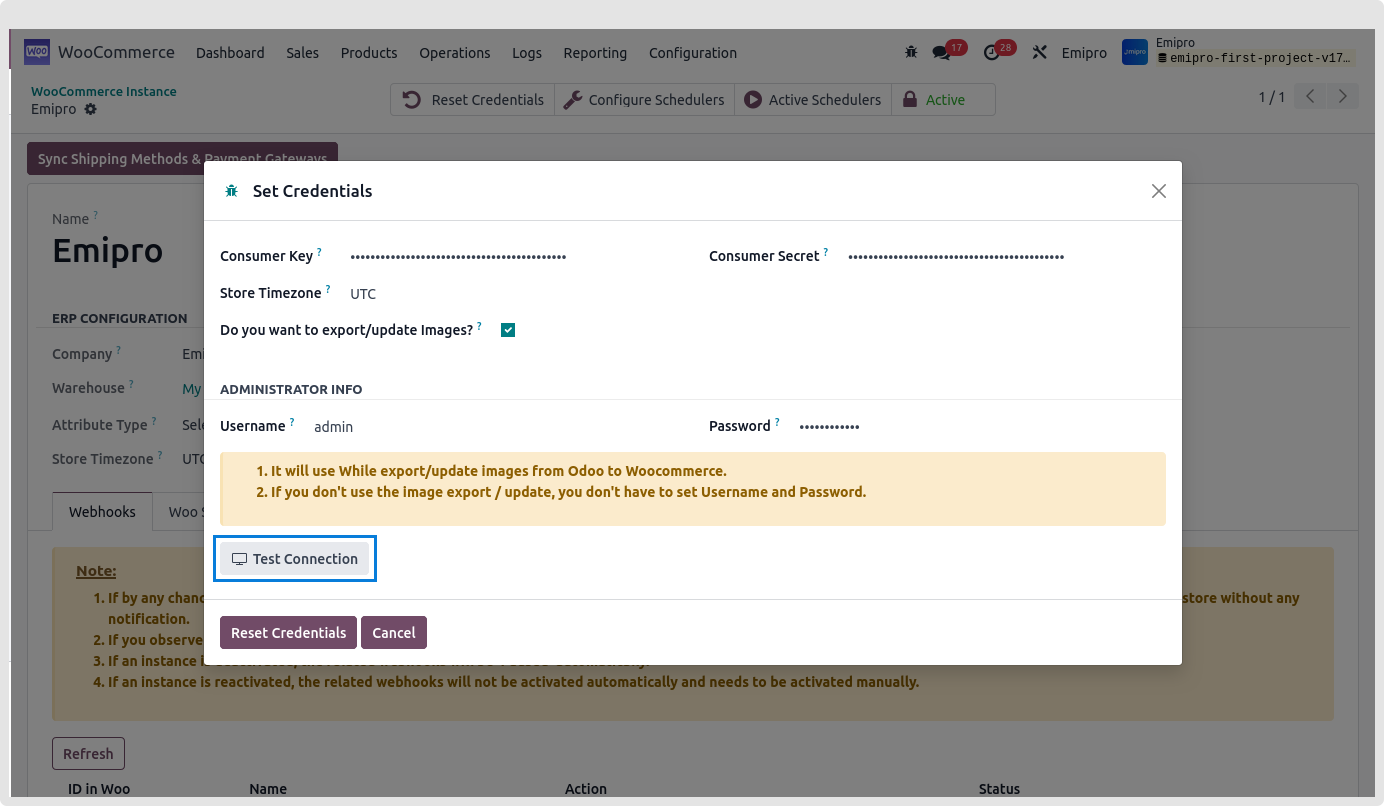
Test Connection
- Once you have installed the Odoo WooCommerce connector from Apps -> WooCommerce in Odoo, you will be asked to set up your WooCommerce instance.
- Click on test connection to check whether all the credentials are correct or not. When your connection is checked and confirmed after creating an instance, it will load default configurations automatically which can be further modified.